There are weeks when I crave homemade apple crisp but don’t have time to peel a mountain of fresh apples – that’s when this magical apple crisp with canned apple filling comes to the rescue! Some food snobs might turn up their noses at canned apples, but hear me out – when you’re rushing between soccer practice and work meetings, having those perfectly sliced apples waiting in your pantry is a lifesaver. I first discovered this shortcut when my neighbor dropped off a bubbling pan of crisp after my twins were born – “emergency dessert,” she called it. The aroma of cinnamon and brown sugar wafting through my kitchen? Absolute perfection in under an hour. Now it’s my secret weapon for last-minute potlucks and those “I need something sweet NOW” moments.

Why You’ll Love This Apple Crisp with Canned Apple
This recipe is my go-to when I need dessert magic fast. Here’s why it never fails:
- Pantry hero – Uses simple ingredients you likely have already
- 15-minute prep – Just dump, mix, and bake
- Budget-friendly – Canned apples cost less than fresh this time of year
- No-fail delicious – The buttery oat topping hides any “shortcut” secrets
- Comfort in a dish – Warm spices make it taste homemade (because it is!)
Seriously – this crisp disappears faster than I can make it every single time.
Ingredients for Apple Crisp with Canned Apple
Here’s everything you’ll need to create this easy, comforting dessert – I promise it’s nothing fancy! The beauty of this recipe is how ordinary pantry staples transform into something extraordinary:
- 2 cans (21 oz each) apple pie filling – My secret? Look for the “extra fruit” varieties that have more apple chunks
- 1 cup all-purpose flour – Spoon and level for perfect measurement
- 1 cup old-fashioned rolled oats – Not quick oats! We want that wonderful chewy texture
- 1/2 cup packed dark brown sugar – Pack it tight – this adds that molasses depth Grandma would approve of
- 1/2 cup (1 stick) butter, melted – Use the real stuff, please! No margarine shortcuts here
The Spice Mix That Makes It Special:
- 1 teaspoon cinnamon – The warm hug of spices
- 1/4 teaspoon nutmeg – Just a whisper for complexity
- 1/4 teaspoon salt – Balances all the sweetness
See? Nothing complicated! These simple ingredients come together to create magic – just like my neighbor’s life-saving dessert that started my love affair with canned apple crisps. You can find more delicious dessert inspiration on Pinterest.
How to Make Apple Crisp with Canned Apple
Okay, let’s make some magic happen! This apple crisp comes together so easily, you’ll be amazed. Here’s exactly how I do it:
Step 1: Preheat and Prep
First things first – preheat that oven to 350°F (175°C). While it’s heating up, grab your 9×9-inch baking dish and give it a quick spritz with cooking spray. Trust me, you don’t want to skip this step unless you enjoy chiseling baked-on apple filling!
Step 2: The Apple Base
Open those cans of apple pie filling and dump them right into your prepared dish. Use a spatula to spread it evenly – no fancy layering needed here. Pro tip: If the apples seem clumped together, gently break them apart with your spoon for better coverage.

Step 3: Mix the Topping
Now for the fun part – in a medium bowl, whisk together the flour, oats, brown sugar, cinnamon, nutmeg and salt until combined. Pour in that glorious melted butter and stir with a fork until you’ve got beautiful crumbly clusters. The texture should resemble wet sand that holds together when you squeeze it.
Step 4: Assemble and Bake
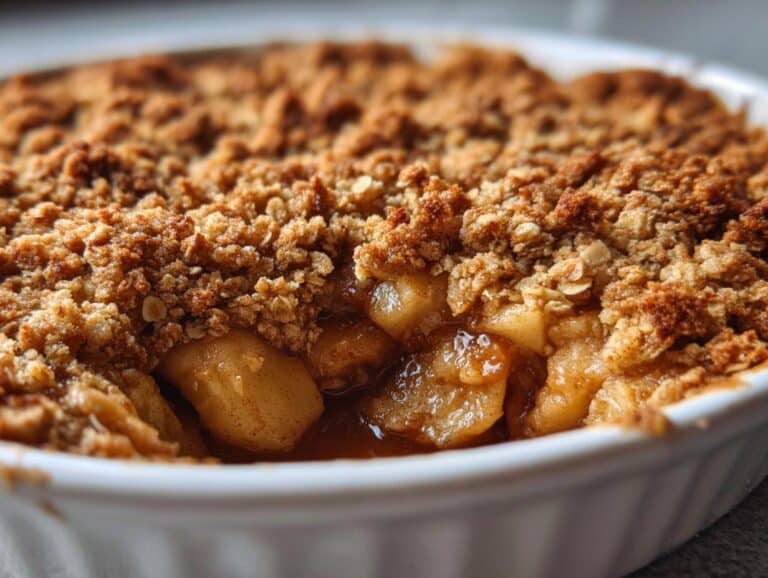
Sprinkle that oat mixture evenly over the apples – I like to use my fingers to break up any big clumps. Bake for 30-35 minutes until the topping is golden brown and you can see bubbly apple goodness peeking through the edges.

Step 5: The Hardest Part – Waiting!
Let the crisp rest for at least 10 minutes before serving (if you can resist!). This gives the juices time to thicken slightly so you don’t end up with soupy plates. The aroma filling your kitchen will test your patience though!
See? I told you it was easy! From pantry to plate in under an hour, with minimal cleanup. The crispy, buttery topping paired with that tender apple filling is absolute perfection. Now go grab some vanilla ice cream – you’ve earned it!
Tips for Perfect Apple Crisp with Canned Apple
After making this crisp more times than I can count, here are my foolproof tricks for apple crisp perfection every single time:
- Spice like a pro – Taste your apple filling first! Some brands are sweeter than others. Adjust cinnamon up to 1 1/2 tsp if needed – I often add a pinch of cardamom for a modern twist.
- Press, don’t sprinkle – Gently press the topping into the apples slightly. This prevents it from just sitting on top and creates those crave-worthy crispy/chewy edges.
- Watch the clock – Ovens vary! Start checking at 25 minutes. You want bubbling around the edges but not dried-out apples. The topping should smell like toasted oatmeal.
- Cool wisely – Resist cutting in immediately! Letting it rest 15 minutes lets the juices thicken into that perfect spoonable consistency.
Follow these simple tricks, and you’ll have people begging for your “secret family recipe” – our little canned apple crisp secret!
Variations for Apple Crisp with Canned Apple
One of my favorite things about this crisp? How easily you can switch it up! Try mixing in chopped pecans with the topping for crunch, or swap cinnamon for pumpkin pie spice in fall. Feeling adventurous? Add a handful of dried cranberries to the apple filling for tart bursts of flavor. The possibilities are endless!
Serving Suggestions for Apple Crisp with Canned Apple
Oh, the joy of serving this warm, bubbly crisp! I always scoop vanilla ice cream right on top – that hot-cold contrast is heavenly. For breakfast (don’t judge!), a dollop of Greek yogurt adds protein. My kids love it with whipped cream and caramel drizzle for special occasions. Really, it’s perfect straight from the pan too – I won’t tell if you sneak a bite while it’s still piping hot!
Storing and Reheating Apple Crisp with Canned Apple
Leftovers? Ha! Just kidding – I know they’re rare, but if you do have some crisp left, here’s how to keep it tasting fresh. Cover tightly and refrigerate for up to 3 days. To reheat, I pop individual portions in the microwave for 30 seconds, or warm the whole dish at 300°F for 15 minutes. Pro tip: Sprinkle a few drops of water on top before reheating to bring back that just-baked moisture. And yes, it’s still delicious cold straight from the fridge – not that I’d know from experience or anything…
Nutritional Information for Apple Crisp with Canned Apple
Now, I’m no nutritionist, but here’s the scoop on what’s in each serving (about 1/6 of the pan). Remember, these are estimates – your exact numbers might vary depending on which brand of apple filling or butter you use:
- Calories: About 320 per serving
- Sugar: 25g (mostly from the apples and brown sugar)
- Fat: 12g (that glorious butter at work!)
- Fiber: 3g (thank you, oats and apple skins)
It’s dessert, not health food – but those oats and apples do give you some redeeming nutrients between all that deliciousness!
Frequently Asked Questions
Can I use fresh apples instead of canned?
Absolutely! You’ll need about 6 cups peeled, sliced apples tossed with 1/4 cup sugar and 1 tsp cinnamon. Bake 5-10 minutes longer since fresh apples release more liquid. I often do half canned, half fresh when apples are in season.
Can I make this gluten-free?
Yes! Swap the all-purpose flour for your favorite gluten-free blend (I like 1:1 mixes). Make sure your oats are certified GF too. The texture might be slightly more crumbly but just as delicious.
Can I freeze apple crisp?
You sure can! Assemble completely but don’t bake. Wrap tightly in plastic then foil and freeze up to 3 months. When ready, bake frozen at 375°F for 45-50 minutes. The topping might not get quite as crispy, but the flavor stays perfect.
Why is my topping soggy?
Usually means your butter mixture wasn’t crumbly enough before baking, or you didn’t bake long enough. Next time, mix until it resembles wet sand, and bake until deeply golden – those bubbles around the edges are your cue it’s ready!
Your Turn to Make Magic!
Now I want to hear from you – did this apple crisp with canned apples become your new go-to dessert? Snap a pic of your golden, bubbly creation and tell me how it turned out! Nothing makes me happier than seeing your kitchen successes.


15-Minute Magical Apple Crisp with Canned Apple Bliss
- Total Time: 45 minutes
- Yield: 6 servings
- Diet: Vegetarian
Description
A simple and delicious apple crisp made with canned apples for a quick dessert.
Ingredients
- 2 cans (21 oz each) of apple pie filling
- 1 cup all-purpose flour
- 1 cup rolled oats
- 1/2 cup brown sugar
- 1/2 cup butter, melted
- 1 tsp cinnamon
- 1/4 tsp nutmeg
- 1/4 tsp salt
Instructions
- Preheat oven to 350°F (175°C).
- Spread apple pie filling evenly in a greased 9×9-inch baking dish.
- In a bowl, mix flour, oats, brown sugar, cinnamon, nutmeg, and salt.
- Stir in melted butter until the mixture is crumbly.
- Sprinkle the topping evenly over the apple filling.
- Bake for 30-35 minutes until golden brown.
- Let cool slightly before serving.
Notes
- Use a mix of spices like allspice or cloves for extra flavor.
- Serve warm with vanilla ice cream or whipped cream.
- Store leftovers in the fridge for up to 3 days.
- Prep Time: 10 minutes
- Cook Time: 35 minutes
- Category: Dessert
- Method: Baking
- Cuisine: American


