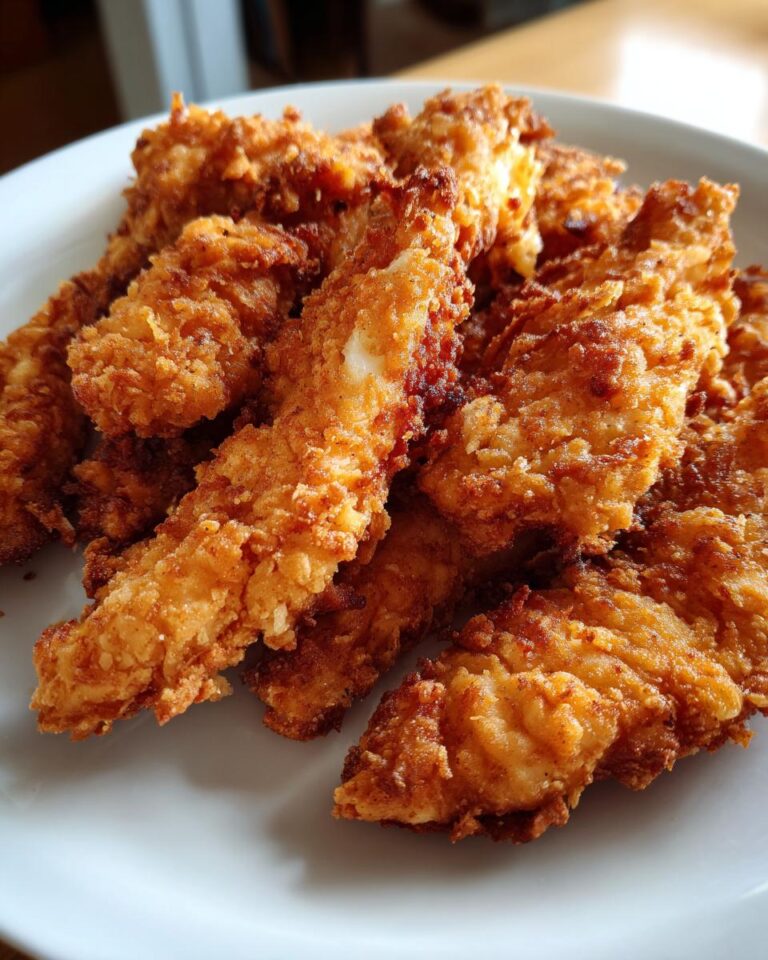
Okay, so listen, I’ve got this super secret weapon in my arsenal for getting even the pickiest eaters to gobble up dinner: Baked Chicken Tenders (Kid-Friendly)! Seriously, my kids practically inhale these things! And the best part? It’s ridiculously easy. I’m talking, like, easier than ordering takeout (and way healthier, which is a total win).
I’ve been a mom for a while, and trust me, I’ve battled the dinner table wars more times than I can count. Over the years, I’ve perfected this recipe. It’s perfect for those busy weeknights when you need something quick, delicious, and, most importantly, something the kids will actually eat. So, ditch the frozen stuff and get ready to become a chicken tender hero!

Ingredients for Delicious Baked Chicken Tenders (Kid-Friendly)
Alright, let’s gather our troops! You won’t believe how few ingredients you need for these amazing chicken tenders. It’s all about keeping it simple, I promise!
Ingredient List
- 1 pound chicken tenders (yep, just the tenders!)
- 1/2 cup breadcrumbs (plain or Italian, your call!)
- 1/4 cup grated Parmesan cheese (freshly grated is best, but pre-grated works in a pinch!)
- 1 teaspoon garlic powder (because, yum!)
- 1/2 teaspoon paprika (for a little color and flavor)
- Salt and pepper to taste (don’t be shy with the pepper!)
- 2 tablespoons olive oil (or any oil you like)

How to Make Baked Chicken Tenders (Kid-Friendly): Step-by-Step Instructions
Okay, now for the fun part! These baked chicken tenders are so easy, you’ll be making them on repeat. Seriously, even my kids can help with this, which always makes it more fun (and sometimes less messy!).
Preparing the Chicken Tenders
First things first, preheat your oven to 400°F (that’s about 200°C for my friends across the pond!). While that’s heating up, grab a bowl and let’s make the magic breadcrumb mix. Toss in your breadcrumbs, that yummy Parmesan cheese, garlic powder, paprika, salt, and pepper. Give it a good whisk to make sure everything’s all mixed up. Next, drizzle the olive oil over the chicken tenders. I usually just toss them around in the bowl to get them nice and coated. Then, one by one, toss those tenders in the breadcrumb mix, making sure they’re completely covered.
Baking Instructions
Now, grab a baking sheet and get those breaded chicken tenders all lined up! Make sure they’re not touching so they can get nice and crispy. Pop that baking sheet into the preheated oven and let them bake for 15-20 minutes. Keep an eye on them! You want them to be golden brown and cooked all the way through. You’ll know they’re done when they reach an internal temperature of 165°F (74°C). If you’re not sure, a meat thermometer is your friend!
Serving Suggestions
Once they’re out of the oven, let them cool for a minute (if you can resist!). Then, it’s time to serve! These baked chicken tenders are amazing with all sorts of dipping sauces. Think ketchup, honey mustard, BBQ sauce, ranch… the possibilities are endless! I usually serve them with some veggie sticks and maybe some tater tots, but honestly, they’re pretty awesome on their own, too!
Why You’ll Love These Baked Chicken Tenders (Kid-Friendly)
Seriously, these baked chicken tenders are a total game-changer. Here’s why you (and your kids!) will be obsessed:
- Quick & Easy: From start to finish, you’re looking at about 30 minutes. Perfect for busy weeknights!
- Kid-Approved: My kids, and their friends, devour these. No more dinner battles!
- Healthy-ish: Baked, not fried, so it’s a much better option than those frozen ones.
- Flavorful: The breadcrumb coating gives them a delicious, crispy texture.
- Versatile: Serve them with whatever dipping sauces your kids love!
Tips for Perfect Baked Chicken Tenders (Kid-Friendly) Every Time
Okay, so you want those baked chicken tenders to be perfect, right? Trust me, I get it! Here are a few things I’ve learned along the way that’ll help you nail it every single time. First, don’t overcrowd the baking sheet! Give those tenders some space so they can get nice and crispy. Also, keep an eye on them towards the end of the baking time. Ovens can be sneaky, and you don’t want to overbake them – dry chicken is a total bummer. The internal temp is key, so grab that meat thermometer!
Frequently Asked Questions About Baked Chicken Tenders (Kid-Friendly)
Alright, let’s get to the nitty-gritty! I get asked these questions ALL the time about my baked chicken tenders, so I figured I’d put them all in one spot to help you out. It’s all about making sure you have the best experience possible, so don’t be shy if you have more questions!
Absolutely! Feel free to experiment with different types of breadcrumbs. I usually use plain breadcrumbs because they’re what I typically have on hand, but Italian breadcrumbs are fantastic too – they add a little extra flavor right off the bat! You could even try panko breadcrumbs for an extra crispy texture. Just make sure you adjust the seasonings to your liking if you’re using a flavored breadcrumb.
What dipping sauces go well with these chicken tenders?
Oh, the dipping sauces! This is the fun part! My kids go wild for ketchup and honey mustard, but honestly, anything goes. You could try BBQ sauce, ranch dressing, sweet chili sauce, or even a simple mix of mayo and sriracha for a little kick. I also like to make a quick yogurt dip with some herbs and a squeeze of lemon juice. The sky’s the limit! Get creative and see what your family loves with these chicken tender recipes.
How do I know when the chicken tenders are cooked?
The easiest way to know if your baked chicken tenders are cooked is to use a meat thermometer! You want the internal temperature to reach 165°F (74°C). If you don’t have a thermometer (but you should!), you can also cut into one of the thickest tenders to make sure the inside is no longer pink and the juices run clear. But really, a thermometer is your best friend in the kitchen!
Variations on Baked Chicken Tenders (Kid-Friendly)
Okay, so you’ve got the basic baked chicken tenders down, which is awesome! But, you know me, I’m always looking for ways to shake things up. The best part about this recipe is how easily you can customize it! Want a little more flavor? Try adding some different herbs and spices to the breadcrumb mix. Garlic powder is a must, but feel free to throw in some onion powder, dried oregano, or even a pinch of red pepper flakes (if your kids can handle a little heat!).
You can also get sneaky and add some finely grated veggies to the mix! Zucchini and carrots disappear beautifully, and you’re sneaking in some extra nutrients. Trust me, they won’t even notice. It’s all about making it your own and having fun in the kitchen!
Estimated Nutritional Information for Baked Chicken Tenders (Kid-Friendly)
Alright, so I’m not a nutritionist, and I can’t give you the *exact* numbers, you know? But I can tell you that these baked chicken tenders are way better for you than those frozen ones. If you want a more accurate estimate, I suggest using a nutrition calculator with the ingredients list. You’ll get things like calories, fat, protein, and carbs.
Storage and Reheating Instructions for Baked Chicken Tenders (Kid-Friendly)
So, you’ve got leftovers? Score! These baked chicken tenders are just as good the next day (if they last that long!). Just let them cool completely, then pop them into an airtight container. They’ll be good in the fridge for about 3-4 days.
To reheat, I like to put them back in the oven at 350°F (175°C) for about 10 minutes, or until they’re heated through and crispy again. Or, if you’re in a hurry, the microwave works too, but they might not be quite as crispy. You can also reheat them in your air fryer for a few minutes – that’s my go-to for extra crispiness!
Serving Suggestions for Baked Chicken Tenders (Kid-Friendly)
Okay, so you’ve got your delicious baked chicken tenders ready to go, but what do you serve with them? Don’t worry, I’ve got you covered! For my kids, it’s all about the sides. Think classic kid-friendly favorites like french fries (sweet potato fries are a good swap!), tater tots, or even some yummy mac and cheese.
To sneak in some veggies, I usually whip up some steamed broccoli, carrot sticks with ranch, or a simple side salad. It’s all about balance, right? And trust me, even the pickiest eaters will happily chow down on their chicken tenders when they have some tasty sides to go with them!
Conclusion
So, there you have it – my go-to recipe for the easiest, most delicious baked chicken tenders that even the pickiest eaters will love! Now go forth and make some magic in your kitchen! And hey, if you try it, please rate the recipe and leave a comment below! I love hearing from you all, and don’t forget to share your creations on social media!
Print
Craving Simple Dinner? 15-Min Baked Chicken Tenders!
- Total Time: 30 minutes
- Yield: 4 servings
- Diet: Halal
Description
Easy and delicious baked chicken tenders perfect for kids.
Ingredients
- 1 pound chicken tenders
- 1/2 cup breadcrumbs
- 1/4 cup grated Parmesan cheese
- 1 teaspoon garlic powder
- 1/2 teaspoon paprika
- Salt and pepper to taste
- 2 tablespoons olive oil
Instructions
- Preheat oven to 400°F (200°C).
- In a bowl, mix breadcrumbs, Parmesan cheese, garlic powder, paprika, salt, and pepper.
- Drizzle olive oil over the chicken tenders.
- Coat each chicken tender with the breadcrumb mixture.
- Place tenders on a baking sheet.
- Bake for 15-20 minutes, or until cooked through and golden brown.
- Serve and enjoy!
Notes
- You can use different seasonings to your liking.
- Serve with your favorite dipping sauces.
- Prep Time: 10 minutes
- Cook Time: 20 minutes
- Category: Main Course
- Method: Baking
- Cuisine: American


