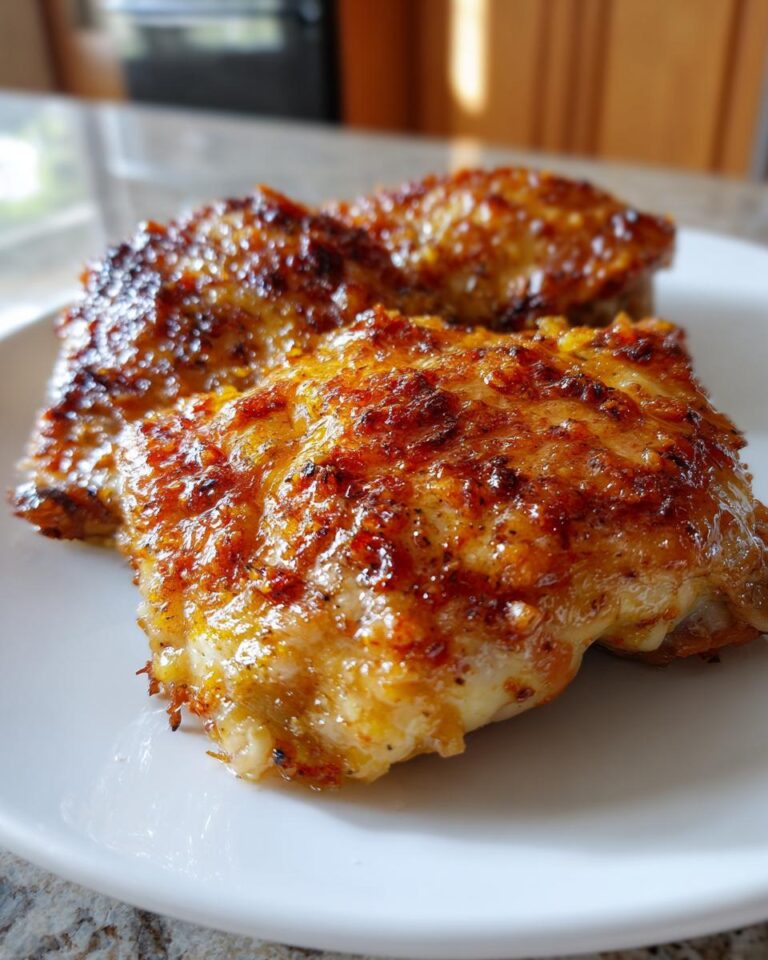
Okay, so listen up, because I’m about to share my *absolute* favorite weeknight dinner: Baked Garlic Butter Chicken Thighs (Crispy & Easy)! Seriously, this recipe is a game-changer. I’ve been making this for years, and it’s always a hit, even with the picky eaters in my family. It all started when I was trying to find a way to get perfectly crispy chicken skin without deep-frying (messy!), and after a bunch of trials, this is what I landed on.
I’m not gonna lie, I got the basic idea from a friend who’s a chef, but I’ve totally tweaked it to my own tastes. And trust me, it’s so simple, even if you’re a beginner cook, you’ll nail it. The best part? It’s ready in under an hour, which is a lifesaver on busy weeknights. Plus, the smell that fills your kitchen while it’s baking? Pure heaven! It’s the kind of comfort food that makes you feel all warm and fuzzy inside. So, let’s get cooking!
Why You’ll Love These Baked Garlic Butter Chicken Thighs (Crispy & Easy)
Okay, so let me tell you why this recipe is the bomb. First off, it’s seriously fast – like, from-hungry-to-dinner-on-the-table fast! We’re talking less than an hour, people. And listen, it’s *easy*. Even if you’re not a kitchen whiz, you can totally do this. I promise!
Then there’s the flavor. Oh. My. Goodness. The garlic butter? It’s a flavor explosion! It’s all savory, herby goodness that gets into every single bite. And the crispy skin? Forget about it! It’s the perfect combo of juicy meat and that satisfying crunch. Honestly, these oven baked chicken thighs are a total winner for any weeknight.
Ingredients You’ll Need for Baked Garlic Butter Chicken Thighs
Alright, let’s talk about what you’ll need to make this magic happen. Don’t worry, the ingredient list is super short and sweet! You probably already have most of this stuff in your kitchen, which is always a win in my book. The key to this recipe is good quality ingredients, but don’t stress about it too much. Just grab what you have and let’s get cooking!
Chicken Thighs: The Star of the Show
First up: the chicken! You’ll want about 6-8 chicken thighs for this recipe. And listen closely: for the crispiest skin, you absolutely *must* use bone-in, skin-on chicken thighs. Trust me on this one! The bone adds flavor, and the skin? Well, that’s where all the delicious crispiness comes from. Don’t even think about using boneless, skinless. It won’t be the same, I tell ya!
The Garlic Butter Mixture: Flavor Explosion
Now for the good stuff: the garlic butter! This is where all the flavor comes from. You’ll need 4 tablespoons of butter, and you can use either salted or unsalted – whatever you have on hand. Just make sure to melt it! I usually do this in the microwave, but you can also melt it on the stovetop. Next up, we’re adding 4 cloves of minced garlic. Don’t be shy with the garlic! Then, we’re going to add 1 teaspoon of dried oregano, 1 teaspoon of dried thyme, salt, and pepper to taste. I usually go pretty heavy on the pepper, but you do you! Mix it all together, and *wow* – the aroma alone will make your mouth water!
Step-by-Step Instructions: How to Make Oven Baked Chicken Thighs
Okay, now for the fun part: let’s actually make these baked garlic butter chicken thighs! Don’t worry, it’s super simple, and I’ll walk you through every single step. Just follow along, and you’ll be enjoying a delicious dinner in no time. First things first: go ahead and preheat your oven to 400°F (that’s 200°C for my friends across the pond). It’s super important to let your oven get nice and hot before you put the chicken in. Trust me, it helps with that crispy skin!
Preparing the Garlic Butter
First, grab a bowl and put those 4 tablespoons of butter in it. Like I said before, melt that butter! If you’re using the microwave, do it in short bursts, like 15-20 seconds at a time, and give it a stir in between. You don’t want it to explode! Once the butter is melted, add in your minced garlic, oregano, thyme, salt, and pepper. Now, just give it a good stir with a fork or a whisk until everything is nice and combined. Make sure you get all those herbs and garlic bits mixed in – you want every bite to be bursting with flavor! Careful, it splatters!
Coating the Chicken Thighs
Okay, time to get those chicken thighs ready! Place those beautiful chicken thighs in a baking dish. The size of your dish doesn’t really matter, just make sure it’s big enough that the chicken thighs aren’t totally crammed together. You want a little space between them so the air can circulate and help them get nice and crispy. Now, pour that glorious garlic butter mixture all over the chicken thighs. Make sure you get every single one coated, and don’t be shy! Use a spoon to make sure the tops and sides are completely covered. I like to use my hands (clean ones, of course!) to make sure the skin is fully coated. If you have extra garlic butter, don’t worry, it will baste the chicken while it cooks.
Baking the Baked Garlic Butter Chicken Thighs for Maximum Crispiness
Alright, pop that baking dish into your preheated oven. Now, let those babies bake for about 35-40 minutes. But here’s the thing: every oven is a little different, so the cooking time can vary. You’ll know they’re done when the chicken is cooked through and the skin is golden brown and *super* crispy! The internal temperature of the chicken should reach 165°F (74°C). You can check this with a meat thermometer, but if you don’t have one, just make sure the juices run clear when you poke the thickest part of the thigh with a fork. If it’s not quite crispy enough at the 35-minute mark, you can broil it for a minute or two, but keep a close eye on it so it doesn’t burn!

Resting and Serving
Once your chicken is cooked through and gorgeous, take it out of the oven. Now, here’s a super important step: let it rest for about 5-10 minutes before you serve it. I know, I know, it’s hard to wait when it smells *this* good, but resting allows the juices to redistribute, which means your chicken will be even more tender and juicy. While it rests, the skin will crisp up even more! Serve it up with your favorite sides – think roasted veggies, a fresh salad, or some creamy mashed potatoes. Yum!

Equipment You’ll Need
Okay, so you don’t need a ton of fancy equipment for this recipe, which is fantastic! Basically, you’ll need a baking dish – any size will do, but make sure it’s big enough to hold all your chicken thighs without overcrowding them. You’ll also need a bowl for mixing up that amazing garlic butter, and a spoon or whisk to stir it all together. Oh, and a meat thermometer is always a good idea, but not totally necessary!
Tips for Achieving Perfectly Crispy Baked Garlic Butter Chicken Thighs (Crispy & Easy)
Alright, so you want that skin *super* crispy, right? I got you! There are a couple of little tricks that will take your oven baked chicken thighs from good to absolutely amazing. Trust me, these tips are easy, and they make all the difference. Get ready to impress yourself (and everyone else!) with these little secrets.
Achieving the Crispiest Skin
This is the big one: crispy skin! The secret? Pat the chicken thighs dry with paper towels *before* you put them in the baking dish. Seriously, this is a game-changer! Excess moisture is the enemy of crispy skin. Then, make sure you get the skin *really* well-coated with that garlic butter mixture. Don’t be shy! This helps the skin crisp up beautifully in the oven!
Don’t Overcrowd the Pan
Okay, this is another super important tip. Don’t, I repeat, *don’t* overcrowd your baking dish! If you pack the chicken thighs in too tightly, they’ll steam instead of bake, and you won’t get that gorgeous, crispy skin we’re aiming for. Make sure there’s enough space between each thigh for the heat to circulate. I usually aim to have about an inch of space between each piece of chicken. If you have a lot of thighs, you might need to bake them in batches. It’s totally worth it for the crispiness!
Serving Suggestions: What to Serve with Your Garlic Butter Chicken
Okay, so you’ve got your perfectly crispy garlic butter chicken thighs, now what? Well, the possibilities are endless, but I’ve got a few go-to side dishes that really take this meal to the next level. First off, roasted veggies! Toss some broccoli, carrots, or Brussels sprouts with a little olive oil, salt, and pepper, and roast them alongside the chicken. Yum!
You could also whip up some creamy mashed potatoes or a simple green salad to balance things out. Honestly, anything goes! This chicken is so flavorful, it pairs well with pretty much anything. Just pick your favorites and enjoy!
Variations: Spice Up Your Oven Baked Chicken Thighs
Okay, so you love the basic recipe? Awesome! But, you know me, I’m always looking for ways to mix things up. The great thing about this oven baked chicken is that you can totally customize it to your taste! Want a little heat? Add a pinch of red pepper flakes to the garlic butter mixture. Or, if you’re a fan of herbs, try adding some fresh rosemary or parsley along with the thyme and oregano.
You can also swap out the garlic butter for something like a lemon-herb butter or even a spicy buffalo butter! Seriously, get creative and have fun with it. Don’t be afraid to experiment! That’s how the best recipes are born, right?
Storage and Reheating Instructions
Okay, so, you somehow have leftovers? Lucky you! This baked garlic butter chicken is even good the next day, which is a major win. Just let the chicken cool completely before you put it in an airtight container. Then, pop it in the fridge – it’ll be good for about 3-4 days.
To reheat, I usually just pop it back in the oven at 350°F (175°C) for about 10-15 minutes, or until it’s heated through. You can also reheat it in the microwave, but it might not be quite as crispy. If you want to crisp up the skin, a quick run under the broiler for a minute or two is your best bet!
Frequently Asked Questions About Baked Garlic Butter Chicken Thighs (Crispy & Easy)
Alright, let’s get to some quick Q&A! I know you probably have some questions buzzing around in your head, so I’m here to help. I get asked these all the time, so hopefully, this clears things up! Don’t worry, it’s all super straightforward, just like the recipe itself.
Can I use chicken breasts instead of thighs?
So, can you use chicken breasts instead of thighs? You *can*, but I don’t recommend it if you’re going for that super juicy, flavorful result! Chicken breasts tend to dry out more easily than thighs, especially in the oven. If you *really* want to use chicken breasts, I would. I would suggest pounding them to an even thickness and keeping a close eye on them while they bake. You’ll also want to reduce the cooking time, probably by about 10-15 minutes, since they cook faster. Just make sure the internal temperature reaches 165°F (74°C) using a meat thermometer, and don’t overbake them! The oven baked chicken breasts will still be good, but not as amazing as the thighs, trust me!
How do I know when the chicken is cooked through?
This is a super important question! You *definitely* want to make sure your chicken is cooked all the way through before you eat it. The easiest way to tell is to use a meat thermometer. Stick it into the thickest part of the chicken thigh. When it reads 165°F (74°C), you’re good to go! If you don’t have a meat thermometer (no worries!), you can also check by poking the thickest part of the thigh with a fork or knife. The juices should run clear, not pink. Also, the meat should be opaque (not pink) all the way through. If you’re still unsure, it’s always better to err on the side of caution and cook it a little longer. Nobody wants undercooked chicken, yikes!
Can I make this ahead of time?
Absolutely! This garlic butter chicken is a great make-ahead meal. You can prep the chicken thighs and the garlic butter mixture ahead of time, even the day before. Just store the chicken thighs in the baking dish and the garlic butter mixture in a separate container in the fridge. When you’re ready to cook, all you have to do is pour the garlic butter over the chicken and bake! You might need to add a few extra minutes to the baking time if the chicken is coming straight from the fridge. Easy peasy!
Nutritional Information
Okay, so here’s a quick heads-up about the nutritional info. I’ve done my best to estimate the values, but remember, things can vary a bit depending on the size of your chicken thighs and the exact brands of ingredients you use. These numbers are just a guideline, but they should give you a general idea. Enjoy your delicious and easy baked garlic butter chicken thighs!
For more delicious recipes and cooking inspiration, check out my Pinterest page!
Print
6 Garlic Butter Chicken Pieces Ready in 1 Hour!
- Total Time: 50 minutes
- Yield: 4 servings
- Diet: Gluten Free
Description
Crispy and easy baked garlic butter chicken thighs. A simple, flavorful dinner.
Ingredients
- Chicken thighs: 6-8
- Butter: 4 tablespoons, melted
- Garlic: 4 cloves, minced
- Dried oregano: 1 teaspoon
- Dried thyme: 1 teaspoon
- Salt: to taste
- Black pepper: to taste
Instructions
- Preheat your oven to 400°F (200°C).
- In a bowl, mix melted butter, minced garlic, oregano, thyme, salt, and pepper.
- Place chicken thighs in a baking dish.
- Pour the garlic butter mixture over the chicken.
- Bake for 35-40 minutes, or until chicken is cooked through and skin is crispy.
- Let it rest for a few minutes before serving.
Notes
- Adjust seasonings to your preference.
- You can add a squeeze of lemon juice after cooking.
- Serve with your favorite sides.
- Prep Time: 10 minutes
- Cook Time: 40 minutes
- Category: Dinner
- Method: Baking
- Cuisine: American

 7")


 10")
 11")