You know those nights when a chocolate craving hits hard, but turning on the oven feels like way too much effort? That’s exactly why I fell in love with this chocolate mug cake recipe. I can’t tell you how many midnight snack emergencies this little miracle has saved me from! In just minutes, you’ll have a warm, gooey chocolate cake ready to devour straight from the microwave. My college roommate first showed me this trick during finals week, and let me tell you – it’s been my secret weapon for instant dessert gratification ever since. Best part? You probably have all the ingredients in your pantry right now.
Why You’ll Love This Chocolate Mug Cake
This chocolate mug cake is my go-to solution when I need a sweet fix right now. It’s the dessert equivalent of hitting the easy button – minimal effort, maximum reward. Here’s why I’m obsessed:
- Done in under 5 minutes (seriously!)
- Uses just one mug – hello, easy cleanup
- Perfect single serving – no leftovers tempting you
- Basic ingredients you probably have on hand
Perfect for Late-Night Cravings
Picture this: It’s 10pm, you’re watching your favorite show, and suddenly – bam! – chocolate craving hits. No need to resist or wait. Just grab a mug and in the time it takes to find the remote under the couch cushions, you’ll be digging into warm chocolatey goodness. The microwave does all the work while you stand there salivating.
No Oven Needed
Who wants to wait for an oven to preheat when dessert emergencies strike? Not me! This microwave mug cake skips all that nonsense. No heating up the whole kitchen, no worrying about overbaking, and no pans to scrub later. Just mix, zap, and enjoy. It’s basically magic – if magic tasted like chocolate cake.
The Simple Ingredients That Make Magic Happen

Here’s the beautiful truth – you only need five basic ingredients for this chocolate mug cake, and I bet you’ve got them all in your kitchen right now! The simplicity is what makes this recipe so brilliant. No fancy equipment, no specialty ingredients, just pantry staples coming together in perfect harmony.
- 4 tablespoons all-purpose flour – Just regular plain flour, nothing fancy
- 2 tablespoons unsweetened cocoa powder – The darker the better for rich chocolate flavor
- 3 tablespoons granulated sugar – Or brown sugar if you want a caramel note
- 3 tablespoons milk – Any kind you have, even almond milk works
- 1 tablespoon vegetable oil – Canola works great too
That’s it! Five ingredients and you’re on your way to chocolate heaven. I love that I don’t need to run to the store for anything special – these are the kind of basics I always have around. Pro tip: use a standard 12-ounce microwave-safe mug – any smaller and you might have a messy overflow situation (trust me, I’ve learned this the hard way!).
How to Make Chocolate Mug Cake in the Microwave
Alright, let’s get to the good part – turning those simple ingredients into a warm, chocolatey masterpiece! I’ve made this mug cake so many times I could probably do it in my sleep, but I’ll walk you through each step to ensure your first try turns out perfect.
Mixing the Dry Ingredients
First things first – grab your favorite microwave-safe mug (that 12-ounce one I mentioned earlier is perfect). Add the flour, cocoa powder, and sugar right into the mug. Here’s my secret: whisk these together with a fork before adding any liquids. This breaks up any cocoa powder lumps and makes sure everything’s evenly distributed. You want to see a uniform brown mixture with no white flour streaks – that’s how you know it’s ready for the wet ingredients.
Adding Wet Ingredients
Now for the fun part! Pour in your milk and oil all at once. I like to make a little well in the center of my dry ingredients first – it helps prevent flour from flying everywhere when you start stirring. Use that same fork to mix everything together, scraping the sides and bottom of the mug. You’re looking for a smooth, thick batter with no dry spots. If you see any stubborn flour pockets, just give it another few stirs. Don’t worry if it seems thick – that’s exactly how it should be!
Microwaving Your Chocolate Mug Cake
Here’s where the magic happens! Pop your mug into the microwave and set it for 1 minute 30 seconds on high power. But – and this is important – stop it at the 1 minute mark to check. Microwave strengths vary, and nothing’s sadder than an overdone mug cake. The top should look set but still slightly moist. If it’s still super jiggly, give it another 15-30 seconds. Remember, it will continue cooking a bit as it cools. My microwave’s sweet spot is exactly 1 minute 20 seconds – you’ll learn yours after a couple tries.
Cooling and Serving
Patience, my friend! I know it’s tempting to dig right in, but let your mug cake sit for about a minute first. This gives it time to set properly and saves you from burning your tongue (another lesson I learned the hard way). The cake will pull away slightly from the sides of the mug when it’s ready. Top it with whatever makes you happy – a scoop of vanilla ice cream melting over the top is my personal weakness. Then grab a spoon and enjoy your warm, chocolatey creation!
Tips for the Best Chocolate Mug Cake

After making approximately a zillion of these chocolate mug cakes (okay fine, maybe just dozens), I’ve picked up some foolproof tricks to ensure yours turns out perfect every single time. These little nuggets of wisdom will take your mug cake from “pretty good” to “oh wow I need to make this again tomorrow” status.
1. The Mug Matters – Size It Right
Believe me, I learned this one the messy way! Your standard coffee mug (about 12 oz) is ideal – anything smaller risks overflow when the cake rises. I once used a cute little teacup and ended up with chocolate lava all over my microwave. Not fun at 1am! Also, make sure your mug is microwave-safe – no metallic designs or anything.
2. The Microwave Power Dance
Microwaves vary wildly in strength, so that first check at 1 minute is crucial. If yours runs hot, you might only need 1 minute 10 seconds. The cake should look set on top but still slightly moist – remember it keeps cooking as it cools. Underdone is always better than overdone with mug cakes!
3. Get Creative with Toppings
While delicious plain, this mug cake becomes next-level with toppings. My favorites:
- A scoop of vanilla ice cream melting into the warm cake
- A dollop of peanut butter swirled in before microwaving
- Mini chocolate chips sprinkled on top right after cooking
- A drizzle of caramel sauce and flaky sea salt
The possibilities are endless!
4. The Stirring Secret
Don’t rush mixing the batter! Take an extra 30 seconds to really scrape the bottom and sides of the mug to incorporate all the dry ingredients. Little pockets of flour can hide down there and create dry spots in your finished cake. I like to make a “W” motion with my fork to get everything smooth.
5. Let It Rest (If You Can!)
I know it’s hard to wait, but letting your mug cake sit for a full minute after microwaking makes a huge difference. This resting period allows the steam to redistribute, making the texture more uniform instead of gummy at the bottom. Plus, it saves your tongue from molten chocolate burns – definitely worth the brief wait!
Chocolate Mug Cake Variations
Once you’ve mastered the basic chocolate mug cake (which, let’s be honest, is amazing on its own), it’s time to play around with some fun twists! I love experimenting with different flavors – it’s like having a whole dessert menu at my fingertips. Here are my favorite go-to variations that take seconds to throw together:
Chocolate Chip Lover’s Dream
This one’s obvious but oh-so-good. Simply stir a handful of chocolate chips into your batter before microwaving. I prefer mini chips because they distribute better, but regular ones work great too. The melted pockets of chocolate take this from “nice little cake” to “why don’t I eat this every night?” status.
Peanut Butter Swirl
Drop spoonfuls of peanut butter into your mixed batter and use a toothpick to swirl it around before microwaving. The peanut butter melts into gooey ribbons throughout the cake – absolute magic! Bonus points if you use chunky peanut butter for little nutty surprises.
Mocha Madness
For coffee lovers, replace 1 tablespoon of milk with strong brewed coffee or espresso. The coffee enhances the chocolate flavor beautifully without making it taste like coffee. Top with whipped cream and chocolate shavings for a café-worthy treat.
Nutella Surprise
Drop a dollop of Nutella right into the center of your batter before microwaving. As it cooks, the Nutella creates a molten chocolate-hazelnut core that’ll make you swoon. Just be careful – that first bite can be lava-hot!
Cinnamon Spice
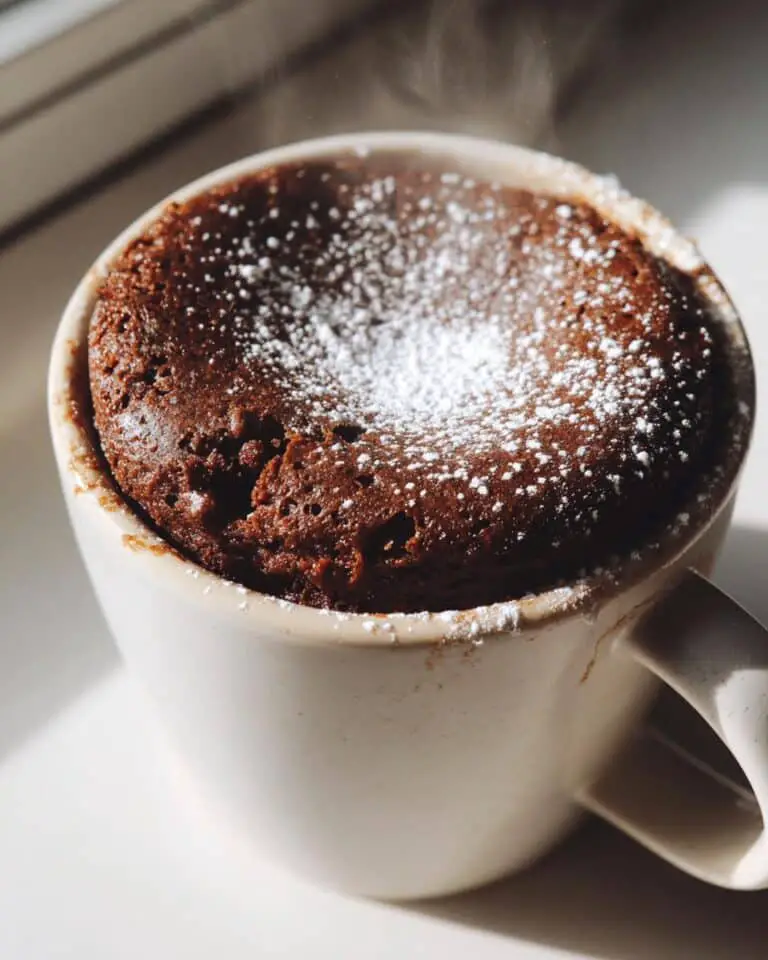
Add a pinch of cinnamon and a dash of vanilla extract to the batter for a warm, comforting twist. It reminds me of Mexican hot chocolate in cake form. Dust with powdered sugar if you’re feeling fancy.
The best part? You can mix and match these ideas! I’ve done chocolate chip peanut butter swirl that was downright dangerous. Just remember – when adding extras, don’t overfill your mug or you might end up with overflow (another lesson from my messy experiments!).
Storing and Reheating
Okay, let’s be honest – who has leftovers with a single-serving mug cake? But hey, I’ve actually had times where I made two (one for now, one for later), or started eating one and got distracted (rare, but it happens!). If you end up with extra, here’s how to handle it.
Short-Term Storage
If you want to save your mug cake for later that same day, just leave it in the mug and cover loosely with plastic wrap or a lid. It’ll stay good for a few hours – the texture holds up surprisingly well! For next-day enjoyment, pop the whole mug into an airtight container or wrap tightly with plastic wrap. The cake keeps its moisture thanks to that tight mug environment.
Reheating Your Mug Cake
When you’re ready for round two, here’s the trick: microwave it for 20-30 seconds to bring back that warm, gooey texture. If it’s been stored refrigerated, add 10 more seconds. Watch closely – reheated cakes can sometimes surprise you with sudden dryness if overheated. A quick tip: sprinkle a few drops of water on top before reheating to keep it moist.
Truth be told, mug cakes are best fresh, but with these simple storing tricks, you can stretch that deliciousness a bit longer. Now, who’s up for making another one right away instead? I know I am!
Chocolate Mug Cake Nutritional Information

Now, I’m no nutritionist, but I know we all like to have at least a general idea of what we’re eating (especially when it’s chocolate cake at midnight!). These numbers are estimates based on the basic recipe – toppings will obviously change things. Remember, this is a treat, not health food – but it’s nice to know the facts!
- Calories: About 350 per mug
- Sugar: 28g (that’s the good stuff!)
- Fat: 12g (mostly from the oil)
- Carbs: 58g
- Protein: 5g
If you’re watching specific dietary needs, here are some easy swaps I’ve tried: almond milk cuts about 15 calories, and swapping half the sugar with a zero-calorie sweetener works surprisingly well. But honestly? Sometimes you just need the real deal – life’s too short not to enjoy your chocolate cake fully!
Frequently Asked Questions
Over my many late-night mug cake experiments, I’ve gotten all sorts of questions from friends (and made plenty of mistakes myself!). Here are answers to the most common ones that pop up when people try this magical little dessert for the first time.
Can I Double This Chocolate Mug Cake Recipe?
Absolutely! Just mix everything in a larger microwave-safe bowl instead of a mug – think cereal bowl size. Double all ingredients and microwave for about 2 minutes 30 seconds, checking at 2 minutes. The cake will be taller, so make sure your bowl has plenty of room for rising. Pro tip: stir halfway through cooking to ensure even baking.
Can I Use Water Instead of Milk?
You can, but I wouldn’t recommend it unless you’re desperate! Milk adds richness and helps create that perfect tender crumb. If you’re out of milk, try substituting with coffee, almond milk, or even melted ice cream for extra flavor. Water makes the cake taste… well, watery. Not terrible in a pinch, but definitely not as dreamy.
Why Did My Chocolate Mug Cake Turn Out Dry?
Ah, the tragedy of an overdone mug cake! This usually happens from:
- Microwaving too long (always check early!)
- Not mixing thoroughly (dry flour pockets remain)
- Using too large a mug (batter spreads too thin)
If yours turns out dry, try adding an extra teaspoon of milk next time or reducing microwave time by 10-15 seconds. A scoop of ice cream on top can also help mask any dryness!
Can I Make This Chocolate Mug Cake in the Oven?
Technically yes, but honestly? The magic is in the microwave! Oven baking changes the texture completely – it becomes more like a regular cupcake than that wonderful moist, dense microwave texture we love. If you must use an oven, bake at 350°F for about 12-15 minutes in an oven-safe ramekin. But really, the microwave version is faster and better – that’s why it’s called a mug cake!
Can I Make This Ahead of Time?
The batter? Not really – it’s best mixed and microwaved immediately. But you can measure out the dry ingredients in advance (I sometimes prep several mugs-worth when I know I’ll want them!). Just add the wet ingredients when ready to cook. Stored batter separates and makes the cake gummy – definitely not ideal.
There you have it – all my hard-earned mug cake wisdom! Now go grab your favorite mug and treat yourself to some warm chocolatey goodness. Trust me, once you try it, you’ll be hooked!
You can also find more recipe inspiration on Pinterest.
Print
5-Minute Chocolate Mug Cake Recipe for Insane Cravings
- Total Time: 3 minutes 30 seconds
- Yield: 1 serving
- Diet: Vegetarian
Description
A quick and easy single-serving chocolate cake you can make in the microwave in just minutes.
Ingredients
- 4 tbsp flour
- 2 tbsp cocoa powder
- 3 tbsp sugar
- 3 tbsp milk
- 1 tbsp vegetable oil
Instructions
- Mix all dry ingredients in a microwave-safe mug.
- Add milk and oil, then stir until smooth.
- Microwave on high for 1 minute 30 seconds.
- Let cool slightly before eating.
Notes
- Check at 1 minute to avoid overcooking.
- Top with whipped cream or ice cream if desired.
- Prep Time: 2 minutes
- Cook Time: 1 minute 30 seconds
- Category: Dessert
- Method: Microwave
- Cuisine: American


