Oh, the holidays! The twinkling lights, the cozy nights, and of course, the *cookies*. If you’re anything like me, your kitchen becomes the heart of the house during this magical time, and what better way to fill it with cheer than with a truly spectacular cookie? That’s where my Christmas Kitchen Sink Cookies come in! Seriously, these are my absolute go-to. They’re like a party in your mouth, packed with all the good stuff – sweet candies, salty pretzels, melty chocolate, and whatever else you can dream up. They’re wonderfully easy to whip up, which is a lifesaver when you’re juggling all those other holiday to-dos. Forget stressing over complicated recipes; these “everything but the kitchen sink” Christmas cookies are your ticket to a delicious, festive, and totally fuss-free treat that everyone will rave about!
Why You’ll Love These Christmas Kitchen Sink Cookies
Honestly, what’s not to love? These cookies are a total win for so many reasons:
- Quick and Easy Preparation: You can get them mixed up and ready to bake in no time, which is a lifesaver during the busy holiday season.
- Customizable Mix-Ins: This is where the fun really happens! Toss in your favorite candies, chocolates, or even some festive sprinkles. They’re your cookies, after all!
- Perfect for Sharing: Whether it’s a cookie exchange, a holiday party, or just a sweet treat for the neighbors, these are always a huge hit.
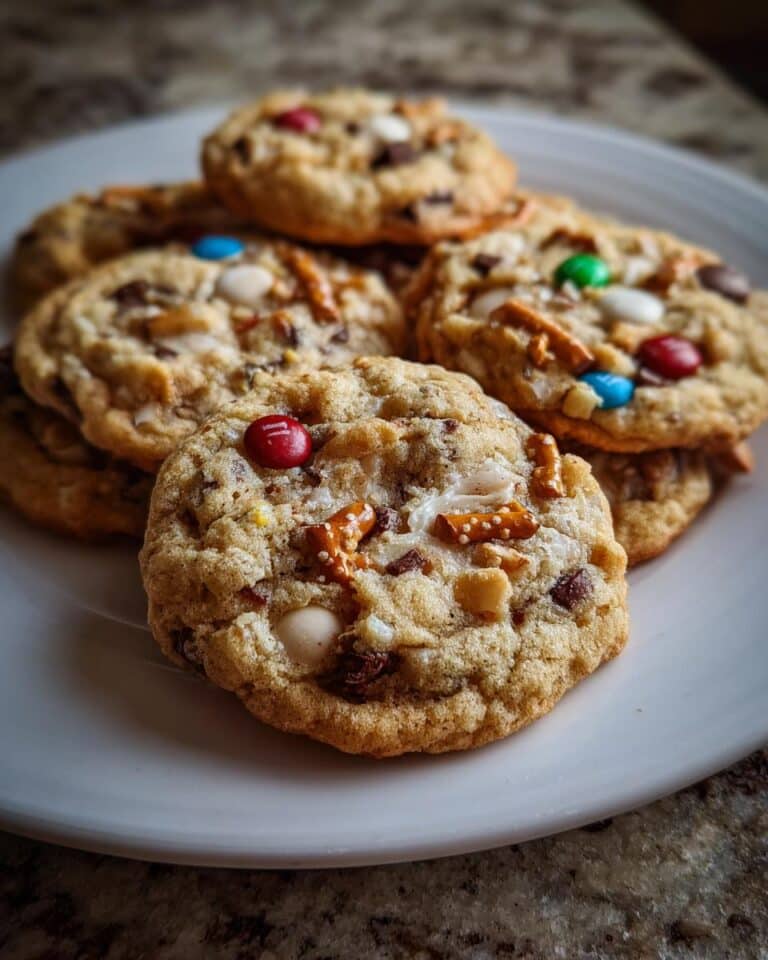
- Delightful Sweet and Salty Combination: That perfect balance of sweet M&Ms and chocolate with the salty crunch of pretzels? It’s pure cookie magic!
Gather Your Ingredients for Christmas Kitchen Sink Cookies
Alright, let’s get our goodies ready! This is where the “everything but the kitchen sink” magic really starts. You’ll want to have everything measured out and prepped before you even think about mixing, trust me on this one. It makes the whole process so much smoother, especially when you’re excited to get baking!
Dry Ingredients for Christmas Kitchen Sink Cookies
All-purpose flour: 2 cups
Baking soda: 1 teaspoon
Salt: 1/2 teaspoon
Wet Ingredients for Christmas Kitchen Sink Cookies
Unsalted butter, softened: 1 cup (that’s two sticks!)
Granulated sugar: 1 cup
Packed light brown sugar: 1 cup
Large eggs: 2
Vanilla extract: 1 teaspoon
The “Sink” Mix-Ins for Christmas Kitchen Sink Cookies
M&Ms: 1 cup total. We’ll use half in the dough and save the other half to press on top later for that extra festive look!
Chocolate chips: 1 cup total. Same as the M&Ms, half go in, half go on top. You can use milk, dark, or semi-sweet – whatever you love!
Mini pretzels, broken: 1 cup. Just give them a quick rough chop so they’re not huge chunks. They add the perfect salty crunch!
Chopped nuts (Optional): 1 cup. Walnuts or pecans are great here if you’re a nut fan.
Shredded coconut (Optional): 1 cup. If you’re a coconut lover, this adds a lovely chewiness.
How to Prepare Christmas Kitchen Sink Cookies: Step-by-Step
Okay, team, let’s get these amazing Christmas Kitchen Sink Cookies into the oven! It’s really not complicated, and the results are SO worth it. Just follow along with me, and you’ll have a batch of cookie perfection in no time.
Preparing Your Baking Station

Mixing the Cookie Dough
In a medium bowl, just give your flour, baking soda, and salt a quick whisk together. Set that aside for a sec. Now, grab your big mixing bowl. We’re going to cream together the softened butter with both the granulated and light brown sugars. Beat them until they’re nice and fluffy and look like pale, creamy clouds. This step is super important for texture! Next, beat in your eggs, one at a time, making sure each one is fully mixed in before adding the next. Then, stir in that lovely vanilla extract.
Shaping and Topping the Cookies

Baking and Cooling the Christmas Kitchen Sink Cookies
Into the hot oven they go! You’ll want to bake these for about 10 to 12 minutes. Keep an eye on them – you’re looking for the edges to be a lovely golden brown, and the centers should look set, not gooey. Once they’re done, let them hang out on the baking sheets for a few minutes. This helps them firm up a little before you try to move them. Then, carefully transfer them to a wire rack to cool completely. Patience is key here so they don’t fall apart!
Tips for Perfect Christmas Kitchen Sink Cookies
Want to make sure your Christmas Kitchen Sink Cookies turn out absolutely amazing every single time? I’ve got a few little tricks up my sleeve that really make a difference. These aren’t complicated, but they help ensure your cookies are just perfect – think chewy centers, crisp edges, and just the right amount of everything!
Achieving Thicker Christmas Cookies
So, you want super thick, bakery-style cookies? My biggest tip is to chill that dough! After you’ve mixed everything together, cover the bowl and pop it in the fridge for at least 30 minutes, or even an hour if you have time. This lets the flour hydrate and the fats firm up, which means they won’t spread out as much in the oven. They’ll bake up beautifully thick and chewy!
Customizing Your Everything Christmas Cookies
This is where the “everything” really comes into play! Don’t be afraid to get creative with your mix-ins. Besides the M&Ms and chocolate chips, think about adding some festive sprinkles, chopped-up holiday candy canes, or even a little bit of cinnamon or nutmeg to the dry ingredients for an extra festive kick. You could even swap out some of the chocolate chips for white chocolate or butterscotch chips. The possibilities are endless!
Preventing Over-Baking
The trick to a chewy cookie is not to over-bake them! While 10-12 minutes is usually spot on, ovens can be finicky. You’re looking for the edges to be lightly golden brown, but the centers should still look a little soft and slightly underdone. They’ll continue to set up as they cool on the baking sheet, which is exactly what you want for that perfect chewy texture. Trust me, it’s better to pull them out a minute too soon than a minute too late!
Storing and Freezing Your Christmas Sink Cookies
One of the best things about these Christmas Sink Cookies is how well they keep, which means you can totally make them ahead of time! If you happen to have any leftovers (which is rare in my house!), just store them in an airtight container at room temperature. They’ll stay fresh for about 3-4 days. But honestly, my favorite trick is to make a big batch and freeze some for later. They’re the ultimate make-ahead holiday treat!
Storing Fresh Cookies
Once your cookies are completely cool, pop them into a good quality airtight container. You can layer them between parchment paper if you’re worried about them sticking, but usually, they’re sturdy enough. They’ll be delicious for a few days!
Best Practices for Freezer Christmas Cookies
Want to have these ready whenever a craving strikes or for unexpected holiday guests? Freeze them! Let your cookies cool *completely* first. Then, arrange them in a single layer on a baking sheet and pop that into the freezer for about an hour until they’re firm. Once frozen solid, you can transfer them to a freezer-safe bag or container. They’ll keep beautifully for up to 3 months. Just pull out as many as you need, let them thaw at room temperature for about 15-20 minutes, and enjoy your little bites of Christmas cheer!

Frequently Asked Questions about Christmas Kitchen Sink Cookies
Got questions about these amazing Christmas Kitchen Sink Cookies? I’ve got answers! These cookies are so popular, and I get asked about them all the time. Let’s dive into some of the most common things people wonder about.
Can I make these Everything But The Kitchen Sink Christmas Cookies ahead of time?
Oh, absolutely! These are fantastic for making ahead. You can bake them and store them in an airtight container at room temperature for about 3-4 days. Or, even better, bake them, let them cool completely, and then freeze them for up to 3 months. They’re the perfect freezer cookies to have on hand!
What are the best mix-ins for Christmas Cookies Pretzel?
For these Christmas Cookies Pretzel, you really can’t go wrong! Beyond the M&Ms and chocolate chips, I love adding chopped candy canes for a pepperminty punch, some festive red and green sprinkles, or even some dried cranberries for a little tartness. The key is to get a good mix of sweet and salty, so the pretzels are a must!
How do I ensure my Christmas Kitchen Sink Cookies are perfectly chewy?
The secret to super chewy Christmas Kitchen Sink Cookies is all about the chilling and the baking time. Make sure you chill your dough for at least 30 minutes before baking – this stops them from spreading too much. Then, when you’re baking, pull them out when the edges are golden brown but the centers still look a little soft. They’ll finish cooking on the hot baking sheet and turn out perfectly chewy!
Can I substitute any of the ingredients in these Christmas Sink Cookies?
You can definitely play around with the mix-ins! For example, swap out M&Ms for Reese’s Pieces or other candies. You can use different kinds of chocolate chips like white chocolate or butterscotch. If you don’t have pretzels, you could try crushed potato chips for a salty crunch. Just remember that the butter, sugars, eggs, and flour are pretty key to the cookie’s structure, so try to stick to those!
Nutritional Information Disclaimer
Please keep in mind that the nutritional information provided for these cookies is an estimate. Actual values will vary significantly based on the specific types and quantities of mix-ins you choose to use.
For more delicious recipes and inspiration, check out our Pinterest page!
Print
Awesome Christmas Kitchen Sink Cookies: 10 Minute Prep
- Total Time: 32 minutes
- Yield: Approximately 24 cookies
- Diet: Vegetarian
Description
These Christmas Kitchen Sink Cookies are a festive and easy treat, packed with a variety of sweet and salty additions. They’re perfect for holiday gatherings and can be made ahead of time.
Ingredients
- 2 cups all-purpose flour
- 1 teaspoon baking soda
- 1/2 teaspoon salt
- 1 cup (2 sticks) unsalted butter, softened
- 1 cup granulated sugar
- 1 cup packed light brown sugar
- 2 large eggs
- 1 teaspoon vanilla extract
- 1 cup M&Ms, divided
- 1 cup chocolate chips, divided
- 1 cup mini pretzels, broken
- 1 cup chopped nuts (optional)
- 1 cup shredded coconut (optional)
Instructions
- Preheat your oven to 350°F (175°C). Line baking sheets with parchment paper.
- In a medium bowl, whisk together the flour, baking soda, and salt. Set aside.
- In a large bowl, cream together the softened butter, granulated sugar, and brown sugar until light and fluffy.
- Beat in the eggs one at a time, then stir in the vanilla extract.
- Gradually add the dry ingredients to the wet ingredients, mixing until just combined.
- Stir in 1/2 cup of M&Ms, 1/2 cup of chocolate chips, broken pretzels, and any optional nuts or coconut.
- Drop rounded tablespoons of dough onto the prepared baking sheets, about 2 inches apart.
- Press the remaining M&Ms and chocolate chips onto the tops of the cookies.
- Bake for 10-12 minutes, or until the edges are golden brown and the centers are set.
- Let the cookies cool on the baking sheets for a few minutes before transferring them to a wire rack to cool completely.
Notes
- For thicker cookies, chill the dough for at least 30 minutes before baking.
- These cookies freeze well. Store cooled cookies in an airtight container in the freezer for up to 3 months.
- Feel free to customize the mix-ins with your favorite holiday candies or toppings.
- Prep Time: 20 minutes
- Cook Time: 12 minutes
- Category: Dessert
- Method: Baking
- Cuisine: American


