Oh, you are going to LOVE this! If there’s one appetizer that screams “party time” and has been a staple at my gatherings for ages, it’s this Classic Cheese Ball. Seriously, it’s the best ever, and I’m so excited to share my foolproof way of making it with you. It’s just one of those simple recipes that always, always impresses everyone. Forget those fussy appetizers that take forever; this beauty comes together in a flash and uses just a few key ingredients like creamy cream cheese and sharp cheddar. Trust me, this is the cheese ball recipe you’ll be reaching for again and again!
Why This Classic Cheese Ball Recipe is a Crowd-Pleaser
Honestly, what’s not to love about this cheese ball? It’s my go-to because it’s ridiculously easy to whip up, and the flavor is just out of this world. It’s the perfect appetizer that always disappears first!
- Super Simple to Make: Seriously, you can have this mixed up in about 15 minutes.
- Incredible Flavor: That combination of tangy cream cheese and sharp cheddar is just, well, *chef’s kiss*!
- Versatile: It’s not just for parties; it’s great for game nights, holidays, or even just a fancy Friday night in.
Simple Ingredients for Your Classic Cheese Ball
This recipe is all about letting a few really good ingredients shine. You don’t need anything fancy, just good quality stuff! You’ll need 8 ounces of cream cheese, and make sure it’s *fully softened*. This is key for getting a super smooth mixture – I usually leave mine on the counter for a good hour or so before I start. Then, grab 8 ounces of sharp cheddar cheese, and please, please shred it yourself! Pre-shredded stuff has anti-caking agents that can make your cheese ball a bit grainy. I like to shred it finely, it just blends better. Next up are the fresh chives. You’ll want about 2 tablespoons, finely chopped, plus a little extra for pretty garnish later. If you can’t find fresh chives, finely chopped green onions work too, but fresh chives have a milder, sweeter oniony bite that I just adore. For a little savory depth, we’re adding 1/4 teaspoon of garlic powder and 1/4 teaspoon of onion powder. Of course, salt and freshly cracked black pepper are essential to taste – start with a pinch and add more if you think it needs it. And for those of you who love a little crunch, you can totally roll your finished cheese ball in about 1/4 cup of chopped pecans or walnuts. Toasting them first really brings out their nutty flavor, but it’s totally optional!
Essential Equipment for Making a Classic Cheese Ball
You don’t need a whole professional kitchen for this! Just a medium mixing bowl to combine everything, some measuring cups and spoons to get those quantities right, and a sturdy spoon or spatula for mixing. Once it’s chilled and shaped, you’ll want a nice serving platter to show it off. That’s pretty much it – simple tools for a simple, delicious appetizer!

How to Prepare Your Classic Cheese Ball
Alright, let’s get this party started! Making this classic cheese ball is honestly so straightforward, you’ll wonder why you haven’t made it a million times before. It’s all about combining, chilling, and shaping. First things first, in your medium mixing bowl, toss in that softened cream cheese, your beautifully shredded sharp cheddar, and those finely chopped fresh chives. Then, sprinkle in the garlic powder and onion powder. Now, this is where the magic starts to happen. Grab your spoon or spatula and just start mixing and mashing everything together. You really want to get in there and combine it all until it’s super smooth and creamy. Don’t be afraid to really work it! Once it’s all nicely blended, give it a little taste and add your salt and pepper. Remember, you can always add more, so start with a pinch and go from there.
Step 1: Combining the Base Ingredients
This is where we bring all those yummy flavors together! Make sure that cream cheese is *really* softened – like, spreadable soft. It makes all the difference in getting a perfectly smooth, lump-free mixture. Just mash it all up with your cheese and seasonings until it looks like one happy, cohesive blend. No one wants a chunky cheese ball, right?
Step 2: Chilling for Perfect Firmness
Okay, so now that everything is mixed up, we need to let it chill out. Cover that bowl tightly with plastic wrap (or a lid) and pop it into the refrigerator for at least an hour. This step is super important! It allows the flavors to meld together, and more importantly, it firms up the mixture so you can actually shape it into a nice, neat ball. If you try to shape it while it’s too warm, it’ll just be a sticky mess, and nobody wants that!
Step 3: Shaping and Coating Your Classic Cheese Ball
Print
Amazing Classic Cheese Ball: 15-Min Recipe
- Total Time: 1 hour 15 minutes
- Yield: 1 cheese ball
- Diet: Vegetarian
Description
A simple and delicious classic cheese ball recipe. It’s perfect for parties and gatherings. This recipe uses cream cheese and cheddar cheese for a rich flavor. Fresh chives add a nice oniony bite.
Ingredients
- 8 ounces cream cheese, softened
- 8 ounces sharp cheddar cheese, shredded
- 2 tablespoons chopped fresh chives, plus more for garnish
- 1/4 teaspoon garlic powder
- 1/4 teaspoon onion powder
- Salt and black pepper to taste
- Optional: 1/4 cup chopped pecans or walnuts for coating
Instructions
- In a medium bowl, combine the softened cream cheese, shredded cheddar cheese, chopped chives, garlic powder, and onion powder.
- Mix until well combined and smooth.
- Season with salt and black pepper to taste.
- Cover the bowl and refrigerate for at least 1 hour to allow the mixture to firm up.
- Once chilled, shape the cheese mixture into a ball.
- If desired, roll the cheese ball in chopped nuts to coat.
- Transfer the cheese ball to a serving platter. Garnish with additional chopped chives.
- Serve with crackers, pretzels, or vegetable sticks.
Notes
- For a smoother texture, ensure your cream cheese is fully softened.
- You can add other seasonings like paprika or a pinch of cayenne pepper for a little heat.
- If you don’t have fresh chives, green onions can be substituted.
- The cheese ball can be made a day in advance and kept refrigerated.
- Prep Time: 15 minutes
- Cook Time: 0 minutes
- Category: Appetizer
- Method: No-Bake
- Cuisine: American
Once your cheese mixture has chilled and firmed up nicely, it’s time to get your hands a little messy – in the best way possible! Scoop the mixture out of the bowl and onto a clean surface or directly onto your serving platter. Gently start shaping it into a ball. If you decided to go with the nut coating, just spread those chopped nuts out on a plate or shallow bowl. Then, carefully roll your cheese ball around in the nuts, pressing gently so they stick all over. Try to get an even coating all around. If you’re not using nuts, just keep shaping until you have a nice, round ball!
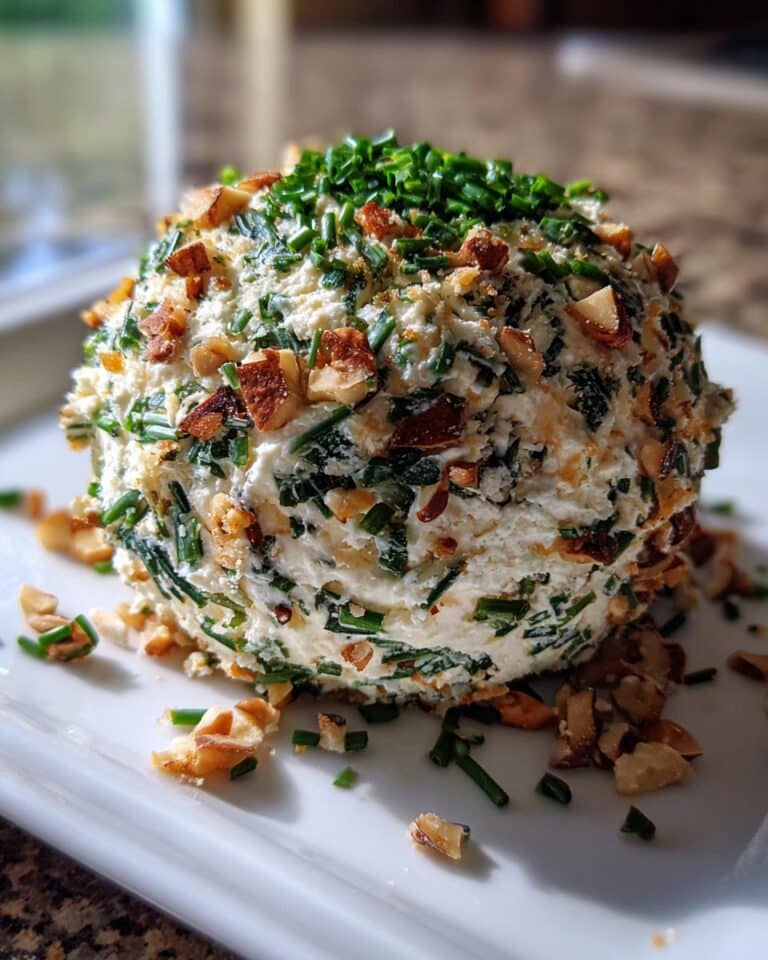
Step 4: Garnishing and Serving Your Appetizer Cheese Ball
Now for the finishing touches! Sprinkle a little extra chopped chives over the top of your beautiful cheese ball. It just makes it look so pretty and adds a fresh pop of color. And there you have it! Your amazing appetizer cheese ball is ready to be devoured. Serve it up with an assortment of your favorite crackers, some crunchy pretzels, or even some fresh veggie sticks. It’s the perfect centerpiece for any gathering!

Tips for the Ultimate Classic Cheese Ball
Okay, so you’ve got the basic recipe, but let’s talk about how to make this cheese ball *truly* legendary. It’s all about a few little tweaks and knowing a couple of tricks. First off, don’t skimp on the quality of your ingredients! Using good sharp cheddar and really fresh chives makes a noticeable difference. And remember that cream cheese? Make sure it’s *fully* softened – it’s the secret to that super smooth, creamy texture. If you like a little kick, don’t be afraid to play with the seasonings. A tiny pinch of cayenne pepper can add a lovely warmth without making it spicy hot. And for those times you need to get ahead, this cheese ball is a lifesaver because it can be made the day before!
Ingredient Substitutions and Additions
While I absolutely adore the classic sharp cheddar and chive combo, feel free to get a little creative! If you can’t find fresh chives, don’t sweat it. Finely chopped green onions (just the green parts, mostly!) are a perfectly good substitute and give a similar oniony flavor. For a bit of heat, I sometimes stir in a tiny pinch of cayenne pepper or even a dash of smoked paprika for a smoky depth. Some people love adding a little bit of chopped dried cranberries or even some crispy bacon bits right into the mix for extra texture and flavor. Just remember, if you add anything wet, you might need to chill it a little longer to firm up!
Making Your Classic Cheese Ball Ahead of Time
This is a game-changer for party planning! You can totally make this cheese ball a full day in advance. Just follow all the steps up to shaping it. Once you’ve formed the ball (with or without nuts), wrap it really well in plastic wrap. Then, just pop it back into the fridge. When you’re ready to serve, just unwrap it, maybe give it a quick garnish with some fresh chives, and place it on your serving platter. It’s so much easier than scrambling right before guests arrive, and honestly, I think the flavors meld even better overnight!
Frequently Asked Questions About This Classic Cheese Ball Recipe
Got questions about making the best ever cheese ball? I’ve got answers! People often ask me about making this classic cheese ball recipe their own way, and I love hearing how you guys adapt it. So, let’s dive into some of the most common things folks wonder about when they’re whipping up this appetizer cheese ball.
Q1. Can I make this cheese ball recipe without nuts?
Absolutely! The nuts are totally optional. If you or your guests have nut allergies, or you just prefer it without, that’s perfectly fine! The cheese ball is delicious all on its own. You can just shape it and garnish it with extra chives. It’s still going to be amazing!
Q2. What’s the best way to store leftover classic cheese ball?
If, by some miracle, you have any leftovers, just wrap the cheese ball tightly in plastic wrap or pop it into an airtight container. It’ll keep just fine in the refrigerator. I usually find it’s best to serve it within 2-3 days for the freshest flavor and texture.
Q3. How long does a cheese ball with cream cheese last?
Generally, a cheese ball made with cream cheese will last about 3-5 days in the refrigerator when stored properly. Remember that the fresh chives are best enjoyed sooner rather than later, so while it’s safe to eat for longer, the quality might diminish a bit after a few days. It’s always best to make it fresh for your party!
Q4. Can I add different cheeses to this simple cheese ball recipe?
You sure can! While the sharp cheddar is classic, feel free to experiment. A mix of sharp cheddar and Monterey Jack, or even some Colby, works wonderfully. Just make sure whatever cheese you use is shredded finely so it blends smoothly with the cream cheese.
Estimated Nutritional Information for Your Cheese Ball
Just a heads-up, the nutritional info below is an estimate! It can totally change depending on the brands of cream cheese and cheddar you use, and of course, how big you slice it. But generally, a serving (about 2 tablespoons) of this delicious cheese ball has around 150 calories, 14g of fat, 5g of protein, and 2g of carbohydrates. It’s certainly a treat!
I just love hearing from you all! If you make this classic cheese ball recipe, please leave a comment below and let me know how it turned out. Did you try any fun variations? I’d be thrilled if you shared a photo of your amazing appetizer cheese ball on social media too – just tag me! Your feedback really makes my day! You can find more delicious recipes on Pinterest.


