I swear, nothing makes my kitchen smell like home quite like a batch of classic chocolate chip cookies baking in the oven. That sweet, buttery aroma with hints of vanilla and chocolate? Absolute magic. I’ve been baking these cookies for, oh, probably twenty years now—since I was tall enough to reach the counter and steal bites of dough when my mom wasn’t looking (don’t worry, I know better now… mostly).
What makes this recipe special? That perfect chewy center with just the right amount of crisp around the edges. You know that moment when you break a warm cookie in half and see all those melty chocolate chips? That’s the moment I live for. These aren’t just any cookies—they’re the kind that disappear before they even cool, the kind kids beg to help make (and sneak nibbles of dough), the kind that turn ordinary afternoons into something sweet and memorable.

The secret’s in the simple things: real butter creamed just right, a mix of brown and white sugars for that deep caramel flavor, and enough chocolate chips to make every bite irresistible. After testing dozens of variations over the years, this is the version I keep coming back to—the one friends request by name and my husband “accidentally” leaves containers open for so they’ll stay soft (nice try, babe).
Why You’ll Love These Classic Chocolate Chip Cookies
Trust me, once you try this recipe, you’ll never go back to store-bought dough again. These cookies hit all the right notes—here’s why they’re my go-to treat for everything from bake sales to bad days:
- That dreamy chewy texture – The perfect balance of slightly crisp edges and a soft center that stays tender for days (if they last that long). I use just enough brown sugar to guarantee that irresistible chew with every bite.
- Simple ingredients you likely have right now – No fancy equipment or rare pantry items needed. If you’ve got butter, eggs, sugar and chocolate chips, you’re minutes away from cookie perfection.
- Quick enough for sudden cookie emergencies – From bowl to baking sheet in 15 minutes flat. I can’t count how many times this recipe has saved me when unexpected guests show up or the kids declare a “we need cookies NOW” emergency.
- The ultimate crowd-pleaser – These disappear faster than any dessert I make. My husband swipes them warm from the cooling rack, my niece insists on helping decorate them with extra chocolate chips, and even my “I don’t eat sweets” father-in-law can’t resist sneaking a few.
- Tastes like childhood nostalgia – That first whiff of vanilla and melting chocolate? Instant flashbacks to after-school snacks and grandma’s kitchen. These cookies aren’t just delicious—they’re edible memories.
The best part? Even beginner bakers nail these on the first try. My neighbor’s 8-year-old made them solo last week (with minimal supervision and maximum chocolate-covered fingers) and they turned out perfectly. That’s the magic of this recipe—it’s foolproof, flexible, and always delivers that classic cookie flavor we all crave.
Ingredients for Classic Chocolate Chip Cookies
Gather these simple ingredients – I promise you probably have most in your kitchen right now! The magic happens when these basic items come together just right. Don’t skip the room-temperature butter trick – it makes all the difference in getting that perfect cookie texture we’re after.
- 2 ¼ cups all-purpose flour – No need to sift, just fluff it with a fork before measuring. I use the spoon-and-level method for accuracy (just spoon flour into the cup and level it off – no packing!).
- 1 cup (2 sticks) unsalted butter, softened – This is KEY. Your butter should be cool but yield slightly when pressed – about 65°F if you want to get technical. I leave mine out for 1-2 hours before baking. No microwave shortcuts here!
- ¾ cup granulated sugar – Just regular white sugar for that classic sweetness.
- ¾ cup packed brown sugar – Pack it firmly into the measuring cup! The molasses in brown sugar is what gives our cookies that gorgeous chew and caramel notes.
- 2 large eggs – Room temp if possible (they incorporate better). I just pop them in warm water for 5 minutes if I forgot to take them out earlier.
- 2 cups semi-sweet chocolate chips – My personal favorite is Ghirardelli, but use what you love. Sometimes I do half chips, half chopped chocolate bars for those melty pockets.
- 1 tsp baking soda – Make sure yours is fresh for best rise (it should fizz when you add a drop to vinegar).
- 1 tsp salt – I use fine sea salt to balance the sweetness.
- 2 tsp pure vanilla extract – The good stuff makes a difference here. No imitation vanilla allowed in these cookies!
See? Nothing weird or complicated. Just honest ingredients that turn into pure magic when combined the right way. Pro tip: Always measure your flour correctly (that spoon-and-level method I mentioned) – it’s the #1 reason cookies turn out too cakey or dry. Now let’s get mixing!
Essential Equipment for Classic Chocolate Chip Cookies
Here’s the beautiful thing about cookie-making – you don’t need fancy gadgets! These are the basics I reach for every time:
- Large mixing bowl – My trusty stainless steel bowl has seen hundreds of cookie batches. Glass or ceramic works great too – just make sure it’s big enough for enthusiastic stirring!
- Hand mixer or sturdy wooden spoon – I actually prefer mixing by hand most days (it’s therapeutic!), but a hand mixer speeds things up when I’m in a hurry. The key is getting that butter and sugar properly creamed.
- Rimmed baking sheets – Light-colored aluminum sheets bake most evenly in my experience. I keep two ready so I can rotate batches quickly. Pro tip: Avoid dark pans – they brown cookies too fast!
- Wire cooling racks – Essential for preventing soggy bottoms. I once tried cooling cookies on plates in a pinch… let’s just say I learned my lesson about steam buildup!
- Measuring cups and spoons – My nesting stainless steel set lives right by the flour canister. For sticky ingredients like brown sugar, I swear by those flat-topped measuring cups you can pack and level easily.
- Silicone spatula – Perfect for scraping every last bit of dough from the bowl (because cookie dough waste is a tragedy). Mine has a little smiley face – silly, but it makes me happy.
That’s really all you need! Fancy stand mixers are nice but absolutely not necessary. My grandma made perfect cookies for fifty years with just a bowl and wooden spoon. The secret’s in the technique, not the tools.
One bonus item I love? A small ice cream scoop for portioning dough – it makes all your cookies uniform and bakes evenly. But a regular tablespoon works just fine in a pinch. Now let’s get to the fun part – making the dough!
How to Make Classic Chocolate Chip Cookies
Alright, let’s get baking! These steps are simple, but pay attention to the little details – that’s what takes these cookies from good to “oh-my-gosh-can-I-have-another” great. I’ll walk you through each part so your cookies turn out perfect every time.
Mixing the Dough
This is where the magic starts – getting that butter and sugar creamed just right creates the base for our dreamy cookies. Here’s how I do it:
- Cream the butter and sugars – In your large mixing bowl, beat the softened butter (remember – cool but yields to pressure!) with both sugars for 2-3 minutes until light and fluffy. I count to 180 in my head while mixing – it should look pale and creamy when it’s ready. This step builds structure and helps create that perfect texture.
- Add eggs one at a time – Crack in the first egg and mix until fully incorporated before adding the second. Scrape down the bowl halfway through – those sneaky butter bits love to hide! The mixture might look slightly curdled after adding eggs – that’s totally normal.
- Mix in dry ingredients – In another bowl, whisk together flour, baking soda and salt. Add this to the butter mixture in 2-3 batches, mixing just until combined after each addition. Here’s my golden rule: when you stop seeing flour streaks, STOP mixing! Overworking the dough makes tough cookies.
- Fold in chocolate chips – Use that trusty spatula to gently stir in the chocolate chips until evenly distributed. The dough will be thick and glorious – if it seems too sticky, that’s actually perfect. Resist eating all the dough now (I know, it’s hard)!

Baking Classic Chocolate Chip Cookies
Now for the best part – transforming that dough into golden, chocolatey perfection:
- Preheat and prep – Heat your oven to 375°F (190°C) while you portion the dough. This gives the oven time to stabilize at the right temperature. Line baking sheets with parchment paper – no greasing needed!
- Portion the dough – Use a tablespoon or small scoop to drop rounded balls of dough (about 1.5 tablespoons each) onto sheets, spacing them 2 inches apart. They’ll spread! For thicker cookies, I sometimes chill the dough balls for 10 minutes first.
- Bake to golden perfection – 9-11 minutes is the sweet spot. The cookies are done when the edges look set and golden but the centers still appear slightly underdone. They’ll continue cooking on the sheet – this is KEY for chewiness! If you like crispier cookies, add 1-2 minutes.
- Cool properly – Let cookies rest on the baking sheet for 5 minutes (this helps them set), then transfer to wire racks to cool completely. The hardest part? Waiting those agonizing minutes before the first bite!
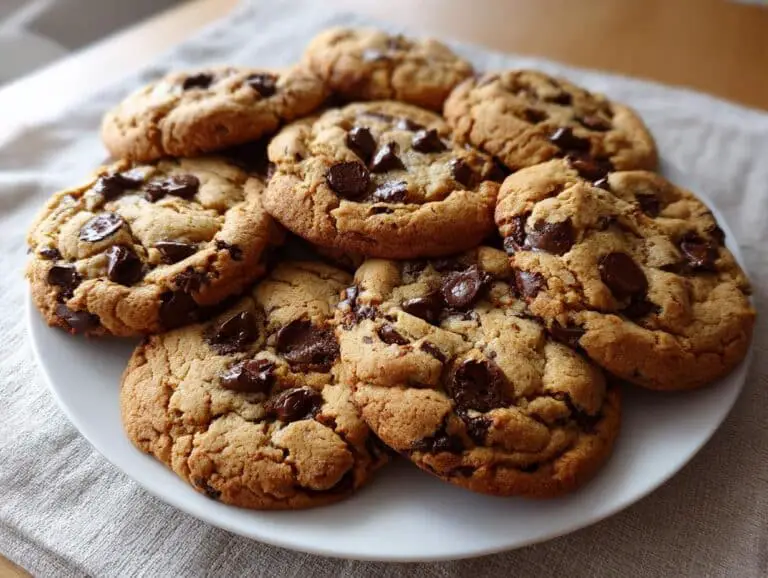
See those gorgeous cracks forming as they cool? That’s the sign of a perfect chocolate chip cookie. A little crisp on the outside, soft and chewy inside, with pockets of melted chocolate in every bite. Your kitchen smells amazing right now, doesn’t it?
Pro Tips for Perfect Classic Chocolate Chip Cookies
After making hundreds (okay, maybe thousands) of these cookies over the years, I’ve picked up some tricks that take them from good to “hide-them-from-your-family” amazing. Here are my battle-tested secrets:
Chill the dough for thicker cookies – If you’ve ever wondered why bakery cookies look so plump and perfect, here’s their secret: chilled dough. Pop your portioned cookie dough in the fridge for just 30 minutes before baking. The cold butter takes longer to melt, so your cookies hold their shape better while baking up gloriously thick. Bonus? Chilled dough spreads less, so you can fit more on each baking sheet without fear of cookie merging!
Parchment paper is your best friend – I never bake cookies without it. Not only does parchment prevent sticking (no more scraping sad cookie remnants off pans), but it also helps cookies bake more evenly. The paper creates a perfect little microclimate under each cookie – golden bottoms without burnt edges. And cleanup? Just toss the paper when you’re done.
Undercook slightly for ultimate chew – Here’s my golden rule: pull cookies out when they still look slightly underdone in the center. Those gorgeous golden edges should be set, but the middle should still appear soft – the residual heat will finish cooking them perfectly as they cool. This is the single biggest game-changer for achieving that bakery-style chew rather than crispy hockey pucks.
Airtight storage keeps them fresh – If by some miracle you have leftovers (unlikely, I know), store them in an airtight container with a slice of bread. The bread absorbs excess moisture while keeping cookies soft – just replace it when it hardens. My cookies stay fresh for up to 5 days this way… though they’ve never lasted that long in my house!
One last tip from my cookie-obsessed heart: always bake a test cookie first. Ovens vary, so I bake one single cookie to check timing before committing a whole sheet. Too flat? Chill the remaining dough longer. Perfect? Now you’ve got your exact bake time dialed in – and hey, someone’s gotta taste test!
Variations for Classic Chocolate Chip Cookies
While I adore the classic version, sometimes it’s fun to mix things up! These simple twists keep the soul of the original while adding little surprises. My family actually begs me to make ALL these versions – so now you can too!
Nutty Chocolate Chip Cookies – My husband swears by adding 1 cup of chopped walnuts or pecans. Toast them first for maximum flavor – just spread on a baking sheet at 350°F for 5-7 minutes until fragrant. The crunch contrasts perfectly with the chewy cookie base. Peanut butter chips instead of nuts? Also divine.
Sea Salt Chocolate Chip Cookies – This is my fancy-but-easy upgrade. Right when the cookies come out of the oven, sprinkle them with flaky sea salt. The salt makes the chocolate taste even richer – Maldon salt works beautifully here. Just a light sprinkle, though! You want a hint of salt, not an ocean breeze.
Double Chocolate Chip Cookies – For serious chocolate lovers, replace ¼ cup of flour with unsweetened cocoa powder. The dough will be darker and richer – almost brownie-like. I like using half semi-sweet and half white chocolate chips for contrast. Warning: these disappear even faster than the original!
Chocolate Chunk Cookies – Sometimes I chop up a good quality chocolate bar instead of using chips. The irregular chunks create those gorgeous melty pockets throughout the cookie. My favorite is a mix of dark and milk chocolate – the different melting points create fantastic texture.
M&M Cookie Hack – For holidays or birthdays, I swap half the chocolate chips for colorful M&Ms. The candy shells add a fun crunch and make the cookies look festive. Kids go nuts for these – just press a few extra M&Ms on top before baking for picture-perfect cookies.
Really, the sky’s the limit! I’ve added crushed pretzels for salty-sweet goodness, stirred in shredded coconut for tropical vibes, even folded in crumbled bacon once (don’t knock it till you try it). The base recipe is so forgiving – play around and make it your own. What’s your favorite way to jazz up classic chocolate chip cookies?
Serving and Storing Classic Chocolate Chip Cookies
Oh, that magical moment when warm cookies meet cold milk – pure bliss! Here’s how I serve and keep these beauties tasting fresh (if they last longer than five minutes, that is).
Serving perfection: These cookies are best served slightly warm, when the chocolate is still gooey and the edges have that perfect crisp. I like to reheat leftovers for 10 seconds in the microwave – just enough to bring back that fresh-from-the-oven magic. Serve with an ice-cold glass of milk (whole milk for ultimate nostalgia) or dunk them in your afternoon coffee like I do when no one’s watching. For special occasions, I’ll plate them with a scoop of vanilla ice cream sandwiched between two cookies – instant cookie ice cream sandwiches that make everyone’s eyes light up!
Room temp storage: If you somehow have leftovers (seriously, how?), store them in an airtight container at room temperature. I line the container with parchment paper between layers to prevent sticking. They’ll stay fresh for about 3 days this way – though in my house they rarely make it past day one. Pro tip: toss in a slice of bread to keep them soft! The cookies absorb moisture from the bread instead of drying out. Just replace the bread when it gets hard.
Freezing for later: These cookies freeze like a dream! For baked cookies, let them cool completely, then freeze in single layers in freezer bags with parchment between layers. They’ll keep for up to 3 months this way. When the craving hits, just thaw at room temperature or pop frozen cookies straight into a 300°F oven for 5 minutes to revive them.
Dough storage: Sometimes I’ll make extra dough just to freeze – perfect for impromptu cookie emergencies! Portion the dough into balls and freeze on a baking sheet before transferring to freezer bags. You can bake them straight from frozen – just add 1-2 minutes to the baking time. Nothing beats having warm cookies ready in 15 minutes with zero prep!
One final confession: my favorite way to “store” these cookies is wrapped in a napkin, tucked into my purse for emergency snacking. Not that I’ve ever done that on the way to, say, a boring meeting or long car ride. Okay, maybe once. Or twelve times. You’ll understand once you taste them!
Nutritional Information for Classic Chocolate Chip Cookies
Okay, let’s be real – we don’t eat chocolate chip cookies for their nutritional benefits! But since we’re all grown-ups here (sort of), here’s the scoop on what’s in these delicious treats. Remember, these values are estimates – your exact numbers will depend on the specific brands and amounts you use. I calculate based on 24 cookies per batch, but let’s be honest… my “tablespoon” of dough sometimes grows in size when no one’s watching!
- Serving size: 1 cookie (about 2.5-inch diameter)
- Calories: 180
- Total fat: 9g (12% DV)
- Saturated fat: 5g (25% DV)
- Trans fat: 0g
- Cholesterol: 30mg (10% DV)
- Sodium: 50mg (2% DV)
- Total carbohydrates: 24g (9% DV)
- Dietary fiber: 1g (4% DV)
- Sugars: 12g
- Protein: 2g
Now, before you panic about the numbers, here’s my philosophy: life’s too short not to enjoy amazing homemade cookies in moderation. I balance my cookie habit with lots of veggies and movement – plus, sharing with friends and family automatically cuts my portion size (well, usually). The pure joy these cookies bring? That’s nutritional value you can’t measure!
Disclaimer: Nutritional values are estimates and vary based on ingredients used. Percent Daily Values (DV) are based on a 2,000 calorie diet. Calculations are approximate and should not replace professional dietary advice.
Classic Chocolate Chip Cookies FAQs
After years of baking these cookies (and fielding questions from friends who’ve tried the recipe), I’ve got answers to all the common troubleshooting questions. Here’s what you really want to know:
“Can I use melted butter instead of softened?”
Oh honey, no! I learned this the hard way when I was impatient one rainy afternoon. Melted butter makes cookies spread too thin while baking, leaving you with flat, greasy crisps instead of those perfect chewy centers we love. The magic happens when you cream softened butter with sugar – it creates tiny air pockets that give cookies their ideal texture. Trust me, waiting that extra hour for butter to soften is worth it!
“Why did my cookies come out flat as pancakes?”
Let me guess – they tasted amazing but looked more like cookie puddles? Been there! Usually it’s one of three things:
- Butter was too warm (see above – it should be cool to the touch but yield slightly when pressed)
- Dough got overmixed after adding flour (stop as soon as you stop seeing white streaks)
- Old baking soda (it loses potency over time – do the vinegar fizz test!)
Next time, try chilling the dough for 30 minutes before baking – it helps the cookies hold their shape beautifully.
“Can I freeze the dough for later?”
Absolutely! This is my secret weapon for spontaneous cookie cravings. Portion the dough into balls, freeze them on a baking sheet until solid (about 2 hours), then transfer to freezer bags. They’ll keep for up to 3 months! When the mood strikes, bake straight from frozen – just add 1-2 minutes to the baking time. I always keep a bag in my freezer for emergencies (like when my niece randomly FaceTimes asking “Auntie, can we bake cookies?”).
Got more questions? Drop them in the comments – I’ve probably made every mistake in the book so you don’t have to! Happy baking, friends.
Nothing makes me happier than seeing your cookie creations! Did you add a fun twist with nuts or sea salt? Maybe your kiddos helped mix the dough (and “accidentally” ate half the chocolate chips first)? I want to hear all about it!
Snap a photo of your golden, chocolate-studded masterpieces and tag me @[YourHandle] – I’ll feature my favorites on my stories! These cookies have brought so much joy to my kitchen over the years, and I’d love to see them bringing smiles to yours too.
Leave a quick rating below if you tried the recipe – did they turn out chewy-perfect? Any brilliant modifications I should try? Your tips help other bakers get that ideal cookie texture we all crave. And if you’ve got questions, ask away! I’m here to help troubleshoot any cookie emergencies.
Most importantly – enjoy every melty, chocolatey bite. Food tastes better when shared, so save one (okay, three) for yourself, then pass the plate. Happy baking, friends – can’t wait to see your cookies!

For more baking inspiration, check out our Pinterest page!
Print
Irresistible Chocolate Chip Cookies – Soft & Chewy Centers
- Total Time: 25 minutes
- Yield: 24 cookies
- Diet: Vegetarian
Description
Classic chewy chocolate chip cookies made from scratch with simple ingredients.
Ingredients
- 2 ¼ cups all-purpose flour
- 1 cup unsalted butter, softened
- ¾ cup granulated sugar
- ¾ cup packed brown sugar
- 2 large eggs
- 2 cups semi-sweet chocolate chips
Instructions
- Preheat your oven to 375°F (190°C).
- Cream butter and both sugars until light and fluffy.
- Beat in eggs one at a time.
- Stir in flour gradually until well combined.
- Fold in chocolate chips.
- Drop tablespoon-sized dough onto baking sheets.
- Bake for 9-11 minutes until edges are golden.
- Cool on wire racks before serving.
Notes
- Use room-temperature butter for best results.
- Don’t overbake for chewier cookies.
- Store in an airtight container for freshness.
- Prep Time: 15 minutes
- Cook Time: 10 minutes
- Category: Dessert
- Method: Baking
- Cuisine: American


