There’s something magical about the smell of cinnamon and sugar bubbling up from a golden apple pie in the oven. I swear, it makes my whole house feel like a hug! This classic American dessert has been my go-to for every fall gathering since I was old enough to roll out pie dough (and trust me, my first attempts were… interesting). What makes this recipe special? It’s that perfect balance – tart apples swimming in warm spices, all wrapped up in a flaky, buttery crust that shatters just right when you cut into it. After years of tweaking, I’ve landed on a version that never fails to disappear before the coffee’s even poured.

Why You’ll Love This Apple Pie
Oh, where do I even start? This pie is everything you want in a classic dessert – and then some! Here’s why it’ll become your new favorite:
- That crust! Flaky, buttery layers that shatter beautifully with every bite (I still sneak little scraps from the trimmings)
- The filling sings with the perfect sweet-tart balance – no mushy apples here, just tender slices coated in cinnamon warmth
- So simple to throw together, even when you’re juggling a million other holiday tasks
- Smells incredible while baking – your neighbors might just “drop by” when they catch a whiff
Seriously, this pie disappears faster than I can say “seconds please!” at family dinners.
Ingredients for Apple Pie
Okay, let’s talk ingredients – and I mean the real deal, nothing fancy or fussy. This is the kind of simple, honest list that makes magic happen. Here’s exactly what you’ll need:
- 6 medium tart apples – My go-tos are Granny Smith (peeled, cored, and sliced about 1/4″ thick – trust me, thickness matters!)
- 1/2 cup granulated sugar – Pack it in like you mean it – we want that caramelized goodness
- 2 teaspoons cinnamon – The heart and soul of this pie. None of that stale stuff from who knows when
- 2 tablespoons butter – Cold, cubed, and ready to melt into appley pockets of joy
- 2 pie crusts – Homemade if you’re feeling fancy, but hey, the refrigerated kind works in a pinch (we’ve all been there)
See? Nothing weird or complicated. Just good old-fashioned pie magic waiting to happen in your kitchen.
Equipment Needed for Apple Pie
Now let’s gather our tools! You probably have most of these already tucked away in your kitchen:
- 9-inch pie dish – My trusty ceramic one has seen more apple seasons than I can count
- Rolling pin – For getting that crust nice and even (wine bottles work in emergencies!)
- Sharp knife – Essential for slicing apples evenly – dull knives are the enemy!
- Mixing bowl – Big enough to toss all those glorious apple slices around
Bonus items if you’re feeling fancy: pastry brush for egg washes (though fingers work too), and a little flour sifter keeps your counter tidy. That’s it – no fancy gadgets required!
How to Make Apple Pie
Alright, let’s get baking! This is where the magic happens – turning simple ingredients into that golden, bubbling beauty we all love. Follow these steps, and you’ll have a pie that’ll make your grandma proud.
Preparing the Apple Filling
First things first – the apples! I like to slice them about 1/4 inch thick – thin enough to soften perfectly but thick enough to keep their shape. Toss them in a big bowl with the sugar and cinnamon, and don’t be shy about getting your hands in there. The real trick? Let this mixture sit for 15 minutes while you prep the crust. You’ll see juices start pooling at the bottom – that’s liquid gold for flavor!
Assembling the Pie
Roll out your bottom crust and gently tuck it into the pie dish, leaving about an inch hanging over. Now pile in those glorious apples – mound them high because they’ll shrink as they cook. Scatter the butter cubes over the top like little treasures. Brush the crust edges with water, then lay the top crust over everything. Here’s my favorite part – crimping the edges! Use your fingers to seal them together in a wavy pattern, then trim the excess with kitchen shears. Don’t forget to cut several steam vents in the top – get creative with the pattern!

Baking the Apple Pie
Pop that beauty onto the middle oven rack at 375°F. After about 30 minutes, peek through the window – you should see the crust turning golden. If the edges are browning too fast, tent them with foil. The pie’s done when the juices bubble thickly through the vents (about 45-50 minutes total). Now comes the hardest part – letting it cool for at least 2 hours before slicing. I know, I know – but trust me, that wait means perfect slices instead of apple soup!
Tips for Perfect Apple Pie
After burning my fair share of crusts and battling soggy bottoms, I’ve picked up some foolproof tricks that’ll make your pie shine:
- Keep everything cold – I pop my pie dough in the fridge for 30 minutes before rolling. Warm dough = tough crust!
- Mix your apples – I use 2 Granny Smiths for tartness and 4 Honeycrisps for sweetness. The combo gives amazing flavor depth.
- Fight the soggies – Sprinkle a tablespoon of flour or breadcrumbs on the bottom crust before adding filling – it soaks up extra juices.
- Egg wash magic – Brush the top crust with beaten egg and sprinkle sugar for that gorgeous golden sparkle.
- Listen to your pie – When you hear thick, slow bubbles through the vents, it’s done! Fast bubbles mean more baking time.
These little touches turn good pie into “can I have your recipe?” pie every time!
Apple Pie Variations
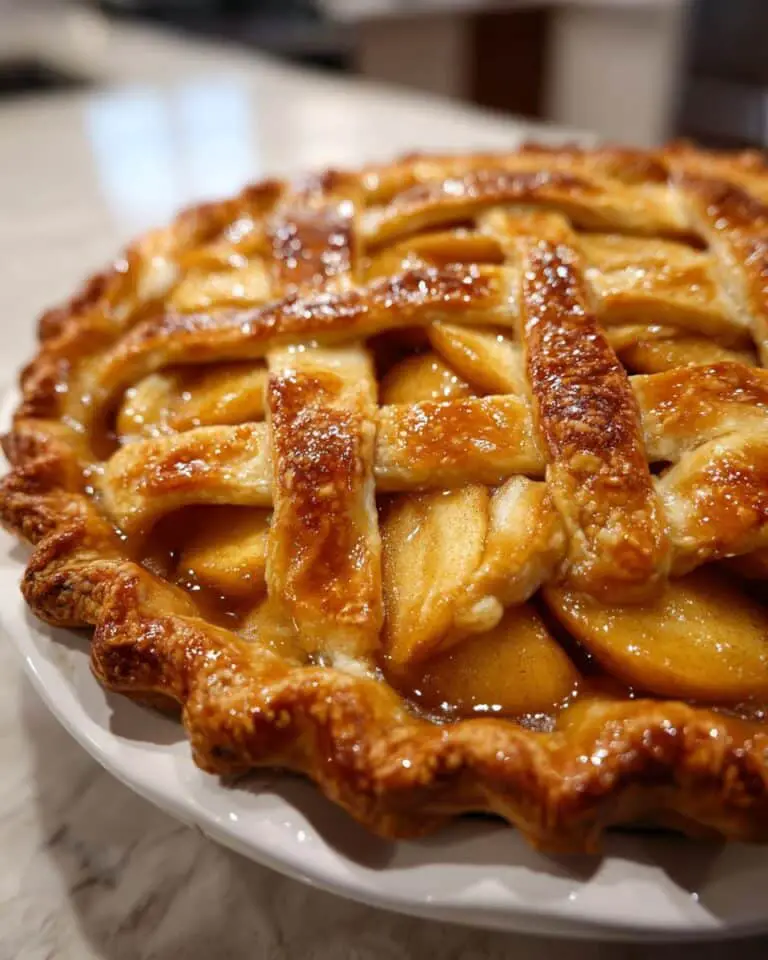
Once you’ve mastered the classic, try these fun twists to keep things exciting! A pinch of nutmeg with the cinnamon adds warmth – just don’t overdo it or it’ll overpower the apples. For extra indulgence, drizzle caramel sauce over each slice. Feeling fancy? Try a lattice crust – it’s easier than it looks and makes your pie Instagram-worthy! My wildcard? A handful of fresh cranberries mixed with the apples for a tart surprise in every bite.
Serving and Storing Apple Pie
Oh honey, serving this pie is half the fun! I always let mine cool just enough so the juices set – about 2 hours – but serve it still slightly warm. That’s when vanilla ice cream melts into all those little vents in the crust and… wow. Just wow. Leftovers? (Like there ever are any!) Cover loosely at room temp for 2 days max, or pop it in the fridge for up to 5 days. Pro tip: reheat slices in a 300°F oven for 10 minutes to bring back that fresh-baked magic.
Apple Pie FAQs
I’ve fielded enough apple pie questions over the years to start my own hotline! Here are the answers to what everyone always asks me:
What are the best apples for pie?
You want firm, tart apples that hold their shape – Granny Smith is my ride-or-die, but mixing in Honeycrisp or Braeburn adds nice sweetness. Avoid Red Delicious – they turn to mush!
Can you freeze apple pie?
Absolutely! Bake it completely, let it cool, then wrap tightly in plastic and foil. It’ll keep for 3 months frozen. Thaw overnight in the fridge, then warm in a 350°F oven for 15 minutes to revive that crisp crust.
Help! My filling is runny – how do I fix it?
Don’t panic! Next time, toss your apple slices with 1 tablespoon of flour or cornstarch before adding sugar. If it’s already baked and soupy, just serve it in bowls with extra ice cream – I call it “deconstructed pie” and everyone still gobbles it up.
How do I keep the bottom crust from getting soggy?
Two tricks: First, brush the unbaked bottom crust with egg white before adding filling. Second, bake your pie on the lowest oven rack for the first 20 minutes – the direct heat crisps it up beautifully.
Nutritional Information
Now, I’m no nutritionist – I’m just a pie lover who occasionally checks the scale! But here’s the general breakdown per slice (based on 8 servings): about 320 calories, 12g fat, and 50g carbs. Of course, your exact numbers will dance around depending on apple sweetness, crust thickness, and whether you sneak that extra pat of butter (no judgment here!).
Tag me if you bake this beauty – I’d love to see your golden crust masterpieces!
For more delicious recipes and inspiration, check out our Pinterest page!
Print
Irresistible Apple Pie Recipe with 6 Juicy Apples
- Total Time: 1 hour 10 minutes
- Yield: 8 servings
- Diet: Vegetarian
Description
A classic homemade apple pie with cinnamon and sugar, perfect for fall.
Ingredients
- 2 pie crusts
- 6 apples
- ½ cup sugar
- 2 tsp cinnamon
- 2 tbsp butter
Instructions
- Preheat your oven to 375°F (190°C).
- Peel and slice the apples.
- Mix the apples with sugar and cinnamon.
- Place one pie crust in a pie dish.
- Add the apple mixture.
- Dot with butter.
- Cover with the second pie crust.
- Seal and crimp the edges.
- Cut slits in the top crust.
- Bake for 45-50 minutes.
Notes
- Use tart apples for best flavor.
- Let the pie cool before slicing.
- Prep Time: 20 minutes
- Cook Time: 50 minutes
- Category: Dessert
- Method: Baking
- Cuisine: American


