Oh my goodness, let me tell you about my absolute favorite kitchen shortcut – dump cakes! I first discovered them years ago when my cousin brought one to a family potluck. “It’s just dumped together,” she said with a wink. Skeptical me took one bite and – wow! – I was hooked. That’s why I’m so excited to share my Easy Pear Dump Cake Recipe with Crumbly Topping with you today.
This recipe is my go-to when I need something impressive but don’t have time (or energy) for complicated baking. You literally dump everything in the pan – hence the name – but the magic happens in the oven. The pears soften into jammy perfection while that golden crumbly topping forms these irresistible buttery crisp bits. It’s the kind of dessert that makes people think you spent hours in the kitchen when really, you barely broke a sweat!

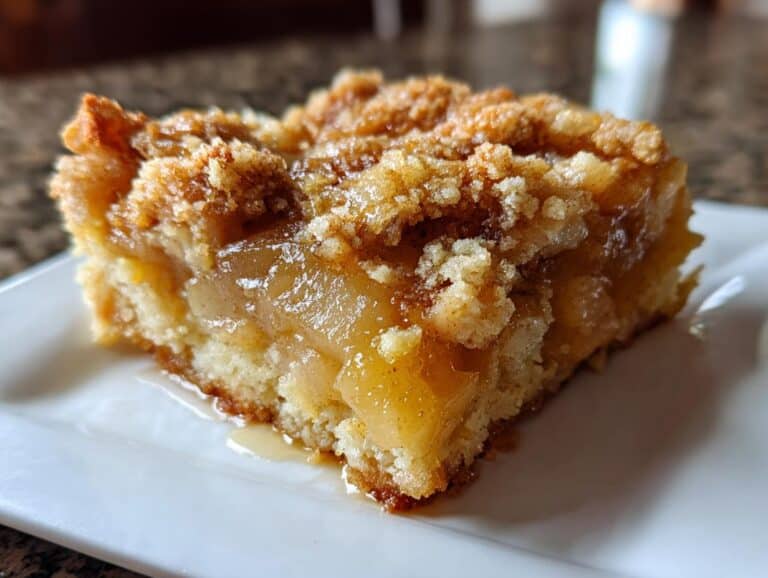
What I love most is how forgiving this easy pear dump cake is. No fancy techniques, no special equipment – just simple ingredients transforming into something cozy and delicious. Whether it’s last-minute guests or just one of those “I need dessert NOW” days, this recipe never lets me down. And that crumbly topping? It’s the stuff dreams are made of – crisp, buttery, and begging to be paired with a scoop of vanilla ice cream.
Gathering Your Ingredients for Easy Pear Dump Cake
Okay, let’s talk about the magic lineup that makes this easy pear dump cake so darn good! I love that it only takes a handful of simple ingredients – the kind you probably already have in your pantry. Here’s exactly what you’ll need (and why each one matters):
- 2 cans (15 oz each) canned pears, drained – The star of the show! I like to use juice-packed pears (not heavy syrup) and give them a gentle drain. Pro tip: save that juice for smoothies!
- 1 box (15.25 oz) yellow cake mix – Any brand works, but I’m partial to Betty Crocker for that perfect crumb texture. No need to prepare the mix – we use it dry!
- 1/2 cup unsalted butter, melted – Real butter makes all the difference in creating that glorious golden topping. I melt it in the microwave in 15-second bursts to avoid burning.
- 1/2 cup brown sugar – This caramel-like sweetness plays so nicely with the pears. Light or dark both work – I use what’s in my sugar jar!
- 1 tsp cinnamon & 1/4 tsp nutmeg – My favorite cozy spice duo. The cinnamon brings warmth while the nutmeg adds just a whisper of complexity.
See? Nothing fancy or complicated – just good, honest ingredients ready to transform into something magical. Now let’s talk about the fun part – putting it all together!
How to Make Easy Pear Dump Cake Recipe with Crumbly Topping
Alright, let’s get to the fun part – making this ridiculously easy dessert! Trust me, if I can do this while simultaneously helping with homework and answering work emails, anyone can. Here’s exactly how I layer everything for that perfect pear dump cake:
- Preheat your oven to 350°F (175°C) – I like to do this first thing so it’s nice and toasty by the time I’m ready to bake. Pro tip: if your oven runs hot (like mine does), you might want to go 25°F cooler.
- Spread those beautiful pears – Take your drained pears and scatter them evenly in a greased 9×13-inch baking dish. No need to be precise – just dump them in! I like to give them a little pat to flatten slightly.
- Sweet spice magic – Sprinkle your brown sugar, cinnamon, and nutmeg right over the pears. This creates a caramel-like layer as it bakes – my favorite part!
- The “dump” in dump cake – Here’s where it gets fun. Open your cake mix and just pour it evenly over the pears. No mixing, no fuss – just let it sit there like a delicious blanket. I sometimes tilt the pan to spread it more evenly.
- Butter time! – Slowly drizzle your melted butter over the cake mix. Go in rows back and forth to cover as much as possible. Don’t worry if some spots look dry – it’ll spread as it bakes.
- Bake to golden perfection – Pop it in the oven for 40-45 minutes. You’ll know it’s done when the topping turns that irresistible golden color and you can smell the cinnamon wafting through your kitchen.
- Let it rest – I know it’s tempting, but let it cool for at least 10 minutes before digging in. This helps the juices thicken up slightly.

Tips for the Best Crumbly Topping
Now here’s where I’ve learned a few tricks through trial and error (mostly error at first!):
The secret to that perfect crumbly texture? Don’t mix the topping! I know it’s tempting to stir everything together, but resist! That dry cake mix needs to stay somewhat separate to form those delicious buttery clumps.
Also – and this is important – use your butter HOT. I melt mine until it’s almost bubbling (but not burning). Hot butter helps create little pockets of crispiness in the topping as it bakes. Cold butter just sits there looking sad.
If you want extra crumbly goodness, try this: after drizzling the butter, take a fork and gently lift sections of the topping here and there. This creates little peaks that get extra crispy in the oven. My kids call these the “crunchy bits” and fight over them!
One last thing – don’t overbake! The topping should be golden, not dark brown. Those extra few minutes can turn your perfect crumbs into hockey pucks (learned that the hard way). Set a timer and check at 40 minutes – your nose will tell you when it’s ready.
Why You’ll Love This Easy Pear Dump Cake Recipe
Let me count the ways this pear dump cake will steal your heart (and probably become your new favorite dessert)! Here’s why I keep coming back to this recipe year after year:
- Almost zero cleanup – One pan, no mixing bowls, just a quick wipe of the counter. My kind of baking!
- Ready in under an hour – From pantry to oven to table before your favorite show finishes.
- Works with whatever you have – Out of pears? Try peaches or apples. No yellow cake mix? White or spice works too.
- Always impresses – The golden crumb topping looks fancy but takes zero skill. I’ve fooled many guests into thinking I’m a pastry chef!
- Kids go crazy for it – Mine call it “pear cookie cake” and beg for seconds (who am I to say no to fruit?).
- Perfect texture every time – Juicy fruit beneath that irresistible buttery crunch – it’s like magic in every bite.
- Makes great leftovers – If it lasts that long! The flavors get even better the next day.
Seriously, this recipe has saved me during busy weeks, unexpected guests, and those “I need something sweet NOW” moments. It’s the dessert equivalent of your favorite cozy sweater – simple, comforting, and always there when you need it.
Ingredient Substitutions & Variations
One of the best things about this easy pear dump cake? It’s practically begging for you to make it your own! Over the years, I’ve tried all sorts of twists on this recipe – some intentional, some born from “oops, I’m out of that” moments. Here are my favorite swaps and additions:
When you’re out of canned pears
No canned pears? No problem! You can absolutely use fresh pears – just peel, core, and slice about 4 medium ones (they should equal roughly the same volume as the cans). Fresh pears give a brighter flavor but may need 5 extra minutes baking time since they’re not as soft to start.
Other canned fruits work beautifully too – my second favorite is peaches, but I’ve had great success with apricots, applesauce, and even pineapple chunks when I’m feeling tropical. Just drain them well like you would the pears.
Mixing up the cake mix
That yellow cake mix is delicious, but don’t be afraid to experiment! A spice cake mix adds wonderful autumnal flavors that complement the pears perfectly. For chocolate lovers, a devil’s food cake mix creates an unexpected but delightful combo (trust me on this one!).
Need it gluten-free? Any gluten-free yellow cake mix works like a charm. Just check that your other ingredients are GF too if that’s a concern.
Taking the topping up a notch
If you want to add some crunch, sprinkle chopped pecans or walnuts over the cake mix before adding the butter. About 1/2 cup does the trick. My Aunt Carol always adds shredded coconut, which toasts up beautifully in the oven.
For extra richness, swap half the butter for melted coconut oil. It gives the topping this incredible crisp texture and subtle tropical note that’s just dreamy with the pears.
Feeling fancy? A teaspoon of vanilla extract or almond extract mixed into the melted butter adds lovely depth. Just don’t tell Grandma I’m messing with her basic formula!
Remember – baking is all about making it yours. The basic recipe is foolproof, so have fun playing with these variations. The only wrong way is not trying it at all!
Serving Suggestions for Easy Pear Dump Cake
Now comes the best part – eating this glorious pear dump cake! I’ve served this dessert a hundred different ways, and here are my absolute favorite pairings that’ll take it from great to “Oh my goodness, can I have the recipe?”
Warm with vanilla ice cream is my go-to – the cold creaminess melting into the warm pears and crumbly topping is just heavenly. I use good quality vanilla bean ice cream because that little extra makes all the difference. Pro tip: let the cake cool just enough so the ice cream doesn’t immediately turn into soup!
For a lighter option, try freshly whipped cream with a hint of vanilla. I like to whip mine not quite to stiff peaks so it’s still soft and dreamy when it hits the warm cake. A sprinkle of cinnamon on top ties everything together beautifully.
Feeling indulgent? Drizzle with warm caramel sauce or even homemade butterscotch. The way it seeps into all those nooks and crannies of the crumb topping is pure magic. Sometimes I’ll add a pinch of sea salt to the caramel for that sweet-salty contrast everyone loves.
Don’t overlook simple pairings too – a dusting of powdered sugar gives it such an elegant look with zero effort. Or serve it alongside a hot cup of coffee or spiced tea – the flavors complement each other perfectly.
My favorite way? Straight from the pan with a big spoon while it’s still warm from the oven. There’s something so comforting about digging into that first serving when the pears are at their juiciest and the topping is at its crispiest. Just don’t blame me if you end up eating half the pan!
Keeping Your Pear Dump Cake Fresh & Delicious
Now, let’s talk about what to do with any leftovers (though in my house, that’s a rare problem to have!). This pear dump cake keeps beautifully, and with a few simple tricks, you can enjoy it just as much the next day.
Storing at room temperature: If I know we’ll finish it within a day or two, I just cover the baking dish tightly with foil and leave it on the counter. The crumb topping stays crisp this way – no need to refrigerate unless your kitchen is super warm.
Refrigerating for longer: For storage up to 3 days, pop it in the fridge in an airtight container. I like to portion it out first so I can grab single servings easily. That buttery topping might soften a bit, but the flavors actually deepen – it’s like a whole new dessert experience!
Reheating like a pro: Here’s my secret for bringing back that fresh-from-the-oven magic:
- Oven method: 10 minutes at 300°F on a baking sheet restores the crisp topping perfectly.
- Microwave quick-fix: 15-20 seconds gives you warm pears, though the topping stays soft (still delicious!).
One important note – never store it while still warm! I learned this the hard way when my entire cake turned soggy from trapped steam. Let it cool completely first, about an hour on the counter.
And yes, you can freeze it too! Wrap individual portions tightly in plastic wrap, then foil, and freeze for up to 2 months. Thaw overnight in the fridge, then reheat as above. Perfect for when you need emergency dessert at a moment’s notice!
Easy Pear Dump Cake Recipe FAQs
Over the years, I’ve gotten so many great questions about this pear dump cake – and made plenty of mistakes myself! Here are the answers to everything you might be wondering before you bake:
Can I use fresh pears instead of canned?
Absolutely! Fresh pears work beautifully – just peel, core, and slice about 4 medium ones to equal the canned amount. They’ll give a brighter flavor but may need 5 extra minutes in the oven since they start out firmer. No need to add extra liquid either – the fresh pears will soften perfectly on their own.
How do I prevent a dry topping?
The trick is in the butter distribution! Make sure to drizzle it slowly in a back-and-forth motion to cover as much of the cake mix as possible. If some spots still look dry after baking (it happens to me too), just serve with ice cream or whipped cream to balance it out. And remember – don’t overbake! That 40-45 minute window is key.
What other fruits work in this dump cake?
Oh, so many options! My go-tos are canned peaches or applesauce, but I’ve had great success with apricots, pineapple chunks, and even mixed berries. The method stays the same – just drain any canned fruit well. Berries might release more juice, so I sometimes add an extra tablespoon of flour to the cake mix if using fresh ones.
Can I make this gluten-free?
Yes indeed! Just swap in your favorite gluten-free yellow cake mix and double-check that your other ingredients are GF too. The texture comes out just as crumbly and delicious – my gluten-sensitive niece can’t tell the difference!
Why is my topping not crumbly?
Usually this means the butter got mixed in too much. Remember – we’re going for a “dump and drizzle” approach, not stirring! Also, make sure your butter is properly melted (but not browned) and evenly distributed. If all else fails, try popping individual servings under the broiler for a minute to crisp up the top – works like a charm!
Nutritional Information
Okay, let’s talk nutrition – but let me be honest upfront! These numbers are just estimates since brands and exact measurements can vary. I always say a little indulgence is good for the soul, but here’s the general picture per serving (based on my usual ingredients):
Each delicious slice of this pear dump cake comes in around 280-300 calories. The brown sugar and cake mix bring the carbs (hey, it’s dessert!), while that glorious butter adds richness. But here’s the good news – those canned pears actually contribute some fiber and vitamin C to balance things out!
I’ve found this recipe strikes a nice middle ground – satisfying enough that a small portion does the trick, but not so heavy that you’ll feel weighed down. Of course, if you’re watching specific nutrients or have dietary needs, always check your exact ingredients. The beauty of dump cakes is how adaptable they are to different preferences!
Remember – food is about joy as much as nutrition. A warm slice of this pear cake shared with loved ones feeds more than just the body. Now go enjoy every crumbly, buttery bite without guilt!
I’d love to hear how your pear dump cake turns out! Did you stick with the classic version or try one of the fun variations? Maybe you discovered a brilliant new twist I should know about? Drop a comment below with your experience – your tips might help other home bakers too! And if this recipe saved your dessert emergency (we’ve all been there), give it a rating so others can see how easy and delicious it is. Happy baking, friends!
You can find more delicious recipes like this on our Pinterest page!
Print
Irresistible Easy Pear Dump Cake Recipe with 4 Secret Tips
- Total Time: 55 mins
- Yield: 12 servings
- Diet: Vegetarian
Description
A simple and delicious pear dump cake with a crumbly topping. Perfect for a quick dessert using canned pears.
Ingredients
- 2 cans (15 oz each) canned pears, drained
- 1 box (15.25 oz) yellow cake mix
- 1/2 cup unsalted butter, melted
- 1/2 cup brown sugar
- 1 tsp cinnamon
- 1/4 tsp nutmeg
Instructions
- Preheat oven to 350°F (175°C).
- Spread drained pears evenly in a greased 9×13-inch baking dish.
- Sprinkle brown sugar, cinnamon, and nutmeg over the pears.
- Pour dry cake mix evenly over the pears.
- Drizzle melted butter over the cake mix.
- Bake for 40-45 minutes until the top is golden and crisp.
- Let cool slightly before serving.
Notes
- Use fresh pears if preferred.
- Add nuts for extra crunch.
- Serve warm with ice cream.
- Prep Time: 10 mins
- Cook Time: 45 mins
- Category: Dessert
- Method: Baking
- Cuisine: American


