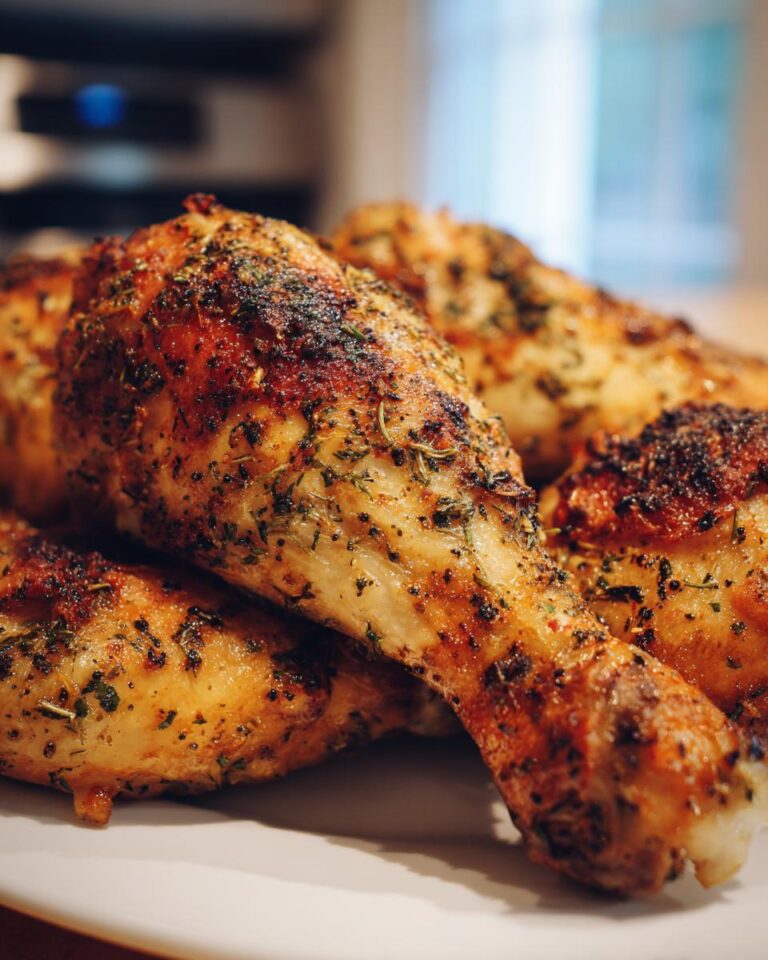
Oh, my goodness, you HAVE to try these Garlic Parmesan Chicken Drumsticks (Oven-Baked)! Seriously, they’re the easiest, most flavorful things ever, and perfect for a crazy weeknight when you need something delicious, fast. I’m talking crispy, savory chicken, coated in a cheesy, garlicky dream. Forget boring chicken dinners – these drumsticks are a total game-changer, and I make them at least once a week.
The best part? It takes like, maybe 10 minutes to get them ready to go in the oven. Then, you just let the oven do its thing, and BAM! Dinner is served. Trust me, your family will be begging for more. They’re that good.
Why You’ll Love These Garlic Parmesan Chicken Drumsticks (Oven-Baked)
Okay, so besides the fact that they’re totally delish, here’s why these chicken drumsticks are going to become your new go-to:
- Quick and Easy: Seriously, you can have these prepped and in the oven in under 15 minutes. Perfect for those nights when you’re running around!
- Bursting with Flavor: That Parmesan crust gets all golden and crispy, and the garlic? Oh, the garlic! It’s pure savory bliss.
- Family-Friendly: Even the pickiest eaters in your house will gobble these up. My kids LOVE them!
Ingredients You’ll Need for Garlic Parmesan Chicken Drumsticks (Oven-Baked)
Alright, friends, here’s what you’ll need to make these amazing Garlic Parmesan Chicken Drumsticks (Oven-Baked). Don’t worry, it’s a short list, and I bet you already have most of this stuff in your kitchen! You know how I love easy recipes, and this one is a winner.
- About 8 chicken drumsticks – you can adjust how many you make, of course!
- 1/4 cup of good quality, grated Parmesan cheese (freshly grated is best, trust me!)
- 2 tablespoons of olive oil – extra virgin is what I usually use.
- 4 cloves of garlic, minced – or more, if you’re a garlic fiend like me!
- 1 teaspoon dried oregano – it adds that perfect touch of herby goodness.
- 1/2 teaspoon of salt – or to taste, depending on your preference.
- 1/4 teaspoon of black pepper – freshly ground is always nice!
Step-by-Step Instructions: How to Make Garlic Parmesan Chicken Drumsticks (Oven-Baked)
Okay, now for the fun part! This is where the magic happens, and trust me, it’s super simple. You’ll be enjoying these Oven Baked Chicken Drumsticks in no time. Let’s get cooking!
Preparing the Parmesan Mixture
First things first, preheat your oven to 400°F (that’s about 200°C for my friends across the pond!). Now, grab a bowl and let’s make that amazing Parmesan mixture. Dump in your grated Parmesan cheese, the olive oil, minced garlic (smells amazing already, right?), dried oregano, salt, and pepper. Then, give it a good mix with a spoon or whisk until everything is nice and combined. Make sure every bit of garlic is mixed in there. Yum!

Coating the Chicken
Next up: the chicken! Place those drumsticks in your baking dish. Now, using a spoon or even your hands (I always wash them first, of course!), gently brush or rub that gorgeous Parmesan mixture all over each drumstick. Make sure every single piece is coated. I like to get in there and make sure they’re all covered – it’s the best way to make sure every bite is bursting with flavor!

Baking the Oven Baked Chicken Drumsticks
Pop those beautifully coated drumsticks into the preheated oven. Bake them for about 35-40 minutes. You want them to cook until the chicken is cooked through and the internal temperature reaches 165°F (that’s about 74°C). The easiest way to check is with a meat thermometer – don’t worry if you don’t have one, just make sure the juices run clear when you poke them with a fork. It’s important to make sure they are fully cooked!
Finishing Touches
Once they’re done, take them out of the oven, but resist the urge to dig in immediately! Let those drumsticks rest for a few minutes before serving. This lets the juices redistribute, making them extra juicy. For extra crispy skin, you can broil them for the last 2-3 minutes, but keep a close eye on them so they don’t burn! Serve them up with your favorite sides, and get ready to enjoy the best Garlic Parmesan Chicken Drumsticks (Oven-Baked) you’ve ever had!
Tips for the Best Garlic Parmesan Chicken Drumsticks (Oven-Baked)
Okay, so you want to make these Garlic Parmesan Chicken Drumsticks (Oven-Baked) absolutely perfect? Here are a few little secrets I’ve learned along the way! First off, make sure you get every single drumstick evenly coated with that Parmesan mixture. I mean, don’t be shy! Really get in there and make sure every nook and cranny is covered. It makes all the difference, I swear!
Also, and this is important, invest in a meat thermometer! It takes the guesswork out of whether the chicken is cooked through. It’s a lifesaver, and you can get them pretty cheap these days. Just stick it in the thickest part of the drumstick. Easy peasy!
Ingredient Notes and Possible Substitutions
Okay, let’s talk ingredients! You know I’m all about keeping things easy, but sometimes a few little tweaks can make a big difference. For the Parmesan cheese, I *highly* recommend using freshly grated. Pre-grated stuff is okay in a pinch, but the fresh stuff just melts better and has so much more flavor. Trust me, it’s worth the extra minute of grating!
If you don’t have oregano, don’t sweat it! You can totally swap it out for other dried herbs. Italian seasoning works great, or even a little bit of thyme or rosemary. And if you’re out of olive oil? Any neutral oil will do – avocado oil, vegetable oil, whatever you have on hand. It’ll still be delicious, I promise!
Serving Suggestions for Your Garlic Parmesan Chicken Drumsticks (Oven-Baked)
Okay, so you’ve got these amazing Garlic Parmesan Chicken Drumsticks (Oven-Baked), and now you need some sides, right? Don’t worry, I got you! Honestly, these drumsticks go with just about anything, but here are a few of my faves. Roasted veggies are always a winner – think broccoli, carrots, or even some sweet potatoes.
Mashed potatoes are a classic comfort food pairing, and a fresh, crisp salad is always a good idea to balance things out. Whatever you choose, you can’t go wrong!
Storage and Reheating Instructions
So, you’ve got leftovers? Awesome! These Garlic Parmesan Chicken Drumsticks (Oven-Baked) are just as good the next day (if not better!). Just let them cool completely, then pop them into an airtight container and store them in the fridge. They’ll be good for about 3-4 days, but honestly, they never last that long in my house!
To reheat, I like to put them back in the oven at a low temperature (around 300°F or 150°C) until they’re warmed through. You could also use the microwave, but be careful not to overdo it, or they’ll get rubbery. Just a few seconds at a time until they’re nice and hot!
Estimated Nutritional Information
Okay, so, about the nutrition stuff… I’m no dietitian, and this is just a home kitchen, not a lab! So, the nutritional information is just an estimate. It can change depending on the brands of ingredients you use, how much of each thing you actually put in, and all sorts of things like that. So, take it all with a grain of salt (pun intended!).
But hey, enjoy those delicious Garlic Parmesan Chicken Drumsticks (Oven-Baked)! That’s what really matters, right?
For more delicious recipes and cooking inspiration, check out my Pinterest page!
Print
Garlic Parmesan Chicken: 10 Minute Dream!
- Total Time: 50 minutes
- Yield: 4 servings
- Diet: Gluten Free
Description
These oven-baked garlic parmesan chicken drumsticks are easy to make and full of flavor. A perfect weeknight meal.
Ingredients
- 8 chicken drumsticks
- 1/4 cup grated Parmesan cheese
- 2 tablespoons olive oil
- 4 cloves garlic, minced
- 1 teaspoon dried oregano
- 1/2 teaspoon salt
- 1/4 teaspoon black pepper
Instructions
- Preheat oven to 400°F (200°C).
- In a bowl, mix Parmesan cheese, olive oil, garlic, oregano, salt, and pepper.
- Place chicken drumsticks in a baking dish.
- Brush the Parmesan mixture over the drumsticks.
- Bake for 35-40 minutes, or until chicken is cooked through and the internal temperature reaches 165°F (74°C).
- Let rest for a few minutes before serving.
Notes
- For extra crispy skin, broil for the last 2-3 minutes.
- You can adjust the seasonings to your preference.
- Serve with your favorite sides.
- Prep Time: 10 minutes
- Cook Time: 40 minutes
- Category: Main Course
- Method: Bake
- Cuisine: American


