Oh my goodness, you have to try these homemade brownies! They’re the kind that make you close your eyes and just sigh with that first bite – perfectly fudgy in the middle with those crisp edges we all fight over. I’ve been making this exact recipe since I was tall enough to reach the stove, standing on a step stool while my grandma showed me how to melt the butter just right. It became our family’s go-to dessert for every birthday, bake sale, and “I had a bad day” moment. There’s something magical about how just five simple ingredients can transform into these rich, chocolatey squares of pure comfort. And trust me – once you taste brownies made with real butter and good cocoa powder, you’ll never go back to boxed mixes again!
Why You’ll Love These Homemade Brownies
Listen, these aren’t just any brownies – they’re the kind that make people ask for your recipe! Here’s why they’re special:
- Foolproof to make: Only 5 ingredients and one bowl? Yes please!
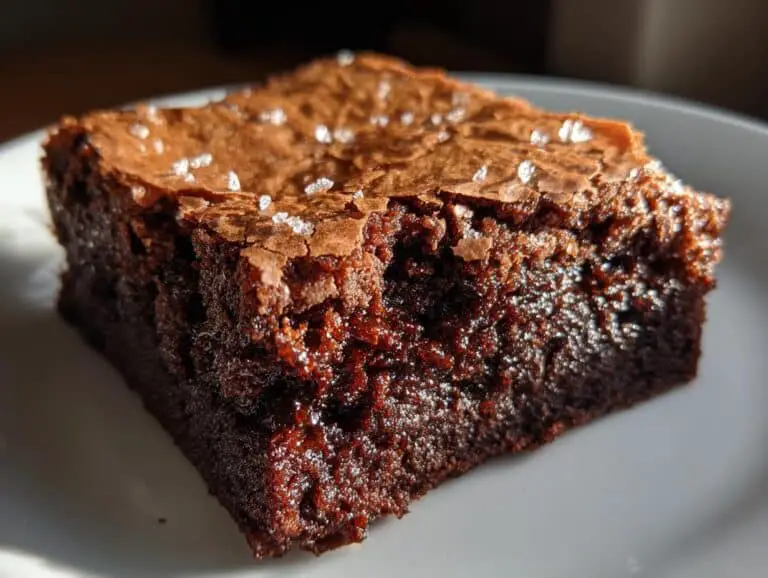
- That perfect fudgy texture: Crisp on top, dense and moist inside – just how a brownie should be
- Rich chocolate flavor: Using real butter and quality cocoa makes all the difference
- Better than boxed mixes: You’ll taste the homemade love in every bite
I’ve served these spiderweb brownies at countless gatherings, and they disappear every single time. That’s the best compliment a baker can get!
Ingredients for Homemade Brownies
Gather these simple ingredients – trust me, quality matters here! Here’s exactly what you’ll need:
- 1 cup (2 sticks) butter – melted and slightly cooled (I use unsalted but salted works too)
- 2 cups granulated sugar – the sweet foundation
- 1 cup unsweetened cocoa powder – splurge on the good stuff! Dutch-process works beautifully
- 4 large eggs – room temperature helps them incorporate smoothly
- 1 cup all-purpose flour – just the right amount for structure without drying them out
See? Just five pantry staples stand between you and the most incredible homemade brownies. I always set everything out before starting – it makes the process so much smoother!
How to Make Homemade Brownies

Okay, let’s get baking! I’m going to walk you through each step just like my grandma showed me. Don’t worry – it’s easier than you think, and the smell alone will have your kitchen smelling like a chocolate shop!
Step 1: Preparing the Batter
First things first – preheat that oven to 350°F (175°C) and grease your baking pan. Now, melt the butter gently in a saucepan over low heat – we don’t want it bubbling wildly! As soon as it’s melted, remove it from heat and stir in the sugar and cocoa powder. You’ll get this gorgeous, glossy chocolate mixture that makes me want to dip a spoon in right then!
Step 2: Adding Eggs and Flour
Here’s the fun part! Let your chocolate mixture cool slightly (we don’t want scrambled eggs!), then beat in the eggs one at a time. I like to crack each egg into a small bowl first – trust me, it’s worth the extra dish to avoid shells in your batter! Now gently fold in the flour just until combined – overmixing makes tough brownies, and we want these fudgy!
Step 3: Baking and Cooling
Pour that beautiful batter into your prepared pan – it should be thick and luxurious. Bake for 25-30 minutes until a toothpick comes out with moist crumbs (not wet batter!). The hardest part? Waiting for these homemade brownies to cool completely before cutting! I know it’s tempting, but letting them set means perfect squares instead of crumbly messes.

Tips for Perfect Homemade Brownies
After baking thousands of batches (seriously, my family won’t stop requesting them!), here are my can’t-live-without tips:
- Cocoa matters: Splurge on high-quality cocoa powder – it’s the star of the show!
- Don’t overbake: Pull them out when the center is slightly jiggly – they’ll keep cooking as they cool.
- Resist temptation: Let them cool completely before cutting. I know it’s hard, but it’s worth the wait!
- Room temp eggs: They incorporate better than cold ones straight from the fridge.
- Gentle folding: Overmixing makes tough brownies – just combine until no flour streaks remain.
Follow these, and you’ll get that perfect fudgy-crisp texture every single time!
Variations for Homemade Brownies
Once you’ve mastered the basic recipe (and trust me, you will!), it’s time to get creative! My family’s favorite twist is adding a handful of chocolate chips or chopped walnuts – the crunch is incredible. For peanut butter lovers, try swirling spoonfuls of creamy PB into the batter before baking. My neighbor swears by adding orange zest, while my cousin always folds in mini marshmallows. The beauty of homemade brownies? You can make them exactly how YOU like!
Serving and Storing Homemade Brownies

Oh, the joy of slicing into these homemade brownies! I love them slightly warm so the chocolate melts on your tongue – just pop them in the microwave for 10 seconds if they’ve cooled. Room temperature is perfect too, especially with a scoop of vanilla ice cream melting on top. For storage, keep them in an airtight container at room temperature for 3 days (if they last that long!). Pro tip: Lay parchment between layers if stacking them – no one wants stuck-together brownie squares!
Nutritional Information for Homemade Brownies
Let’s be real – we don’t eat brownies for their health benefits! But if you’re curious, here’s the breakdown per brownie (based on cutting the batch into 12 squares): about 220 calories, 12g fat, 28g carbs, and 3g protein. Remember, these are just estimates – your exact numbers might change slightly depending on your specific ingredients and how you slice them. My philosophy? Enjoy every fudgy bite without stressing over the details. After all, homemade treats are meant to be savored!
Frequently Asked Questions
I get asked about these homemade brownies all the time – here are the questions that pop up most often from fellow bakers:
Can I use oil instead of butter? While you can substitute an equal amount of vegetable oil, I really recommend sticking with butter for that rich, fudgy texture. Butter gives brownies from scratch that melt-in-your-mouth quality oil just can’t match!
How do I make them gluten-free? Easy swap! Just use a 1:1 gluten-free flour blend instead of regular flour. I’ve had great results with almond flour too – it makes these fudgy desserts extra moist.
Why did my brownies turn out cakey? Usually means they were overmixed or baked too long. Remember – gentle folding and pulling them out when the center is just set gives you that perfect dense texture.
Can I use chocolate bars instead of cocoa? Absolutely! Melt 6 oz of quality dark chocolate with the butter, then reduce cocoa to 1/2 cup. It makes for an ultra-rich chocolate dessert!
How do I get that shiny crust on top? The magic is in the sugar dissolving completely – make sure to whisk it really well with the warm butter and cocoa before adding eggs.
Now I want to hear from you! Did your kitchen smell like chocolate heaven? Did your family fight over the corner pieces? Snap a photo and tell me all about it in the comments below – I live for these baking stories! Nothing makes me happier than seeing others enjoy these homemade brownies as much as we do. You can also find more delicious recipes on Pinterest!
Print
5-Ingredient Homemade Brownies Recipe for Fudgy Bliss
- Total Time: 35 minutes
- Yield: 12 brownies
- Diet: Vegetarian
Description
Delicious homemade brownies made with cocoa and butter for a fudgy texture.
Ingredients
- 1 cup butter
- 2 cups sugar
- 1 cup cocoa
- 4 eggs
- 1 cup flour
Instructions
- Preheat your oven to 350°F (175°C). Grease a baking pan.
- Melt the butter in a saucepan over low heat.
- Stir in sugar and cocoa until well combined.
- Beat in the eggs one at a time.
- Fold in the flour and mix until smooth.
- Pour the batter into the prepared pan.
- Bake for 25-30 minutes or until a toothpick comes out clean.
- Let it cool before cutting into squares.
Notes
- Use high-quality cocoa for best results.
- Do not overmix the batter to keep the brownies fudgy.
- Store in an airtight container for up to 3 days.
- Prep Time: 10 minutes
- Cook Time: 25 minutes
- Category: Dessert
- Method: Baking
- Cuisine: American


