Okay, friends, gather ’round because I’m about to spill the beans on THE BEST snack in the whole wide world: **Homemade Cheez Its (real cheddar cheese)**! Seriously, forget those sad, store-bought boxes. Once you taste these, you’ll never go back. I spent ages trying to perfect this recipe, and trust me, it’s a total game-changer. They’re crispy, cheesy, and utterly addictive. This recipe is my secret weapon for parties, movie nights, or even just a little afternoon pick-me-up.
I remember the first time I made these; my family devoured them in minutes. The best part? You know exactly what’s going into them. No weird ingredients, just pure, cheesy goodness. Get ready to ditch the processed stuff and embrace the joy of homemade. You’re going to love this!
: 1 Recipe! 4")
Why Make Your Own Homemade Cheez Its (real cheddar cheese)?
Honestly, you guys, once you taste homemade, you’ll understand! These **Homemade Cheez Its (real cheddar cheese)** are a million times better than anything you can buy at the store. Plus, it’s so much fun to make them! You get that amazing cheesy flavor, and the satisfaction of knowing you did it yourself. It’s a win-win, I swear!
The Superior Taste of Homemade Cheez Its (real cheddar cheese)
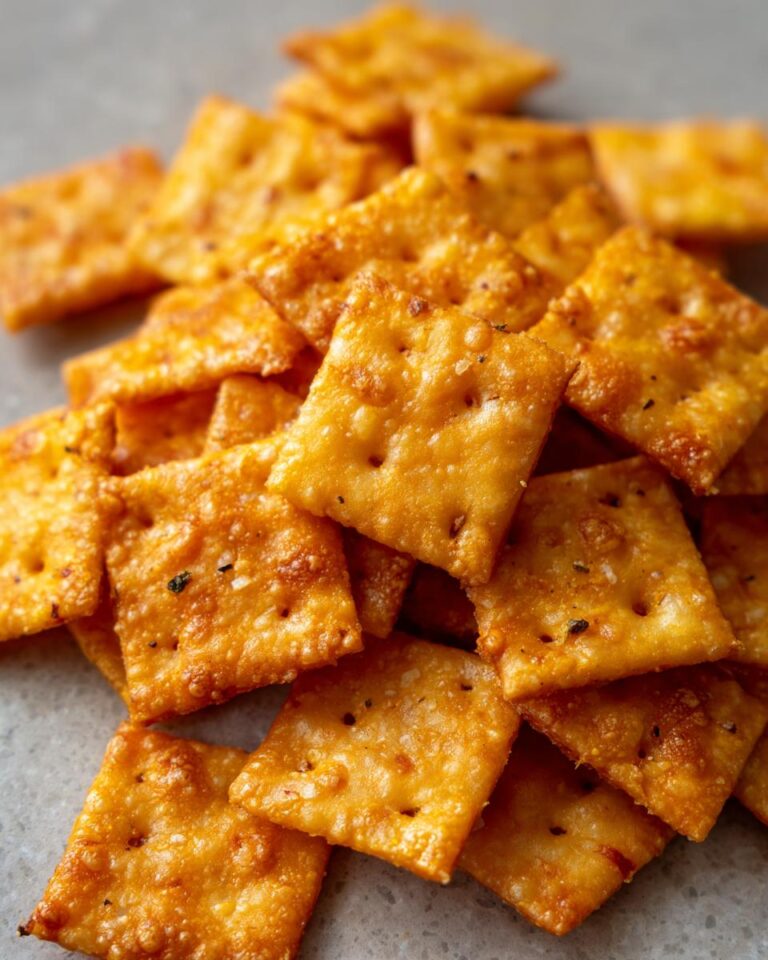
Okay, so the taste… Wow! Store-bought crackers can’t even touch these. They’re so much cheesier and crispier, and you can actually taste the REAL cheddar. There’s a certain freshness that just isn’t there in a box. Trust me, your taste buds will thank you. I promise!
Control Over Ingredients: The Homemade Advantage
Here’s the best part: you know exactly what’s in these! No weird preservatives or mystery ingredients. You control the quality of the cheese, the spices, everything! If you’re like me, and trying to eat better, you can customize them to fit your needs. It’s a total game-changer, right?
: 1 Recipe! 5")
Homemade Cheez Its (real cheddar cheese): The Cheese Knees Recipe Ingredients
Alright, let’s get down to the good stuff: the ingredients! This recipe for **Homemade Cheez Its (real cheddar cheese)** is super simple. You probably have most of these in your pantry already. Grab your measuring cups and let’s get started. You won’t believe how easy it is to whip up a batch of these.
Ingredient Breakdown: Flour, Spices, and More
You’ll need all-purpose flour for that perfect cracker structure, plus a little salt, paprika for color and a touch of sweetness, garlic powder and onion powder for that savory punch. Next, you’ll need some cold, unsalted butter – make sure it’s cold, cubed and ready to go. You’ll also need ice water. The cold butter and water are key for a flaky, crispy result! Don’t skimp on the spices, they make the flavor!
The Star Ingredient: Real Cheddar Cheese
Now, the star of the show: the cheese! I’m talking sharp cheddar cheese, shredded. Seriously, the sharper the better! It gives these **Homemade Cheez Its (real cheddar cheese)** that amazing, bold flavor we all crave. You can get pre-shredded cheese, but I like to shred my own. It just seems to melt better and makes the crackers extra cheesy. Trust me, it’s worth it!
Step-by-Step Instructions: How to Make Homemade Cheez Its (real cheddar cheese)
Okay, now for the fun part: making the crackers! Don’t worry, it’s super easy, I promise. Just follow these steps, and you’ll be munching on delicious **Homemade Cheez Its (real cheddar cheese)** in no time. It might seem like a bit of work, but trust me, the results are so worth it!
Preparing the Dough: Mixing and Chilling
First, grab a bowl and whisk together your flour, salt, paprika, garlic powder, and onion powder. Next, cut in the cold butter. I use a pastry cutter, but you can use your fingers too! Mix until it looks like coarse crumbs. Then, add that lovely shredded cheddar cheese. Next, GRADUALLY add the ice water, mixing until the dough just comes together. Don’t overmix! Now, wrap it up and chill for at least 30 minutes. This helps everything firm up and makes the crackers extra crispy.
Rolling, Cutting and Baking Homemade Cheez Its (real cheddar cheese)
Alright, preheat your oven to 350°F (175°C). Next, roll out your chilled dough super thin! Like, really thin. The thinner, the crispier! I like to use a pizza cutter to make nice, even squares. I usually aim for about 1/2 inch by 1/2 inch, but you can go bigger or smaller. Place your cut squares on a baking sheet. Pop them in the oven for about 12-15 minutes, or until they’re golden brown and look amazing. Keep an eye on them, ovens vary!
Cooling and Storing Your Homemade Cheez Its (real cheddar cheese)
Once they’re out of the oven, let the **Homemade Cheez Its (real cheddar cheese)** cool completely on the baking sheet. This is important for that crispiness! Then, store them in an airtight container to keep them fresh and crunchy. They usually don’t last long in my house, but they should be good for a few days if you can resist eating them all at once!
Tips for Success: Achieving Perfect Homemade Cheez Its (real cheddar cheese)
Want to make sure your **Homemade Cheez Its (real cheddar cheese)** are absolutely perfect? I’ve got a couple of pro tips that will help you nail it every single time. These little secrets make all the difference between good crackers and AMAZING crackers. Trust me, these are essential!
Dough Consistency is Key
The dough consistency is super important! You want it to come together, but not be overworked. It should be firm, but not dry. If it’s too dry, your crackers will be crumbly. If it’s too wet, they won’t be as crispy. Add the ice water a little bit at a time, and stop when the dough just comes together. You got this!
Rolling Out the Dough Thinly
Here’s the secret to those perfect, crispy **Homemade Cheez Its (real cheddar cheese)**: roll the dough out THIN! I mean, really thin. The thinner you roll it, the crispier your crackers will be. Aim for about 1/16 inch thick, or even thinner if you can manage it. This is where a rolling pin and a little patience come in handy. Don’t be shy!
Variations: Spice Up Your Homemade Cheez Its (real cheddar cheese)
Okay, now for the fun part: let’s get creative! Once you’ve mastered the basic **Homemade Cheez Its (real cheddar cheese)** recipe, you can totally customize them to your liking. The possibilities are endless, and you can really make these your own. Get ready to experiment – you might discover your new favorite snack!
Flavor Boosters: Experiment with Spices
Want to kick up the flavor a notch? Add a pinch of cayenne pepper for a little heat! Or, try a dash of smoked paprika for a smoky flavor. For a more savory taste, you can add some dried herbs like rosemary, thyme, or even a little Italian seasoning. Just a teaspoon or two will do the trick!
Cheese Alternatives for Homemade Cheez Its (real cheddar cheese)
Don’t be afraid to switch up the cheese! Monterey Jack, Pepper Jack, or even a blend of cheeses would be great. For a nutty flavor, try some Gruyere or Parmesan. Just make sure you shred the cheese yourself for the best melt and flavor. You can even try a vegan cheese for a dairy-free option!
Serving Suggestions for Your Homemade Cheez Its (real cheddar cheese)
So, what goes with these amazing **Homemade Cheez Its (real cheddar cheese)**? Literally anything! They’re perfect on their own, but also amazing with a bowl of soup, a simple salad, or alongside your favorite dips. Maybe a nice creamy cheese dip? Or even a classic hummus!
Storage and Reheating Instructions for Homemade Cheez Its (real cheddar cheese)
Okay, so if you somehow have leftovers (I doubt it!), here’s the deal. Store your perfectly made **Homemade Cheez Its (real cheddar cheese)** in an airtight container at room temperature. They’ll stay fresh and crunchy for a few days – if they last that long! You can also reheat them briefly in the oven for a couple of minutes to bring back that extra crispiness. Don’t overdo it!
Estimated Nutritional Information for Homemade Cheez Its (real cheddar cheese)
Alright, so, I’m no nutritionist, but I can give you a rough estimate! Keep in mind, this is just an approximation, since it can vary depending on your ingredients and how you make them. But hey, it’s good to have a general idea, right? You can expect values similar to the data provided above. It’s safe to say they’re worth it, though!
Frequently Asked Questions About Homemade Cheez Its (real cheddar cheese)
Okay, so I get asked these questions ALL the time, so let’s get you in the know! First up: “Can I use pre-shredded cheese?” Sure, you *can*, but I really recommend shredding your own. It melts better, and the flavor is just so much better! Next: “Can I make these gluten-free?” Absolutely! Just swap the all-purpose flour for a gluten-free blend. You might need to add a touch more water. And the last one: “What if my dough is too dry?” Don’t panic! Just add a tiny bit more ice water, a teaspoon at a time, until it comes together. You’ve got this!
So there you have it, folks! Now you can make your own amazing **Homemade Cheez Its (real cheddar cheese)** and ditch the boring store-bought stuff forever. Happy snacking! For more delicious recipes, check out RecipesBestOf on Pinterest!
Print: 1 Recipe! 6")
BEST Homemade Cheez Its (real cheddar cheese): 1 Recipe!
- Total Time: 35 minutes
- Yield: About 4 dozen crackers
- Diet: Vegetarian
Description
Make your own delicious and cheesy Homemade Cheez-Its with real cheddar cheese.
Ingredients
- 1 1/2 cups all-purpose flour
- 1/2 teaspoon salt
- 1/2 teaspoon paprika
- 1/4 teaspoon garlic powder
- 1/4 teaspoon onion powder
- 1/2 cup (1 stick) unsalted butter, cold and cubed
- 1 cup sharp cheddar cheese, shredded
- 1/4 cup ice water
Instructions
- Whisk together flour, salt, paprika, garlic powder, and onion powder.
- Cut in cold butter until the mixture resembles coarse crumbs.
- Add shredded cheddar cheese.
- Gradually add ice water, mixing until the dough comes together.
- Wrap the dough and chill for 30 minutes.
- Preheat oven to 350°F (175°C).
- Roll out the dough thinly.
- Cut into small squares.
- Place on a baking sheet.
- Bake for 12-15 minutes, or until golden brown.
- Let cool and enjoy!
Notes
- Use a pizza cutter or knife for even squares.
- For extra flavor, add a pinch of cayenne pepper.
- Store in an airtight container.
- Prep Time: 20 minutes
- Cook Time: 15 minutes
- Category: Snack
- Method: Baking
- Cuisine: American


