Oh, the holidays! There’s just something so magical about this time of year, isn’t there? For me, it always starts with the smell of baking wafting through the house. And if there’s one cookie that screams “holiday tradition” and “cozy comfort” all at once, it’s gotta be these Jam Thumbprint Cookies. Seriously, these Jam Thumbprint Cookies (Buttery & Bright) are like little bites of pure joy. They’re so elegant with their sweet jam centers, but honestly? They’re ridiculously easy to make. I remember making batches of these with my mom when I was little, and now I get to do it with my own kids. It’s just a simple, classic sweet that brings everyone together, and that buttery, bright flavor is unbeatable!

Why You’ll Love These Jam Thumbprint Cookies (Buttery & Bright)
Seriously, these Jam Thumbprint Cookies (Buttery & Bright) are such a winner! They’re the perfect little package of deliciousness. Here’s why they’ll become a fast favorite in your kitchen:
- Quick and Easy Preparation: You won’t believe how fast these come together. They’re one of those super satisfying easy cookie ideas that make you feel like a baking pro without all the fuss.
- Perfectly Buttery Texture: Oh my goodness, the texture! They’re just melt-in-your-mouth tender with that rich, buttery flavor that pairs so well with the sweet jam. Pure shortbread perfection.
- Burst of Bright Flavor: That little dollop of jam in the center? It’s the star! It adds that pop of fruity, bright flavor that cuts through the richness and makes each bite exciting.
Gather Your Ingredients for Jam Thumbprint Cookies (Buttery & Bright)
Alright, let’s get our ducks in a row for these amazing Jam Thumbprint Cookies (Buttery & Bright)! Having everything ready makes the whole process so much smoother. You’ll be surprised at how simple ingredients can create such a delightful cookie. Just grab these few things and we’ll be well on our way to cookie heaven!
Core Ingredients for Buttery Cookies
The magic starts with the base, and for these cookies, it’s all about that rich, tender crumb. You’ll need 1 cup (that’s two sticks!) of unsalted butter, make sure it’s softened – not melty, just soft enough to really cream up nicely. Then, we’ve got 1/2 cup of granulated sugar for sweetness, a teaspoon of good vanilla extract for that classic aroma, and just a pinch of salt to balance everything out. And of course, 2 cups of all-purpose flour to bring it all together.
The “Bright” Jam Filling
Now for the fun part – the filling! You’ll need about 1/2 cup of your absolute favorite jam. Think about what you love! Raspberry is a classic for a reason; it’s got that lovely tartness that really pops against the buttery cookie. Strawberry is always a crowd-pleaser too. Just make sure your jam isn’t too runny, or it might bubble over while baking. A thicker preserve or jam works best to keep that pretty little well full and bright!
Step-by-Step Guide to Making Jam Thumbprint Cookies (Buttery & Bright)
Alright, let’s get these beautiful Jam Thumbprint Cookies (Buttery & Bright) made! It’s a pretty straightforward process, and honestly, the most “work” is just waiting for the dough to chill. Trust me, it’s worth it!
Preparing the Dough
First things first, grab your stand mixer or a sturdy hand mixer. Cream together that softened butter and granulated sugar until it’s super light and fluffy – think pale yellow and airy, like really good frosting! Then, beat in the vanilla extract and that little bit of salt. Now, add the flour in gradually. Mix until it *just* comes together. Seriously, don’t go crazy with the mixer here; overmixing means tougher cookies, and we want tender, buttery ones! Once it’s combined, wrap the dough up and pop it in the fridge for at least 30 minutes. This makes it so much easier to handle.
Shaping and Filling the Jam Cookies
Once the dough has had its chill time, preheat your oven to 350°F (175°C) and grab a baking sheet lined with parchment paper – this is key for easy cleanup! Roll your dough into nice, even balls, about 1 inch in size. Place them on your prepared baking sheet, leaving a little space between them. Now, for the thumbprint part! Gently press your thumb into the center of each ball to make a little well. If your thumb is too big, don’t worry! The back of a small spoon works perfectly too. Fill each little indentation with about half a teaspoon of your chosen jam. Don’t overfill, or it’ll just ooze out everywhere!
Baking and Cooling
Pop those beauties into your preheated oven and let them bake for about 12 to 15 minutes. You’re looking for the edges to be just lightly golden brown. They’ll look a little soft in the middle, but that’s okay – they firm up as they cool. Let them hang out on the baking sheet for a few minutes after they come out; this helps them set. Then, carefully transfer them over to a wire rack to cool completely. This step is super important for getting that perfect texture and making sure your jam filling doesn’t run everywhere!

Essential Equipment for Your Jam Thumbprint Cookies
To whip up these delightful Jam Thumbprint Cookies, you won’t need anything too fancy! Just some trusty kitchen basics. You’ll want a couple of mixing bowls – one for creaming and one for dry ingredients. An electric mixer (handheld or stand) makes creaming the butter and sugar a breeze, but a good sturdy whisk and some elbow grease work too! Of course, you’ll need your measuring cups and spoons for accuracy. A good baking sheet is a must, and I always line mine with parchment paper for easy cleanup and to prevent sticking. That’s pretty much it – simple tools for a simple, delicious cookie!
Tips for Perfect Jam Thumbprint Cookies (Buttery & Bright)
Making these Jam Thumbprint Cookies (Buttery & Bright) is pretty straightforward, but a few little tricks can make them absolutely perfect every single time. It’s all about paying attention to the details!
Achieving the Ideal Dough Consistency
The secret to easy handling and perfectly shaped cookies? Chilling that dough! When the dough is cold, it’s much less sticky and holds its shape beautifully when you roll it into balls and make those little thumbprints. This prevents them from spreading too much in the oven and keeps their lovely, tender texture.
Jam and Filling Tips
When it comes to the jam, a thicker consistency is your best friend. If your jam is super runny, try stirring in just a tiny bit of cornstarch or letting it simmer down a bit first. And when you fill those little wells, don’t pile it too high! A small spoonful is all you need. Overfilling is the main reason jam can bubble over and make a mess. Just a little bit goes a long way to give you that bright burst of flavor!
Storing and Reheating Your Classic Sweets
Once your beautiful Jam Thumbprint Cookies are completely cool, storing them is super easy! Just pop them into an airtight container. They’ll stay wonderfully fresh at room temperature for a good 3-4 days, which is perfect if you want to make them ahead for a party or just have a cookie jar ready to go. Honestly, they rarely last that long in my house! If you ever want to give them a little refresh, you can gently warm them up for just a few seconds in the microwave – maybe 5-10 seconds on a low setting. It just brings back that lovely buttery aroma and makes them taste like they just came out of the oven. They really are the perfect little classic sweets!
Frequently Asked Questions about Jam Thumbprint Cookies (Buttery & Bright)
Got questions about these delightful Jam Thumbprint Cookies (Buttery & Bright)? I’ve got answers! These cookies are pretty forgiving, but a little guidance never hurts.
Jam Variety and Substitutions
Absolutely! The beauty of these thumbprint cookies is how versatile they are. Feel free to use any jam, jelly, or fruit preserves you love! Raspberry, strawberry, apricot, or even a tart cherry jam all work wonderfully. Just make sure it’s not *too* runny, as that can cause it to leak out during baking.
Dough Handling and Storage
Yes, you can totally make the dough ahead of time! Wrap it well in plastic wrap and keep it in the fridge for up to 3 days. It actually gets easier to handle after a good chill. These cookies last about 3-4 days stored in an airtight container at room temperature. They’re best enjoyed within a few days for that perfect buttery texture!
Estimated Nutritional Information
Just a little heads-up, the nutritional info for these Jam Thumbprint Cookies is an estimate per cookie, assuming you get about 24 servings from the batch. Keep in mind that the exact numbers can wiggle around a bit depending on the specific jam and butter you use. Generally, you’re looking at around 150 calories, with about 9g of fat, 2g of protein, 16g of carbs, and 10g of sugar per cookie. Enjoy them!
For more delicious recipes and baking inspiration, check out our Pinterest page!
Print
Jam Thumbprint Cookies: 15 Minutes to Bliss
- Total Time: 35 minutes
- Yield: 24 cookies
- Diet: Vegetarian
Description
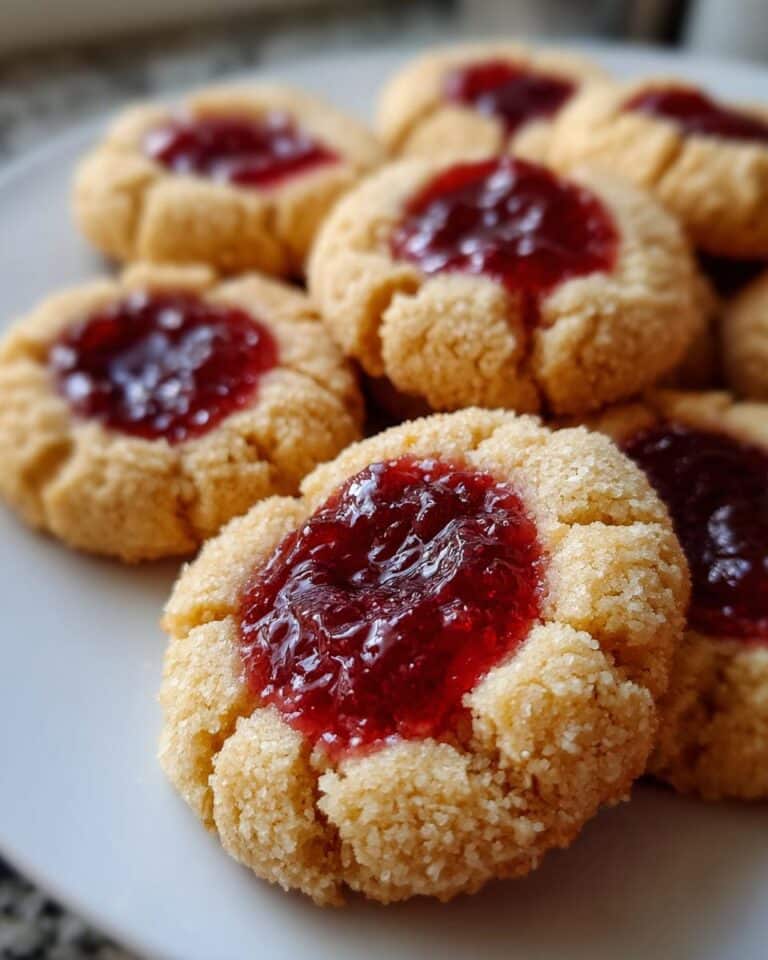
These buttery thumbprint cookies are filled with bright jam, making them a perfect addition to any holiday cookie tray. They are easy to make and offer a classic sweet taste.
Ingredients
- 1 cup (2 sticks) unsalted butter, softened
- 1/2 cup granulated sugar
- 1 teaspoon vanilla extract
- 1/4 teaspoon salt
- 2 cups all-purpose flour
- 1/2 cup your favorite jam
Instructions
- Cream together the softened butter and granulated sugar until light and fluffy.
- Beat in the vanilla extract and salt.
- Gradually add the flour, mixing until just combined.
- Chill the dough for at least 30 minutes.
- Preheat your oven to 350°F (175°C).
- Roll the chilled dough into 1-inch balls.
- Place the balls on a baking sheet lined with parchment paper.
- Use your thumb or the back of a small spoon to create an indentation in the center of each cookie.
- Fill each indentation with about 1/2 teaspoon of jam.
- Bake for 12-15 minutes, or until the edges are lightly golden.
- Let the cookies cool on the baking sheet for a few minutes before transferring them to a wire rack to cool completely.
Notes
- Ensure the butter is softened but not melted for the best texture.
- Do not overmix the dough after adding the flour.
- Chill the dough thoroughly to make it easier to handle.
- Experiment with different jam flavors for variety.
- Store cooled cookies in an airtight container at room temperature.
- Prep Time: 20 minutes
- Cook Time: 15 minutes
- Category: Cookies
- Method: Baking
- Cuisine: American

 7")


 10")
 11")