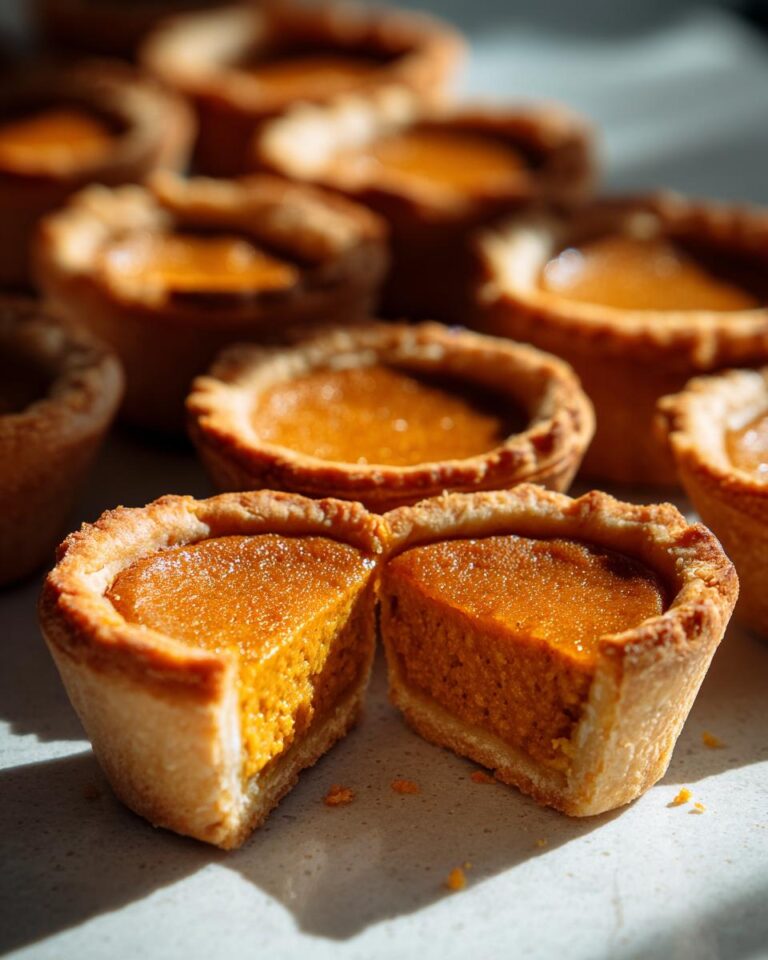
Oh my goodness, you guys, get ready for the cutest, easiest, and most delicious little treats ever: Mini Pumpkin Pies for Individual Servings! Seriously, these tiny pies are pure fall magic, and I’m absolutely obsessed. I’ve been baking pumpkin pies since I was a kid, practically standing on a stool to reach the counter. And trust me, these mini versions are a total game-changer.
They’re perfect for parties (hello, Thanksgiving!), cozy nights in, or even just a little something sweet when you’re craving pumpkin spice goodness. The best part? They’re ridiculously easy. Honestly, you can whip up a batch in under an hour, from start to delicious finish. No rolling out a giant pie crust and hoping for the best – just simple, individual portions of pure pumpkin pie perfection. Get ready to impress everyone with these little beauties! They’re going to be a new family favorite, I promise!

Ingredients for Delicious Mini Pumpkin Pies for Individual Servings
Okay, so here’s what you’ll need to make these amazing little pies! Don’t worry, the ingredient list is super simple. I always keep these things on hand during pumpkin season. You’ll be surprised how easy it is to pull these together, I swear!
- 1 package refrigerated pie crusts (the kind in the roll, usually two crusts)
- 1 (15-ounce) can pumpkin puree (make sure it’s *puree*, not pumpkin pie filling!)
- 1 (14-ounce) can sweetened condensed milk (this stuff is the key to the creamy filling!)
- 2 large eggs (they bind everything together)
- 1 teaspoon pumpkin pie spice (gotta have that fall flavor!)
- 1/2 teaspoon ground cinnamon (just a little extra warmth!)
- Whipped cream, for serving (totally optional, but highly recommended!)
Essential Equipment for Mini Pumpkin Pies
Alright, before we get baking, you’ll need a few things. Nothing fancy, I promise! I bet you already have most of this stuff in your kitchen. Here’s what you’ll need:
- Mini muffin tin (the star of the show!)
- Cookie cutter or a glass (for cutting out the crusts)
- Mixing bowls (for mixing the filling – a couple of sizes are handy)
- Whisk (to get everything nice and smooth)
- Measuring cups and spoons (for accurate measuring – baking is science, after all!)
Step-by-Step Instructions to Make Mini Pumpkin Pies for Individual Servings
Okay, now for the fun part! These little pies come together so quickly, you won’t believe it. Just follow these steps, and you’ll be swimming in pumpkin pie goodness in no time. Ready? Let’s go!
Preparing the Pie Crusts
First things first, we gotta get those crusts ready. Unroll your refrigerated pie crusts – usually, you get two in a package. Now, you can use a cookie cutter (about 3 inches should do it) or even a glass to cut out circles. I usually go for a glass because I’m lazy, and it works just fine! You want enough circles to fill your mini muffin tin. Trust me, it’s easier than it seems. Gently press each circle into the bottom and up the sides of your mini muffin cups. Don’t worry if they aren’t perfect – a little rustic is totally charming!
Making the Pumpkin Filling
Next up, the filling! This is where the magic happens. In a medium-sized bowl, whisk together the pumpkin puree, sweetened condensed milk (that’s the sweet stuff!), eggs, pumpkin pie spice, and cinnamon. Whisk it all until it’s nice and smooth, with no lumps. Seriously, it’s that easy. Careful, it splatters! You’ll love the smell of the pumpkin pie spice, it’s the best part, honestly.
Baking the Mini Pumpkin Pies
Now, pour the pumpkin mixture into the pie crusts, filling them almost to the top. Then, pop those mini muffin tins into a preheated oven at 375°F (190°C). Bake for about 20-25 minutes. Keep an eye on them! You’ll know they’re done when the filling is set – it shouldn’t jiggle when you gently shake the pan. The crusts will be golden brown, too. Ooh, the anticipation!
Cooling and Serving Your Mini Pumpkin Pies
Once they’re done, take them out of the oven and let them cool completely in the muffin tin. This is super important, so the filling sets properly. Then, carefully remove the mini pies from the tin. I usually use a small knife to help loosen them if they stick. Finally, the best part – serving! They’re delicious on their own, but you can totally go the extra mile with a dollop of whipped cream on top. Yum! You can even add a sprinkle of cinnamon, too. Enjoy!
Why You’ll Love This Recipe for Mini Pumpkin Pies
Okay, let me tell you why you’re going to completely fall in love with these little guys! Honestly, they’re the best. Here’s why:
- Quick & Easy: Seriously, under an hour from start to finish!
- Crowd-Pleasing: Perfect for parties, potlucks, and any get-together.
- Delicious Flavor: That classic pumpkin pie taste, but in adorable mini form.
- Perfect Portions: No more giant pies – everyone gets their own little treat!
- Totally Customizable: You can jazz them up with different toppings, spices, whatever you like!
Trust me, you won’t regret making these mini pumpkin pies. They’re a total winner!
Tips for Perfect Mini Pumpkin Pies Every Time
Alright, so you want to make sure your mini pumpkin pies are absolutely perfect? I got you! Here are a few things I’ve learned over the years to help you get the best results. First, don’t overfill those crusts! You want to leave a little room at the top, or else things might bubble over in the oven (and nobody wants that mess!). Also, make sure your oven is properly preheated – this helps the crusts get nice and golden. And finally, let them cool completely before you try to take them out of the tin. Trust me, patience is a virtue when it comes to these little pies!
Mini Pumpkin Pies Variation Ideas
Okay, so you’ve got your basic mini pumpkin pies down? Awesome! Now it’s time to get creative. My favorite part is experimenting! Want to mix things up? You totally can!
Try swapping out the pumpkin pie spice for a different blend. Maybe a little cardamom? Or a dash of nutmeg and cloves? You can even use a different crust! Try a gingersnap crust for a fun twist, or even a chocolate crust if you’re feeling extra decadent. And don’t forget the toppings! Whipped cream is great, but a sprinkle of chopped pecans or a drizzle of caramel sauce would be amazing, too. Have fun with it!
Frequently Asked Questions about Mini Pumpkin Pies
Okay, I know you probably have some questions, so let’s get those answered right now! I get these all the time, so don’t worry, you’re not alone. I’m all about making things easy, so hopefully, these will help you out!
Can I use homemade pie crust?
Absolutely! If you’re feeling ambitious, go for it! Homemade pie crust will take your mini pumpkin pies to a whole new level. Just make sure it’s nice and sturdy, so it holds up to the filling. You might need to adjust the baking time a little, so keep an eye on them. Seriously, homemade is amazing, but store-bought is totally fine too if you’re short on time. I’ve done both, and both are great!
How do I store leftover Mini Pumpkin Pies?
If you *somehow* have leftovers (which is rare in my house!), you can store them in the fridge. Just pop them in an airtight container, and they should be good for about 3-4 days. They’re still delicious cold, but if you want to warm them up a bit, you can microwave them for a few seconds. Just don’t let them sit out on the counter for too long, especially if you have whipped cream on top!
Can I freeze these mini pies?
Yes, you totally can freeze mini pumpkin pies! That’s what I love to do. Once they’re completely cooled, place them on a baking sheet and freeze them for a couple of hours. Then, transfer them to a freezer bag or container. They’ll keep in the freezer for up to a month (maybe even longer, but they taste best sooner!). To thaw, just let them sit in the fridge overnight or on the counter for a couple of hours. Easy peasy!
Estimated Nutritional Information for Mini Pumpkin Pies for Individual Servings
Okay, so here’s a quick heads-up: the nutritional info below is just an estimate. It can change depending on the brand of ingredients and the exact amounts used. But hey, it’ll give you a general idea!

For more recipe ideas, check out Recipes Best Of on Pinterest.
Print
Yummy! 20-Min Mini Pumpkin Pies Recipe
- Total Time: 45 minutes
- Yield: 24 mini pies
- Diet: Vegetarian
Description
These mini pumpkin pies are perfect for individual servings, ideal for parties or a cozy treat.
Ingredients
- 1 package refrigerated pie crusts
- 1 (15 ounce) can pumpkin puree
- 1 (14 ounce) can sweetened condensed milk
- 2 large eggs
- 1 teaspoon pumpkin pie spice
- 1/2 teaspoon ground cinnamon
- Whipped cream, for serving (optional)
Instructions
- Preheat oven to 375°F (190°C).
- Unroll pie crusts and cut out circles using a cookie cutter or a glass.
- Press circles into mini muffin tins.
- In a bowl, whisk together pumpkin puree, sweetened condensed milk, eggs, pumpkin pie spice, and cinnamon.
- Pour pumpkin mixture into the pie crusts.
- Bake for 20-25 minutes, or until the filling is set.
- Let cool completely.
- Serve with whipped cream, if desired.
Notes
- You can use store-bought or homemade pie crust.
- Adjust the baking time depending on your oven.
- For extra flavor, add a pinch of salt.
- Prep Time: 20 minutes
- Cook Time: 25 minutes
- Category: Dessert
- Method: Baking
- Cuisine: American


