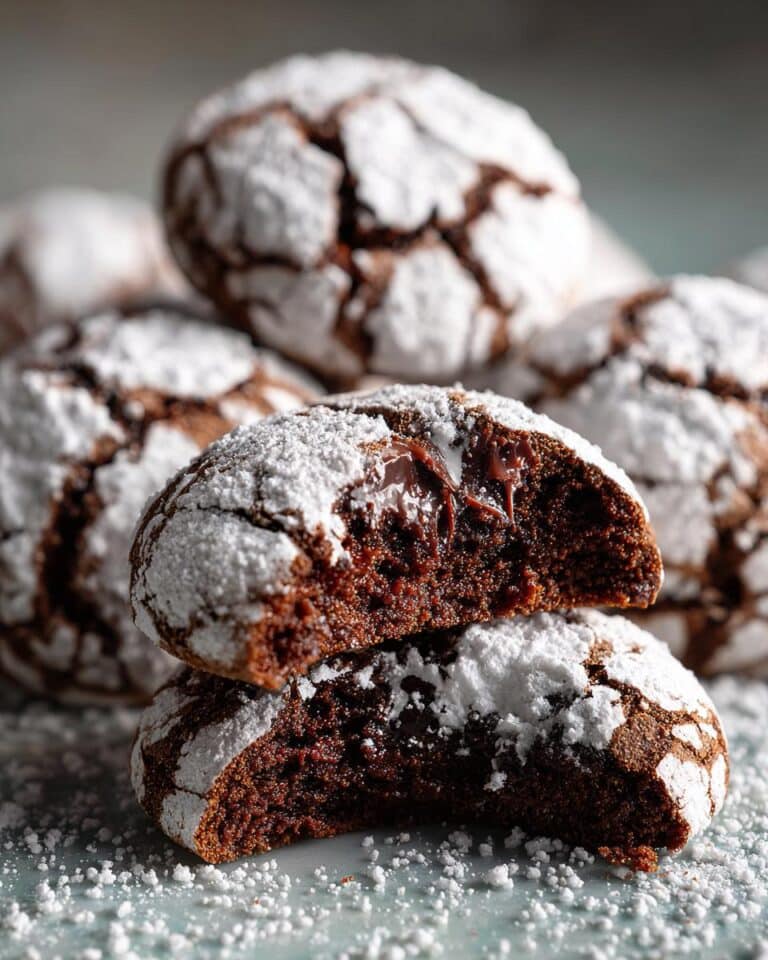
Oh, these Peppermint Kiss Chocolate Crinkles! They’re hands-down one of my absolute favorite things to bake when the holidays roll around. Seriously, the moment I start mixing them, I know Christmas is just around the corner. I remember the first time I made them, I was a little nervous about the peppermint center, but wow, it’s just pure magic! That rich, dark chocolate cookie with that cool, minty surprise inside? It’s a total showstopper, perfect for any holiday cookie swap or just for making your kitchen smell amazing.

Why You’ll Love These Peppermint Kiss Chocolate Crinkles
You’re going to adore these cookies! They’re a total winner for so many reasons:
- The chocolate flavor is super rich – like, melt-in-your-mouth amazing.
- That little peppermint surprise hidden inside? It’s just the coolest burst of minty freshness!
- They are absolutely perfect for any holiday cookie swap; people will be begging for the recipe!
- And the best part? They’re surprisingly easy to whip up, even with all that festive flair.
Gathering Your Ingredients for Peppermint Kiss Chocolate Crinkles
Okay, let’s get our goodies together for these amazing cookies! You’ll need to grab a few things from your pantry and fridge. First up, we’ve got our dry ingredients: 2 1/4 cups of all-purpose flour, 1 teaspoon of baking soda, and 1/2 teaspoon of salt. For the wet stuff, make sure your 3/4 cup of unsalted butter is nice and soft – not melted, just pliable. Then, we need 1 1/2 cups of granulated sugar, 2 large eggs, 1 teaspoon of vanilla extract, and the star of the show for that cool kick, 1/2 teaspoon of peppermint extract. Don’t forget 1/2 cup of unsweetened cocoa powder for that deep chocolatey goodness.
Now, for the fun part! You’ll need about 1/2 cup of powdered sugar for rolling the dough balls, so they get that pretty, snowy look. And of course, the absolute must-have are 24 Hershey’s Kisses – make sure they’re all unwrapped and ready to go. Oh, and if you want an extra pop of festive color and a stronger peppermint punch, a few drops of green food coloring can be a fun addition to the dough. Trust me, it makes them even more special!
Crafting Your Peppermint Kiss Chocolate Crinkles: Step-by-Step
Alright, let’s get down to the fun part – actually making these beauties! It’s a pretty straightforward process, and I promise, even if you’re not a baking pro, you’ll totally nail these. Just follow along with me!
Preparing the Dough Base
First things first, in a medium bowl, go ahead and whisk together your flour, baking soda, and salt. This just makes sure everything is nicely distributed. Now, grab your big mixing bowl and cream together that softened butter and granulated sugar. You want it to get nice and light and fluffy – this is super important for a good cookie texture! Beat in your eggs one at a time, then stir in that lovely vanilla and the star of the show, the peppermint extract. Gradually add your dry ingredients to the wet, mixing until it’s *just* combined. Don’t go crazy mixing! Finally, stir in the cocoa powder until it’s all evenly mixed in. Easy peasy!
Chilling and Shaping the Peppermint Kiss Chocolate Crinkles
Now, this next step is non-negotiable, trust me! Cover that dough up and pop it in the fridge for at least an hour. It needs to chill out because warm cookie dough is just a sticky mess to work with. While it’s chilling, preheat your oven to 350°F (175°C) and line some baking sheets with parchment paper – this is a lifesaver for cleanup! Get a shallow dish and pour in your powdered sugar. Once the dough is nice and firm, scoop out rounded tablespoons and roll them into little balls. Then, roll each ball generously in that powdered sugar until it’s completely coated. They should look like little snowy delights!

Assembling and Baking Your Peppermint Kiss Chocolate Crinkles
Okay, now for the magic! Place those sugar-coated dough balls onto your prepared baking sheets, giving them about 2 inches of space – they’ll spread a bit. Here comes the best part: gently press one unwrapped peppermint kiss right into the center of each dough ball. Make sure it’s nestled in there nicely! Now, into the oven they go for about 10 to 12 minutes. You’re looking for the edges to be set, but the centers should still look a little soft. That’s the secret to a chewy cookie you don’t want to overbake! Let them cool on the baking sheets for a few minutes before carefully transferring them to a wire rack to cool completely. Resist the urge to eat them all right away!
Tips for Perfect Peppermint Kiss Chocolate Crinkles
You want these cookies to be absolutely perfect, right? So, here are a few little tricks I’ve picked up! First, and this is super important, do NOT overbake these. Seriously, pull them out when the edges look set but the center still seems a tad soft. That’s the golden ticket to a wonderfully chewy cookie. Also, make sure your butter is properly softened – not melted liquid, but soft enough to easily indent with your finger. This makes all the difference in the cookie’s texture! And that chilling step? It’s your best friend. Chilling the dough makes it so much easier to handle and roll without it sticking everywhere. Oh, and if you’re really feeling that peppermint vibe, a tiny drop of green food coloring mixed into the dough makes them look extra festive!
FAQs About Peppermint Kiss Chocolate Crinkles
Got questions about these festive little guys? I’ve got answers!
Can I use milk chocolate kisses instead of semi-sweet for my Peppermint Kiss Chocolate Crinkles? You totally can! If you prefer a sweeter cookie, milk chocolate kisses will work beautifully and give them a slightly different, sweeter profile. They’re still going to be delicious!
How should I store these peppermint cookies? To keep them tasting amazing, store these peppermint cookies in an airtight container at room temperature. They’ll stay fresh and yummy for about 3 to 4 days. Perfect for snacking!
Can I make the dough for these chocolate crinkle cookies ahead of time? Yes, you absolutely can! If you’re planning ahead for your holiday baking, you can make the dough for these chocolate crinkle cookies up to 2 days in advance. Just keep it well-wrapped and refrigerated. It makes assembly day a breeze!
Are these cookies suitable for a holiday cookie swap? Oh, 100%! These Peppermint Kiss Chocolate Crinkles are a total showstopper and always a huge hit at any holiday cookie swap. They look incredibly festive and taste even better!
Serving Your Festive Peppermint Kiss Chocolate Crinkles
These festive Peppermint Kiss Chocolate Crinkles are just begging to be the star of your Christmas dessert table! They look absolutely gorgeous piled high on a holiday dessert platter, don’t they? Honestly, they’re so pretty and delicious, they don’t need much else. I love enjoying them with a tall, cold glass of milk – it’s the classic pairing for a reason! Or, if it’s chilly out, a warm mug of hot chocolate or coffee is just divine alongside that chocolate-minty goodness.
Estimated Nutritional Information for Peppermint Kiss Chocolate Crinkles
Just a heads-up, these numbers are estimates, and they can totally change depending on the exact brands you use and how big you roll your cookies. But, for one cookie, you’re generally looking at around 150 calories, about 8 grams of fat, 19 grams of carbohydrates, and a couple of grams of protein. You’ll also find roughly 18 grams of sugar in there. So, enjoy them as a delicious part of your holiday treat spread!
Print
Amazing Peppermint Kiss Chocolate Crinkles: 24 Treats
- Total Time: 1 hour 32 minutes
- Yield: 24 cookies
- Diet: Vegetarian
Description
Peppermint Kiss Chocolate Crinkles are festive cookies with a rich chocolate flavor and a cool peppermint center. They are perfect for holiday gatherings and are sure to impress.
Ingredients
- 2 1/4 cups all-purpose flour
- 1 teaspoon baking soda
- 1/2 teaspoon salt
- 3/4 cup unsalted butter, softened
- 1 1/2 cups granulated sugar
- 2 large eggs
- 1 teaspoon vanilla extract
- 1/2 cup unsweetened cocoa powder
- 1/2 cup powdered sugar, for rolling
- 24 Hershey’s Kisses, unwrapped
- 1/2 teaspoon peppermint extract
Instructions
- In a medium bowl, whisk together flour, baking soda, and salt.
- In a large bowl, cream together butter and granulated sugar until light and fluffy.
- Beat in eggs one at a time, then stir in vanilla extract and peppermint extract.
- Gradually add the dry ingredients to the wet ingredients, mixing until just combined.
- Stir in the cocoa powder until evenly distributed.
- Cover the dough and refrigerate for at least 1 hour.
- Preheat your oven to 350°F (175°C). Line baking sheets with parchment paper.
- Place powdered sugar in a shallow dish.
- Scoop rounded tablespoons of dough and roll into balls.
- Roll each ball in powdered sugar to coat completely.
- Place dough balls on the prepared baking sheets, about 2 inches apart.
- Gently press one peppermint kiss into the center of each dough ball.
- Bake for 10-12 minutes, or until the edges are set and the centers are still slightly soft.
- Let cookies cool on the baking sheets for a few minutes before transferring them to a wire rack to cool completely.
Notes
- For a stronger peppermint flavor, add a few drops of green food coloring to the dough.
- Ensure the Hershey’s Kisses are fully unwrapped before starting.
- Do not overbake, as this will result in dry cookies.
- Prep Time: 20 minutes
- Cook Time: 12 minutes
- Category: Dessert
- Method: Baking
- Cuisine: American


