There’s something magical about the simple act of melting cheese between two slices of bread, isn’t there? My love affair with grilled cheese sandwiches started when I was six years old, coming home from school to find my mom flipping golden-brown sandwiches in her trusty cast iron skillet. The smell of toasting bread and bubbling cheddar would fill our tiny kitchen, and suddenly whatever bad day I’d had didn’t seem so important anymore.
After twenty years of perfecting this recipe (yes, I’ve eaten approximately 4,382 grilled cheeses in my lifetime), I can confidently say this version hits all the right notes. The secret? Using thick-sliced bread that holds up to the heat, real butter (none of that margarine nonsense), and sharp cheddar that melts into gooey perfection without turning greasy. What makes this grilled cheese sandwich special isn’t just the ingredients – it’s the technique I learned through countless trial-and-error batches.
This isn’t just lunch – it’s a warm hug on a plate. Whether you’re cooking for picky kids, needing quick comfort after a long day, or just craving that perfect crispy-yet-melty bite, this grilled cheese delivers every single time. And trust me, once you try my method, you’ll never go back to soggy sandwiches or unevenly melted cheese again.
Why You’ll Love This Grilled Cheese Sandwich
Listen, I know grilled cheese seems simple, but this version? It’s a game-changer. Here’s why you’ll fall head over heels for it:
- Five-minute magic: Seriously, from fridge to plate in under 10 minutes. Bad day? Hangry kids? This is your edible superhero.
- Foolproof crispy perfection: No more guesswork—my butter trick (you’ll see) guarantees that golden crunch without burnt edges.
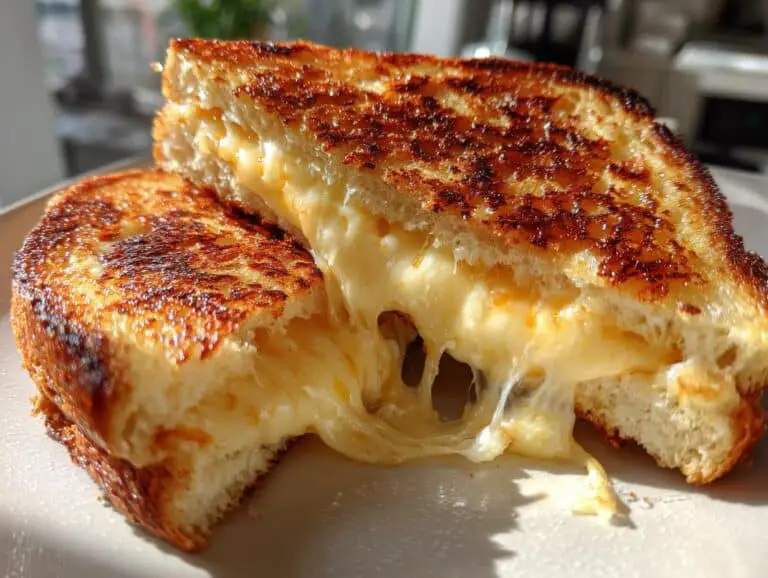
- Cheese pull dreams: Sharp cheddar melts into those Instagram-worthy strings, not a greasy puddle. (Yes, I judge a grilled cheese by its stretch.)
- Customizable canvas: Add bacon, smear on jam, or go wild with garlic butter—it’s the ultimate easy sandwich for your mood.
- Nostalgia in every bite: That first crunch? Pure comfort food magic. It tastes like Saturday lunches with my grandma’s floral apron and her “secret” pinch of paprika.
Bonus? You probably have all the ingredients right now. So go ahead—turn basic bread and cheese into something extraordinary. (P.S. Keep napkins handy. Things get deliciously messy.)
Ingredients for the Perfect Grilled Cheese Sandwich
Here’s the beautiful part – you only need three simple ingredients to make magic happen. But choosing the right ones makes all the difference between “meh” and “WOW!”
- 4 slices thick white bread: My go-to is Texas toast-style bread – that extra thickness means it won’t get soggy under all that melty goodness. Day-old bread works surprisingly well too!
- 2 tbsp softened butter: Leave it out for 30 minutes before cooking. Trust me, trying to spread cold butter tears your bread like a toddler with construction paper.
- 4 slices sharp cheddar cheese (about 2 oz): None of that pre-shredded stuff – it’s coated with anti-caking agents that mess with the melt. Get block cheese and slice it yourself for maximum gooeyness.
Ingredient Notes & Substitutions
Look, I’m loyal to my classic combo, but life happens! Here’s how to adapt:
Bread alternatives: Sourdough adds tangy depth (my rainy day favorite), while whole wheat brings nuttiness. Just avoid super-seedy varieties – those little guys burn fast.
Cheese options: American melts like a dream (great for kids), Gouda adds smoky richness, or mix mozzarella with cheddar for epic cheese pulls. Pro tip: softer cheeses work better than hard aged varieties.
Butter substitutes: Mayo gives insane crispiness (my college roommate swore by it), while olive oil works in a pinch. For dairy-free, coconut oil surprisingly doesn’t taste coconutty after cooking!
Equipment You Need for Grilled Cheese
Here’s the beautiful truth – you don’t need fancy gadgets to make the ultimate grilled cheese. In fact, my grandma’s ancient cast iron skillet still gives me the most perfect golden crust (though I’ll never admit that to her). Here’s your short-and-sweet gear list:
- Cast iron skillet: My ride-or-die for even heat distribution. No cast iron? Any heavy-bottomed pan works.
- Thin metal spatula: Lets you sneak under that crispy bread without demolishing your masterpiece.
- Butter knife: For spreading that glorious butter right to the edges – dry crusts are tragic.
That’s it! No special presses or expensive tools needed. Just like childhood.
How to Make a Grilled Cheese Sandwich
Okay, here’s where the magic happens! Making a grilled cheese seems simple, but these little tricks I’ve learned over the years will take yours from “good” to “oh-my-goodness-I-need-another-one” status. Let’s break it down:
Step 1: Prepare the Bread
First things first – butter like you mean it! Take your softened butter and spread it all the way to the edges of each bread slice. I’m talking millimeter-from-the-crust coverage here. Dry edges are the enemy of perfect grilled cheese. Pro tip: butter the outside of both slices – this gives you that irresistible golden crunch on every bite.
Step 2: Layer the Cheese
Now for the star of the show! Place your cheese slices so they completely cover one unbuttered side of each bread slice. No cheese-free zones allowed – that’s how you end up with sad, bread-only bites. If using different cheese types, layer the better melter (like cheddar) closest to the bread and the more flavorful one (like gruyère) on top. This creates a perfect melt-flavor balance.
Step 3: Cook to Perfection
Heat your skillet over medium heat – not too hot or you’ll burn the bread before the cheese melts. Place your sandwich in the pan and resist the urge to peek for at least 2 minutes. You’ll know it’s ready to flip when the bottom is golden brown (like a perfect toast color) and the cheese just starts melting at the edges. Gently press down with your spatula – this helps the cheese layers bond – then flip. Cook another 2-3 minutes until both sides are evenly golden and the cheese is oozing slightly from the sides. That’s when you know it’s done!

Listen for the sizzle to slow down – that’s nature’s timer telling you your grilled cheese masterpiece is ready. Transfer to a plate, let it rest for just 30 seconds (I know, torture!), then slice diagonally because triangles just taste better. The cheese should stretch at least 3 inches when you pull it apart – that’s the gold standard in my kitchen!
Pro Tips for the Best Grilled Cheese Sandwich
Alright, let me share the little secrets that took my grilled cheese from “fine” to “where has this been all my life” status. These are the game-changers:
- Cheese at room temp: Cold cheese = sad, slow melting. Leave slices out 15 minutes before cooking for that Instagram-worthy ooze.
- Cover that skillet: Toss a lid on for the first minute – steam helps melt the cheese before the bread over-browns. (My grandma’s “aha!” moment in 1978.)
- Patience pays: Let it rest 1 minute before cutting. That cheese needs time to set so it doesn’t all ooze out on the first bite.
- Heat control: Medium is your friend. Too hot burns butter before melting cheese; too low makes greasy, sad bread.
- Press lightly: Just enough to help layers bond – no panini press smashing needed!
Follow these, and you’ll never settle for a mediocre grilled cheese again.
Grilled Cheese Sandwich Variations
Once you’ve mastered the classic, it’s time to play! My grilled cheese sandwich becomes a whole new adventure with these easy twists:
- Tomato Basil: Add juicy tomato slices and fresh basil leaves between the cheese – the acidity cuts right through the richness.
- Everything But The Kitchen Sink: Crispy bacon, caramelized onions, and a swipe of grainy mustard transform it into a full meal.
- Breakfast Edition: Slide a fried egg inside (yolk slightly runny, obviously) for the ultimate morning sandwich.
- Sweet & Savory: Thin apple slices with sharp cheddar and a drizzle of honey? Don’t knock it till you try it.
The best part? These variations still start with that perfect crispy, buttery base we all love. Mix and match based on what’s in your fridge!
Serving Suggestions
Oh, the joy of dipping that crispy grilled cheese sandwich into a steaming bowl of tomato soup – it’s basically childhood in a bite! For something tangy, serve with crunchy dill pickles or a simple green salad. And if you’re feeling fancy? Add some sweet potato fries for the ultimate comfort food plate.
Storage & Reheating
Okay, let’s be real – leftover grilled cheese is rare in my house. But if miracles happen and you’ve got some left, here’s the deal: pop it in an airtight container for up to 2 days. When hunger strikes again, skip the microwave (soggy sadness!) – reheat it in a dry skillet over medium-low to bring back that glorious crunch. It won’t be quite as perfect as fresh, but that crispy revival? Worth the extra three minutes.
Grilled Cheese Sandwich FAQs
After years of cheesy experimentation (and many questionable sandwich mishaps), I’ve answered every grilled cheese question imaginable. Here are the ones I get asked constantly:
Can I use different cheeses?
Absolutely! While sharp cheddar is my ride-or-die, American cheese melts like a dream for kids, and Gruyère adds fancy-pants flavor. Mixing cheeses (like mozzarella for stretch + aged gouda for depth) creates magic. Just avoid super hard cheeses—they refuse to melt properly.
How do I make it extra crispy?
Two words: mayonnaise coating. Swap butter for mayo on the bread’s exterior—it sounds weird, but creates an insane golden crunch. Also, cook on medium heat (not high!) so the bread crisps slowly without burning.
What’s the best bread?
Thick-sliced white or sourdough wins every time—they hold up to the heat without getting soggy. My grandma swore by challah bread for its slight sweetness. Avoid super thin slices unless you want a cheese cracker!
Help! My cheese isn’t melting!
Room-temperature cheese slices melt faster than cold ones. Cover the skillet with a lid for the first minute to trap steam—it helps the cheese surrender to its gooey destiny.
Still have questions? Slide into my DMs—I take grilled cheese emergencies very seriously.

Nutritional Information
Okay, let’s be real – we don’t eat grilled cheese sandwiches for their nutritional virtues! But since knowledge is power, here’s the scoop on what you’re enjoying. Remember: These values are estimates based on the exact ingredients I use – your numbers might vary slightly depending on bread thickness or cheese brand.
- Serving Size: 1 sandwich (2 slices bread + 2 oz cheese + 1 tbsp butter)
- Calories: 400 (Worth every single one!)
- Fat: 20g (12g saturated – that’s the good melty stuff)
- Carbs: 30g (2g fiber)
- Protein: 15g (Cheese power!)
- Sodium: 500mg
- Sugar: 2g
Pro tip: Adding tomato slices boosts vitamin C, while whole wheat bread adds fiber. But let’s be honest – sometimes you just need that pure, unapologetic cheesy goodness exactly as it is!
For more delicious recipes and inspiration, check out our Pinterest page!
Print
5-Min Perfect Grilled Cheese Sandwich with Epic Cheese Pulls
- Total Time: 11 minutes
- Yield: 2 sandwiches
- Diet: Vegetarian
Description
A classic grilled cheese sandwich with melted cheddar cheese.
Ingredients
- 4 slices bread
- 2 tbsp butter
- 4 slices cheddar cheese
Instructions
- Heat a skillet over medium heat.
- Butter one side of each bread slice.
- Place cheese between bread slices with buttered sides facing out.
- Cook in skillet until golden brown, about 3 minutes per side.
- Serve hot.
Notes
- Use thick bread for better texture.
- Adjust cheese quantity to taste.
- Prep Time: 5 minutes
- Cook Time: 6 minutes
- Category: Sandwich
- Method: Grilling
- Cuisine: American


