Oh my goodness, you guys! When the leaves start changing and there’s that crispness in the air, my kitchen just *has* to smell like fall. And my absolute favorite way to capture that feeling? These Salted Caramel Apple Bars for Fall! Seriously, they’re like a cozy hug in dessert form. I’ve been making variations of these for years, and this version, with that perfect balance of sweet apples, gooey caramel, and just the right touch of salt, is the one that always gets rave reviews.

They’re not just delicious, they’re also surprisingly simple to whip up, which is a lifesaver when you’ve got a million other things to do. Trust me, one bite of these Salted Caramel Apple Bars for Fall and you’ll be hooked. It’s the perfect way to welcome the season. Get ready for your new go-to fall treat!
Why You’ll Love These Salted Caramel Apple Bars for Fall
Honestly, why wouldn’t you love these? They’re a total game-changer for your fall baking lineup. Here’s the quick rundown on why these Salted Caramel Apple Bars for Fall are a must-try:
- Quick and easy to prepare: Seriously, you can have these mixed up and in the oven faster than you can say “pumpkin spice.” No complicated steps here!
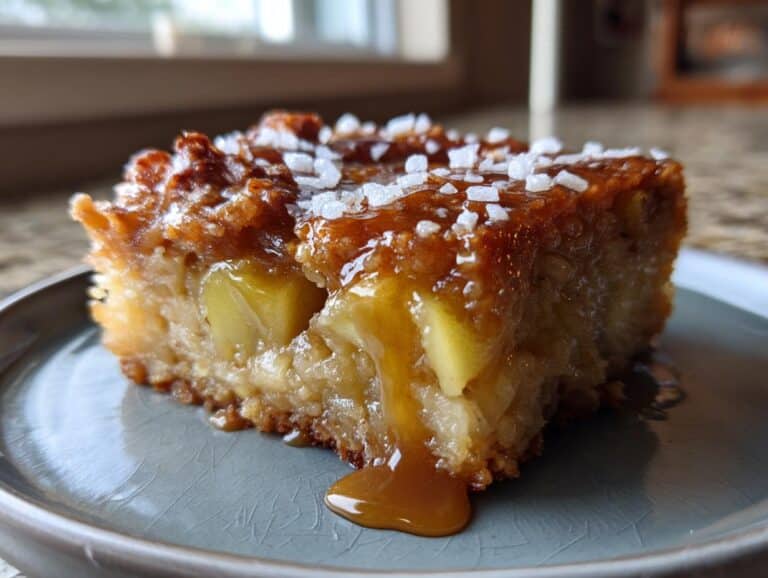
- Packed with classic fall flavors: We’re talking sweet, tender apples, rich caramel, a hint of salt, and that perfect buttery crumble. It’s autumn in a bite.
- Perfect for holidays and gatherings: Whether it’s Thanksgiving, a casual get-together, or just because, these bars are always a huge hit. They look fancy but are so easy!
- A crowd-pleasing sweet treat: Everyone, and I mean *everyone*, goes crazy for these. They’re the kind of dessert that disappears lightning fast.
Gathering Your Ingredients for Salted Caramel Apple Bars for Fall
Alright, let’s get our pantry ready for these amazing Salted Caramel Apple Bars for Fall! Having everything measured out makes the whole process so much smoother, trust me. It’s like setting yourself up for success right from the start. We need a few things for the base and the crumble topping, and then we’ll get to the good stuff – the apples and caramel!
Crust and Topping Ingredients
For that perfect buttery crust and crumbly topping, you’ll need: 1 ½ cups of all-purpose flour, 1 teaspoon of baking soda to give it a little lift, and ½ teaspoon of salt to balance all that sweetness. Then, we’ve got ½ cup of unsalted butter, and it’s super important that it’s softened – not melted, but soft enough to really cream with the sugar. And speaking of sugar, grab 1 cup of packed brown sugar. That brown sugar is key for that lovely caramel-y depth! Don’t forget 1 large egg and 1 teaspoon of vanilla extract for that classic flavor boost.
Apple and Caramel Layer Ingredients
Now for the star of the show! You’ll need 2 cups of chopped apples. I really love using firm apples like Honeycrisp or Gala because they hold their shape so well when baked, but feel free to use your favorite. Just make sure they’re chopped into nice, bite-sized pieces. Then, we’ve got ½ cup of caramel sauce – you want one that’s nice and thick, not too runny, so it doesn’t just soak into the crust. And the pièce de résistance? ½ teaspoon of flaky sea salt! This is what makes them *salted* caramel apple bars, and it’s an absolute game-changer. It really makes all those sweet flavors pop!
Step-by-Step Guide to Making Salted Caramel Apple Bars for Fall
Alright, let’s get down to business and make these amazing Salted Caramel Apple Bars for Fall! It’s really not complicated at all, and watching them come together is half the fun. Just follow these steps and you’ll be enjoying the best fall dessert ever.
Preparing the Baking Pan and Dough
First things first, let’s get that oven fired up to 350°F (175°C). While it’s heating, grab your 8×8 inch baking pan. Give it a good grease and then a light dusting of flour – this makes sure our bars don’t stick, which is super important for getting nice clean edges later. Now, in a medium bowl, whisk together your flour, baking soda, and salt. Just a quick whisk to make sure everything is evenly distributed. In a separate, larger bowl, it’s time to cream the butter and brown sugar. Use an electric mixer or a good strong arm and a wooden spoon to beat them together until they’re nice and fluffy – think pale yellow and airy. Then, beat in that egg and the vanilla extract until everything is smooth and well combined. Now, gradually add your dry ingredients to the wet mixture. Mix it up until it’s *just* combined. Don’t overmix here, or your bars might get tough! You’ll want to press about half of this dough evenly into the bottom of your prepared baking pan. This is going to be our delicious crust.
Assembling the Layers
Okay, crust is in place! Now, spread your chopped apples evenly over the top of that dough. Try to get them in a nice, even layer so you get apple in every bite. Next comes the gooey goodness: drizzle your caramel sauce all over those apples. Again, try to get it spread out as much as possible. This is where the magic happens, so don’t be shy! Now, for that crucial touch that makes these *salted* caramel apple bars: sprinkle that ½ teaspoon of flaky sea salt right over the caramel. It looks pretty and it tastes incredible. Finally, take the remaining dough you have and crumble it all over the top. Just grab bits of it and sprinkle it around so you’ve got that lovely crumble topping.

Baking and Cooling Your Salted Caramel Apple Bars for Fall
Into the hot oven they go! Bake them for about 30 to 35 minutes. You’re looking for that beautiful golden brown color on top, and you should see the caramel getting nice and bubbly around the edges. It smells absolutely divine at this point, I promise! Once they’re out of the oven, and this is the hardest part, you *have* to let them cool completely in the pan. I know, I know, it’s torture when they smell this good! But trust me, if you try to cut them while they’re warm, they’ll just fall apart. Letting them cool completely allows the caramel to set up and makes cutting those perfect Salted Caramel Apple Bars for Fall so much easier. Patience is key here!
Tips for Perfect Salted Caramel Apple Bars for Fall
Want to make sure your Salted Caramel Apple Bars for Fall are absolutely perfect? I’ve got a few little secrets that really make a difference. First off, the apples! Use firm apples like Honeycrisp, Gala, or Fuji. They have a great sweet-tart flavor and, more importantly, they hold their shape beautifully when baked. Mushy apples just won’t do! For the caramel, you really want a thicker sauce. If yours seems a bit thin, you can simmer it for a few extra minutes to thicken it up before drizzling. And that crucial cooling step? Don’t skip it! Letting these bars cool completely in the pan is the secret to getting those clean, beautiful cuts. It’s worth the wait, I promise!
Variations for Your Fall Flavor Recipes
Now, while these Salted Caramel Apple Bars for Fall are pretty darn perfect as they are, you know me – I love to play around! If you want to jazz them up even more and lean into those cozy Fall Flavor Recipes, try adding a teaspoon of cinnamon or a pinch of nutmeg right into the dough with the dry ingredients. It adds an extra layer of warmth that’s just divine. For a little crunch, toss in about half a cup of chopped pecans or walnuts into the crumble topping. And don’t be afraid to experiment with the caramel – a salted dulce de leche or even a maple caramel would be amazing! These little tweaks make them even more special, and perfect for any fall get-together.
Serving and Storing Your Salted Caramel Apple Bars for Fall
These Salted Caramel Apple Bars for Fall are absolutely divine served at room temperature, which lets all those flavors really shine. You can even warm them up slightly in the microwave for about 10-15 seconds if you want that extra gooey, warm-from-the-oven feel – especially lovely with a scoop of vanilla ice cream! If, by some miracle, you have any leftovers, just pop them into an airtight container. They’ll stay wonderfully fresh on the counter for a couple of days, or you can keep them in the fridge for up to four days. They’re just as delicious the next day!
Frequently Asked Questions About Salted Caramel Apple Bars for Fall
Got questions about these yummy Salted Caramel Apple Bars for Fall? I’ve got answers! It’s always good to know the little details, especially when you’re baking for loved ones or a special occasion.
What are the best apples to use for these bars? For the most delicious Yummy Apple Desserts, especially for September Baking Recipes, I really recommend using firm, crisp apples. Think Honeycrisp, Gala, Fuji, or even a Granny Smith if you like a bit of tartness. They hold their shape so well during baking and give you that lovely texture. Avoid softer apples that might turn to mush!
Can I make these ahead of time for a party? Absolutely! These Salted Caramel Apple Bars for Fall are perfect for making ahead for a party. You can bake them a day or two in advance, let them cool completely, and then store them in an airtight container. They’re actually even better the next day when the flavors have had a chance to meld together!
How long do these bars stay fresh? If you store them properly in an airtight container at room temperature, they should stay fresh and delicious for about 2-3 days. If your kitchen tends to be warm, or if you want them to last a bit longer, you can pop them in the refrigerator for up to 4 days. They’re still fantastic cold!
Can I use store-bought caramel sauce? Yes, you totally can! Using store-bought caramel sauce is a huge time-saver and works perfectly well. Just make sure it’s a thicker caramel sauce meant for topping or drizzling, not a super thin liquid caramel. If it seems a little runny, you can always simmer it gently on the stovetop for a few minutes to thicken it up before you use it. It’s one of those little tricks that makes a big difference!

Nutritional Information
Just a little note for you all – the nutritional information for these Salted Caramel Apple Bars for Fall is an estimate, of course! It can change a bit depending on the exact brands of ingredients you use and how you measure things out. Think of it as a helpful guide rather than a strict rule. Happy baking!
For more delicious recipes and baking inspiration, check out our Pinterest page!
Print
Divine Salted Caramel Apple Bars: 1 Amazing Fall Treat
- Total Time: 55 minutes
- Yield: 16 bars
- Diet: Vegetarian
Description
Delicious salted caramel apple bars perfect for fall gatherings and holidays.
Ingredients
- 1 ½ cups all-purpose flour
- 1 teaspoon baking soda
- ½ teaspoon salt
- ½ cup unsalted butter, softened
- 1 cup packed brown sugar
- 1 large egg
- 1 teaspoon vanilla extract
- 2 cups chopped apples (about 2 medium apples)
- ½ cup caramel sauce
- ½ teaspoon flaky sea salt
Instructions
- Preheat your oven to 350°F (175°C). Grease and flour an 8×8 inch baking pan.
- In a medium bowl, whisk together the flour, baking soda, and salt.
- In a large bowl, cream together the softened butter and brown sugar until light and fluffy.
- Beat in the egg and vanilla extract until well combined.
- Gradually add the dry ingredients to the wet ingredients, mixing until just combined.
- Press half of the dough into the prepared baking pan to form the crust.
- Spread the chopped apples evenly over the crust.
- Drizzle the caramel sauce over the apples.
- Sprinkle the flaky sea salt over the caramel.
- Crumble the remaining dough over the top.
- Bake for 30-35 minutes, or until golden brown and the caramel is bubbly.
- Let cool completely before cutting into bars.
Notes
- Use firm apples like Honeycrisp or Gala for best results.
- Ensure the caramel sauce is thick enough to drizzle.
- Allow bars to cool completely for clean cuts.
- Prep Time: 20 minutes
- Cook Time: 35 minutes
- Category: Dessert
- Method: Baking
- Cuisine: American


