Ooh la la, friends! Get ready to be transported straight to a Parisian patisserie, because we’re diving into the absolute *dream* of a dessert: Mini Lemon Tarts with Lilac Meringue! Seriously, these little beauties are like sunshine and fluffy clouds all rolled into one perfect bite. And the best part? They’re totally doable, even if you’re not a professional pastry chef (trust me, I’m proof!).
There’s just something so elegant and satisfying about a fancy dessert, don’t you think? Like, “eat dessert first” is practically a life motto, right? These mini lemon tarts are the perfect excuse. We’re talking a buttery, crisp crust, a zingy lemon curd that wakes up your taste buds, and then… *that* meringue. Oh, the meringue! It’s light, it’s airy, it’s a gorgeous shade of lilac, and it’s the perfect sweet counterpoint to the tart lemon. Bon appétit!
Ingredients for the Perfect Mini Lemon Tart with Lilac Meringue
Okay, so listen up, because the ingredients are key to making these little tartlets sing! Don’t worry, it’s not a mile-long list, but each one plays a super important role. I like to get everything prepped and ready to go before I even think about turning on the oven. Trust me, it makes the whole process so much smoother!
Essential Ingredients for Mini Lemon Tarts
Let’s break it down, shall we?
Tart Shells
We’re keeping it simple here, so we’re using those adorable little pre-made mini tart shells. You can usually find them in the baking aisle. I like the ones about 2 inches across.
Lemon Curd
For the lemon curd, you can totally go store-bought, I won’t judge! It saves a ton of time. But, if you’re feeling ambitious (and have a little extra time), you can definitely make your own! Here’s a link to my favorite recipe [Link to Lemon Curd Recipe].
Meringue Ingredients
And now for the fluffy, dreamy meringue! You’ll need egg whites (more on that later!), granulated sugar (the regular stuff), a teeny tiny pinch of cream of tartar (it helps stabilize the egg whites), and some purple food coloring. I like to use gel food coloring because it gives a vibrant color without adding extra liquid. I usually use [Brand Name] brand, but any gel food coloring will do the trick!
Step-by-Step Instructions: How to Make Mini Lemon Tart with Lilac Meringue
Alright, friends, let’s get baking! Don’t be intimidated by the steps; it’s all super easy, I promise. Just follow along, and you’ll be biting into these beauties in no time!
Preparing the Lemon Curd Filling
If you’re using store-bought lemon curd, you’re already ahead of the game! Simply grab your mini tart shells and spoon in the lemon curd, filling each one almost to the top. If you’re making your own, let it cool completely before you fill the shells. Be careful, it’s hot!
Creating the Lilac Meringue
Okay, this is where the magic happens! First, make sure your mixing bowl and whisk are squeaky clean. Any little bit of grease will mess up your meringue, so be super careful! In a clean bowl, whip those egg whites and that cream of tartar with an electric mixer until you get soft peaks. Next, start adding the sugar *gradually*, like a tablespoon at a time, while beating. Keep beating until the meringue is stiff and glossy – think nice, firm peaks! Now, for the fun part: gently fold in your purple food coloring. Don’t overmix, we just want a pretty swirl of lilac.
Assembling and Baking Your Mini Lemon Tarts
Now, gently spoon or pipe the meringue onto the lemon curd, making pretty little swirls or peaks. You can get fancy here, or just pile it on – it all tastes the same! Pop those filled tarts into a preheated oven at 350°F (175°C) and bake for about 8-10 minutes. Watch them closely – you want the meringue to be lightly browned and toasted, but not burnt!

Cooling and Serving Your Mini Lemon Tart with Lilac Meringue
Once they’re out of the oven, let them cool completely before you even *think* about eating them! This helps the meringue set and the flavors meld. Then, the best part – dig in! Serve them as is, or get creative with some fresh berries or a sprinkle of powdered sugar. Enjoy every single bite!

Why You’ll Love This Mini Lemon Tart with Lilac Meringue Recipe
Okay, let me tell you why you *need* to make these! Honestly, it’s a win-win all around:
- Tastebud Tango: The tart lemon, the sweet meringue… it’s a flavor party in your mouth!
- Easy Peasy: Seriously, these are way easier than they look. I promise!
- Showstopper Alert: They’re gorgeous! Perfect for impressing guests (or just yourself!).
- Make-Ahead Magic: You can totally make parts of this ahead of time, which is a lifesaver.
- Miniature Delight: Everything is better in mini form, right? Perfect portion sizes!
Trust me, you won’t regret making these. They’re pure happiness!
Equipment You’ll Need for Mini Lemon Tarts
Alright, before we get started, let’s make sure you’ve got your baking arsenal ready! You don’t need a ton of fancy gadgets for this recipe, which is always a bonus. Just the basics, really. You’ll need a mixing bowl (or two!), a whisk (or an electric mixer – I love my stand mixer, but a hand mixer works great too!), and a spatula for folding things together. Oh, and of course, a baking sheet for those adorable little tarts! Easy peasy!
Tips for Mini Lemon Tart with Lilac Meringue Success
Listen, even the best bakers have a few little hiccups along the way! But don’t worry, I’ve learned a thing or two while whipping up these mini lemon tartlets, and I’m sharing all my secrets. A little prep and a few tweaks can make all the difference between “meh” and “OMG, these are incredible!”
Achieving Perfect Meringue Peaks
Meringue can be a bit of a diva, but don’t let it scare you! The key is to start with super clean equipment. Seriously, no grease allowed! Beat those egg whites until they form soft peaks, *then* slowly add the sugar. Keep beating until the meringue is stiff, glossy, and holds its shape. If you under-beat, it’ll be runny. Over-beat, and it’ll get dry and grainy. Keep an eye on it – you’ve got this!
Preventing Soggy Tart Shells
Nobody wants a soggy bottom! To avoid this, try pre-baking those tart shells. Just pop them in the oven for about 5-7 minutes before you add the lemon curd. This gives them a head start on getting crispy. Also, make sure your lemon curd isn’t too hot when you add it. Let it cool a bit before filling the shells so you don’t melt the bottom of the tart! You’ll be golden (or, well, perfectly crisp!).
Variations on Mini Lemon Tarts
Okay, so you’ve mastered the basics, and now you want to get creative? I love that! The beautiful thing about these Mini Lemon Tarts is that you can totally mix things up and make them your own. Don’t be afraid to experiment!
You could swap out the lemon curd for another flavor, like raspberry or key lime. Or, try topping them with fresh berries, a sprinkle of toasted coconut, or even a drizzle of chocolate. For a fun twist, try different shapes of tart shells. You can even experiment with different meringue flavors! Maybe a chocolate meringue? Oh, the possibilities!
Serving Suggestions for Your Mini Lemon Tart with Lilac Meringue
So, you’ve baked these gorgeous tartlets, and now it’s time to show them off! These Mini Lemon Tarts are perfect for pretty much any occasion, honestly. Serve them at a fancy tea party, a casual brunch, or as a sweet ending to a romantic dinner. Pair them with a glass of bubbly, a cup of Earl Grey tea, or even a scoop of vanilla ice cream. And for a little extra flair? Garnish with edible flowers or a dusting of powdered sugar. Voila!
Storage and Reheating Instructions for Mini Lemon Tarts
So, you made a batch of these beauties, but you have leftovers? (Lucky you!). Don’t worry, they’ll still be delicious tomorrow! Just store them in the fridge in an airtight container – that keeps the meringue from getting all weird and sticky. They’ll last for about 2-3 days, but honestly, they’re usually gone way before then!
Reheating? Well, you don’t really *need* to. They’re perfect straight from the fridge! But, if you want to give them a little extra oomph, you can pop them in a preheated oven at a low temperature (like 200°F/93°C) for a few minutes. Just keep a close eye on them!
Estimated Nutritional Information for Mini Lemon Tart with Lilac Meringue
Alright, so, let’s talk numbers! Keep in mind, this is just an estimate, because, you know, ingredients and brands can vary. But, roughly speaking, each of these adorable little Mini Lemon Tarts clocks in at around 150 calories. You’re also looking at about 8 grams of fat, with 4 grams of that being the good stuff. There’s a bit of protein, maybe 2 grams, and about 18 grams of carbohydrates. And, of course, a little bit of sugar – around 15 grams, but hey, it’s dessert, right?
You made it! You’ve got the recipe, the ingredients, and a craving for something amazing. Now, let’s get down to the nitty-gritty and make those beauties! You ready? Let’s do this!
I know it looks like there’s a lot going on, but trust me, it’s all super easy once you get started. I’ll take ya through it step-by-step, no problem. Just grab your apron, your favorite music, and let’s get those Mini Lemon Tarts with Lilac Meringue going!
For more delightful dessert ideas, follow us on Pinterest.
Print
3 Steps to Delightful Mini Lemon Tart with Lilac Meringue
- Total Time: 30 minutes
- Yield: 12 mini tarts
- Diet: Vegetarian
Description
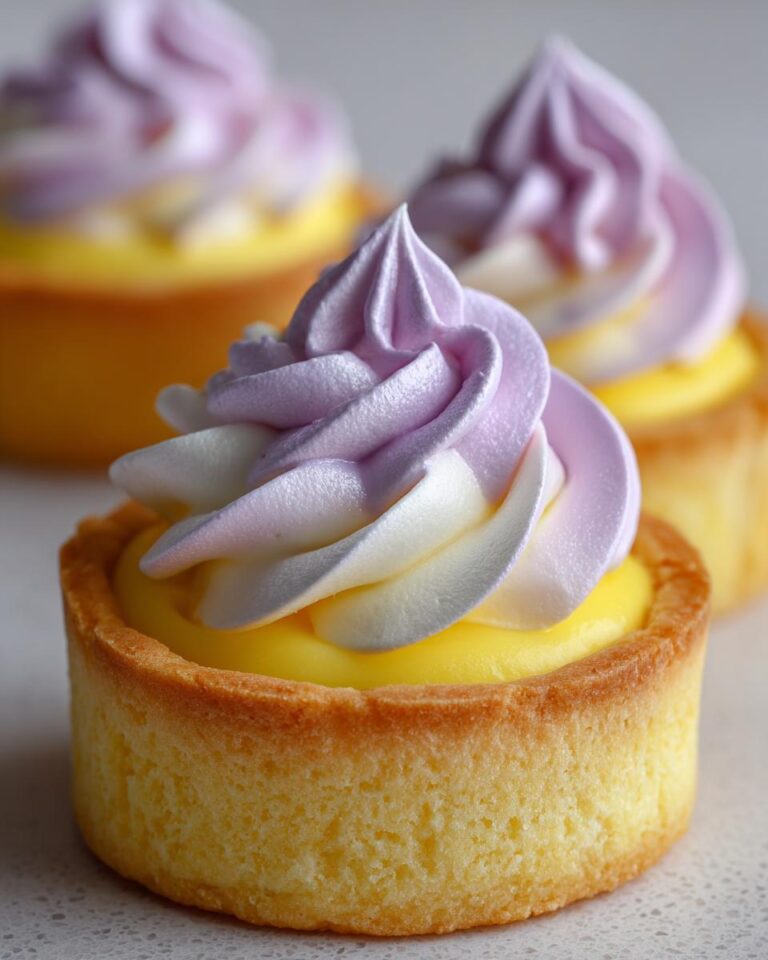
Delicate mini lemon tarts topped with a beautiful lilac meringue.
Ingredients
- 1 package of pre-made mini tart shells
- 1 cup lemon curd
- 3 egg whites
- 1/2 cup granulated sugar
- 1/4 tsp cream of tartar
- Purple food coloring (optional)
Instructions
- Preheat your oven to 350°F (175°C).
- Fill each tart shell with lemon curd.
- In a clean bowl, beat egg whites and cream of tartar until soft peaks form.
- Gradually add sugar, beating until stiff, glossy peaks form.
- Add purple food coloring, if desired, and mix gently.
- Spoon meringue onto lemon curd.
- Bake for 8-10 minutes, or until meringue is lightly browned.
- Let cool before serving.
Notes
- You can make your own lemon curd.
- Adjust the sweetness of the meringue to your taste.
- Store leftover tarts in the refrigerator.
- Prep Time: 20 minutes
- Cook Time: 10 minutes
- Category: Dessert
- Method: Baking
- Cuisine: French

 7")


 10")
 11")