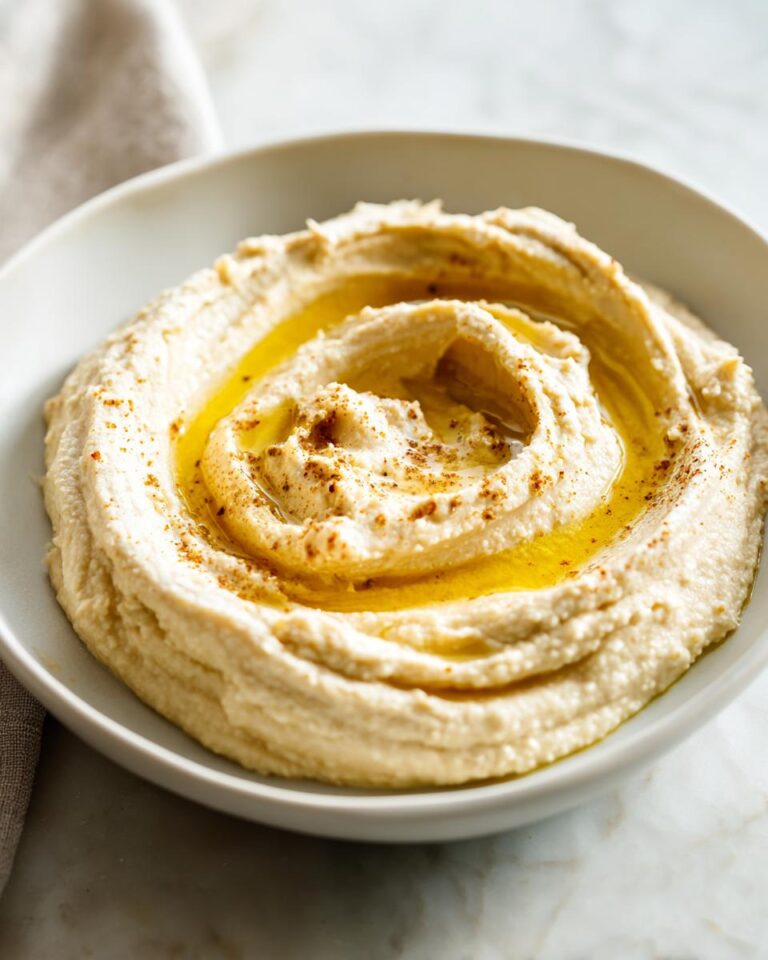
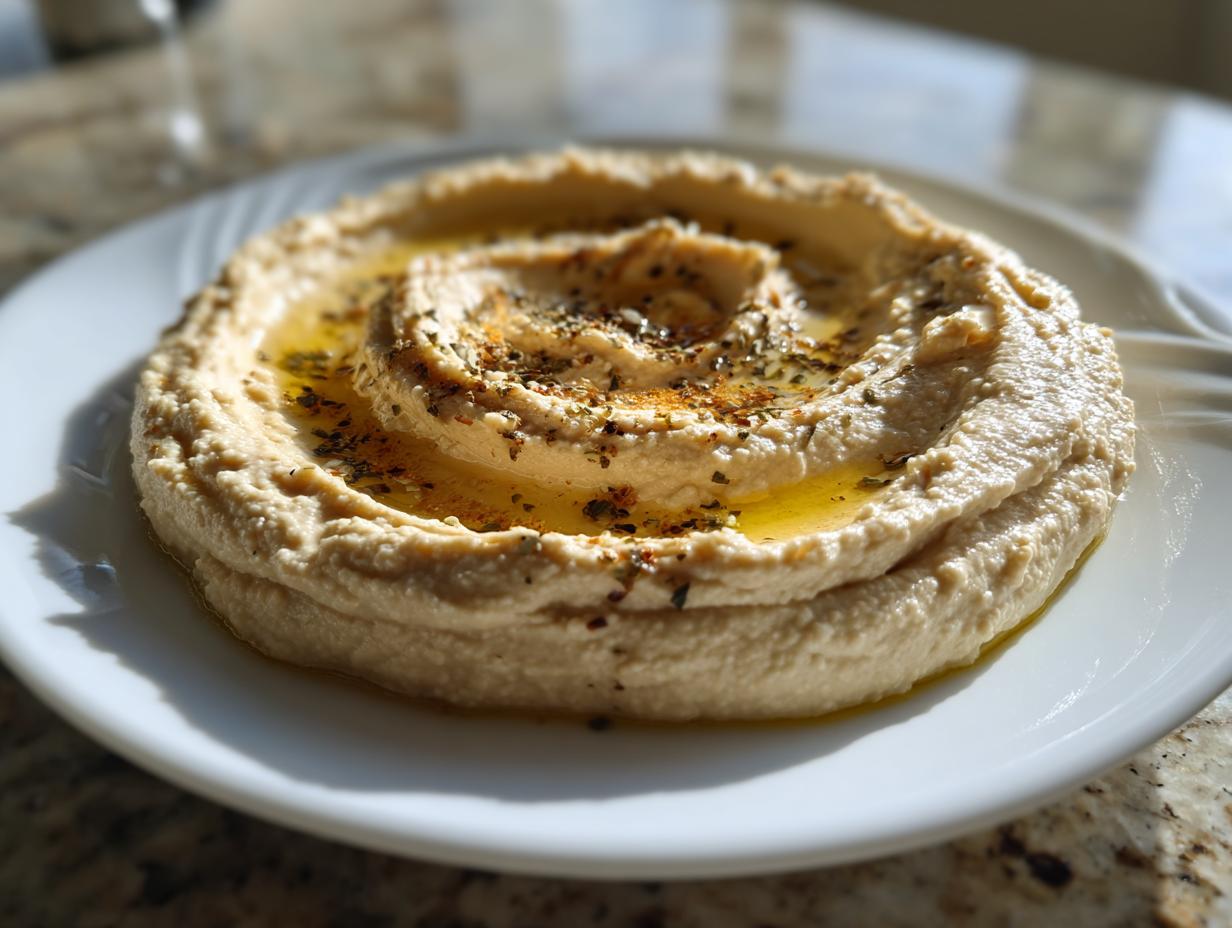
Okay, friends, let me tell you about the best thing ever: my roasted garlic hummus recipe smooth oil! Seriously, this stuff is a game-changer. I’ve been making hummus for years – it’s practically a staple in my house. I’m talking about the kind of hummus that makes you close your eyes and savor every single bite. It’s creamy, it’s garlicky, and it’s so incredibly easy to make. Plus, it’s a fantastic, healthy snack or appetizer that everyone can enjoy, because hey, it’s totally vegan!
I’m going to walk you through my tried-and-true method, from roasting the garlic to getting that perfect, silky smooth texture. We’ll cover everything: the ingredients you need, step-by-step instructions (don’t worry, it’s super simple), and all my little secrets for taking this hummus from good to absolutely amazing. Get ready to ditch the store-bought stuff forever!
Ingredients for Your *Roasted Garlic Hummus Recipe Smooth Oil*
Alright, let’s talk ingredients! You won’t believe how simple this roasted garlic hummus recipe smooth oil is, which is part of the magic. I’m a stickler for using the best stuff, so let’s get specific. You’ll want to grab a good head of garlic, some awesome olive oil (trust me, it makes a difference!), and all the other goodies. Don’t worry, the list is short and sweet.
Detailed Ingredient List
Garlic
1 head of garlic – Yep, a whole head! Don’t skimp on the garlic; that’s where all the flavor comes from.
Olive Oil
2 tablespoons of olive oil, good quality – I like a nice extra virgin olive oil for that lovely fruity flavor. Don’t go cheap on this one!
Chickpeas
1 (15-ounce) can chickpeas, rinsed and drained – I usually go for canned to save time. Make sure you rinse them REALLY well to get rid of that canned taste.
Tahini
1/4 cup tahini, good quality – This stuff is key for that creamy texture. Find a tahini you love; it makes a HUGE difference. I’m talking about a good, smooth one.
Lemon Juice
1/4 cup fresh lemon juice – Freshly squeezed, please! None of that bottled stuff. It brightens up the whole dish.
Water
2-3 tablespoons water, or as needed – This helps get that perfect, smooth consistency. Start with a little and add more if you need it.
Salt
1/2 teaspoon salt, or to taste – Season to your liking! You might need a little more or less, depending on how salty you like things.
Ground Cumin
1/4 teaspoon ground cumin – Just a touch! It adds a warm, earthy flavor that complements the garlic beautifully.
Step-by-Step Instructions: How to Make the Perfect *Roasted Garlic Hummus Recipe Smooth Oil*
Okay, now for the fun part: actually making this amazing roasted garlic hummus recipe smooth oil! Trust me, it’s easier than you think. You’ll be amazed at how simple it is to whip up something so incredibly delicious. Let’s get started!
Roasting the Garlic: The Flavor Foundation
Preparing the Garlic
First up, we gotta roast that garlic! Preheat your oven to 400°F (200°C). Then, grab your head of garlic and, with a sharp knife, slice off the very top, just enough to expose the cloves. Drizzle the top with about a teaspoon of that good quality olive oil – we want those cloves to get nice and caramelized! Next, wrap the whole head in aluminum foil and seal it up tightly. This is key to trapping all those amazing flavors.
Roasting Process
Pop that foil-wrapped garlic into the preheated oven. Now, here’s the important part: let it roast for about 45-60 minutes. You’ll know it’s done when the garlic is super soft and you can easily squeeze the cloves. The smell will be incredible, trust me! This roasting step is what gives the hummus that deep, amazing flavor. Don’t rush it; letting the garlic get soft is crucial!
Blending the *Roasted Garlic Hummus*
Cooling and Squeezing
Once the garlic is roasted, take it out of the oven and let it cool down a bit. Be careful; it’ll still be hot! Once it’s cool enough to handle, unwrap the foil. Now, here’s where the magic happens: squeeze those roasted garlic cloves right into your food processor. You should be able to get them all out easily – they’ll be soft and almost like a paste.
Adding Ingredients and Blending
Now, add the rest of the ingredients into the food processor, in this order: the drained chickpeas, your tahini, the fresh lemon juice, start with about 2 tablespoons of water (you can always add more!), the salt, and the cumin. Now, get that food processor going! Process everything until it’s super smooth. You might need to scrape down the sides a few times to get everything incorporated. Don’t worry if it looks a little thick at first; that’s where the water comes in.
Taste and Adjust
Once it looks smooth, stop the processor, and give it a taste! This is where you can really make it your own. Does it need more salt? Add some! Is it too thick? Add a little more water, a tablespoon at a time, until you get the perfect creamy consistency. You might want a little more lemon juice, too. That’s the beauty of making hummus from scratch – you can adjust it to your perfect taste!
Why You’ll Love This *Roasted Garlic Hummus Recipe Smooth Oil*
Honestly, you’re going to be obsessed with this roasted garlic hummus recipe smooth oil. It’s the best! Here’s why you’ll find yourself making it every week:
Key Benefits
Unforgettable Flavor
That roasted garlic? It’s pure magic! It gives this hummus a depth of flavor you just can’t get from the store-bought stuff. It’s savory, slightly sweet, and totally addictive.
Simple & Easy
Seriously, this recipe is a breeze! From start to finish, you can have a batch of fresh, homemade hummus ready in about an hour (and most of that is hands-off roasting time!).
Healthy & Nutritious
Chickpeas, tahini, olive oil… this stuff is packed with good-for-you ingredients! It’s a great source of protein and fiber, and it’s perfect for a healthy snack or light meal.
Versatile
Serve it with pita bread, veggies, use it as a dip, a spread… the possibilities are endless! It’s great for meal prepping too – I always make a big batch on Sundays.
Tips for Achieving Ultra-Smooth *Roasted Garlic Hummus*
Okay, so you want that hummus to be like, unbelievably smooth, right? I get it! The texture is a HUGE part of what makes this roasted garlic hummus recipe smooth oil so irresistible. Here are a few tricks I’ve learned over the years to get that perfect, silky consistency. Trust me, it’s worth it!
Chickpea Prep for the Smoothest Texture
This is a game-changer! For the smoothest hummus ever, consider peeling your chickpeas. Yeah, I know it sounds like a pain, but trust me, it’s worth the extra effort! Take each chickpea and pinch it gently; the skins will slip right off. It’s a bit tedious, but it makes a massive difference in the final texture. You can also try using a high-speed blender, which can help break down the skins more effectively.
The Importance of High-Quality Tahini
Listen, tahini is the star of the show here. Don’t skimp! Get a good quality tahini, preferably one that’s made from hulled sesame seeds. It should be smooth, creamy, and have a rich, nutty flavor. If your tahini is gritty or bitter, your hummus will be too. I usually look for brands that have a nice, pourable consistency – it should be the same texture as melted peanut butter. Give it a good stir before using, as the oil can separate.
Blending Techniques for Optimal Smoothness
The blending process is key! Don’t rush it. Let your food processor run for a good amount of time, scraping down the sides as needed. Adding the water slowly, a tablespoon at a time, is essential for achieving the perfect consistency. And if you’re still not getting the smoothness you want, try blending for a few extra minutes. Sometimes, a little extra time is all you need to get that dreamy, velvety texture.
Serving Suggestions for Your Delicious *Hummus from Scratch*
Okay, now for the fun part: serving! This hummus from scratch is so versatile, you can serve it in a million different ways. Whether you’re planning a party or just want a quick snack, it’s always a hit. The best part? It’s all about what YOU like!
Classic Pairings
You can’t go wrong with the classics! Think warm pita bread, fresh veggies like carrots, celery, cucumbers, and bell peppers. A drizzle of extra virgin olive oil and a sprinkle of paprika on top is a must, too. Don’t forget some olives and maybe a little feta cheese if you like!
Creative Serving Ideas
Want to get fancy? Spread it on sandwiches, use it as a dip for falafel, or even thin it out with a little extra water and use it as a salad dressing! I love topping it with roasted vegetables, a sprinkle of fresh herbs, or even some spicy chili flakes. Get creative!
Variations: Spice Up Your *Vegan Recipes* with These Ideas
Once you’ve mastered this vegan recipe for roasted garlic hummus, get ready to experiment! This recipe is a fantastic base, which means you can easily customize it to your liking. Seriously, the possibilities are endless! It’s fun to play around with different flavors and make each batch unique.
Flavor Variations
Want to switch things up? Try adding a pinch of red pepper flakes for a little heat or some sun-dried tomatoes for a sweet and savory twist. You could also swap the cumin for other spices like smoked paprika or za’atar. Yum!
Add-Ins
Toppings are where the fun is! I love adding a swirl of pesto to my hummus, or maybe some toasted pine nuts. A sprinkle of fresh parsley or chopped cilantro is always a good idea, too. Get creative and have fun!
Storage & Reheating Instructions for *Healthy Dips*
So, you’ve got some leftover healthy dips? Awesome! This roasted garlic hummus recipe smooth oil actually keeps really well, which is great because you’ll probably want to eat it all the time. Here’s how to store and reheat your delicious creation.
Storage Guidelines
Store your hummus in an airtight container in the refrigerator. It should last for about 5-7 days. Make sure to use a clean spoon or utensil to scoop it out each time to keep it fresh! Easy peasy.
Reheating Methods
You can eat hummus cold, straight from the fridge! But if you want to bring it back to that creamy texture, you can either microwave it in short bursts (stirring in between) or let it sit out at room temperature for about 30 minutes. If it seems a little thick, add a tiny bit of water and give it a stir.
Nutritional Information
Okay, here’s the deal with the nutrition stuff: the values I’m giving you are estimates, because, hey, ingredients and brands vary! I’m using standard estimates based on the ingredients and serving sizes. So, you’ll get a general idea, but don’t take it as gospel. Just a heads up!
Frequently Asked Questions About *Roasted Garlic Hummus Recipe Smooth Oil*
Got questions? I’ve got answers! I get asked these all the time, so I figured I’d put them here to help you out. Making roasted garlic hummus recipe smooth oil is easy, but sometimes you just want a little extra guidance. Here are some of the most common questions I hear when people try my recipe.
Can I use dried chickpeas?
Yes, absolutely! You can totally use dried chickpeas for this hummus from scratch, and the flavor is amazing! You’ll need to soak them overnight (or for at least 8 hours) in cold water, with a teaspoon of baking soda. Then, drain the chickpeas and cook them until they’re super tender. It usually takes about an hour in boiling water, or you can use a pressure cooker to speed things up. The key is to get them REALLY soft! I still recommend peeling them for maximum smoothness, but it’s up to you.
What kind of tahini should I use?
High-quality tahini is KEY! This is one of the most important things for making a truly delicious hummus from scratch. Look for a tahini that’s made from 100% sesame seeds, with no added ingredients (besides maybe a little salt). It should be a pale color and have a smooth, pourable consistency. I usually go for tahini that’s labeled as “hulled,” as it tends to be less bitter. Give the tahini a good stir before using, because the oil separates. Trust me, finding a tahini you love is worth the search!
How long will this hummus last in the refrigerator?
This healthy dip will last for about 5-7 days in the refrigerator, stored in an airtight container. Make sure to use a clean spoon to scoop it out each time to keep it fresh. After a few days, the hummus might thicken up a bit, but you can easily bring it back to life by stirring in a little water or olive oil until you get that creamy texture you love.
Can I freeze hummus?
Yep! You can absolutely freeze this roasted garlic hummus recipe smooth oil. Just transfer it to an airtight container or freezer bag, leaving a little room at the top for expansion. It’ll keep in the freezer for about 2-3 months. To thaw, move it to the refrigerator overnight. You might need to give it a good stir and add a little extra olive oil or water to get that perfect smooth texture back. It might change the texture a little, but it’s still delicious!
What can I serve with hummus?
The sky’s the limit! Seriously! You can serve this hummus from scratch with warm pita bread, fresh veggies like carrots, celery, cucumbers, and bell peppers. You can also use it as a dip for falafel, spread it on sandwiches, or even thin it out with a little extra water and use it as a salad dressing. I love topping it with roasted vegetables, a sprinkle of fresh herbs, or even some spicy chili flakes. It’s so versatile!
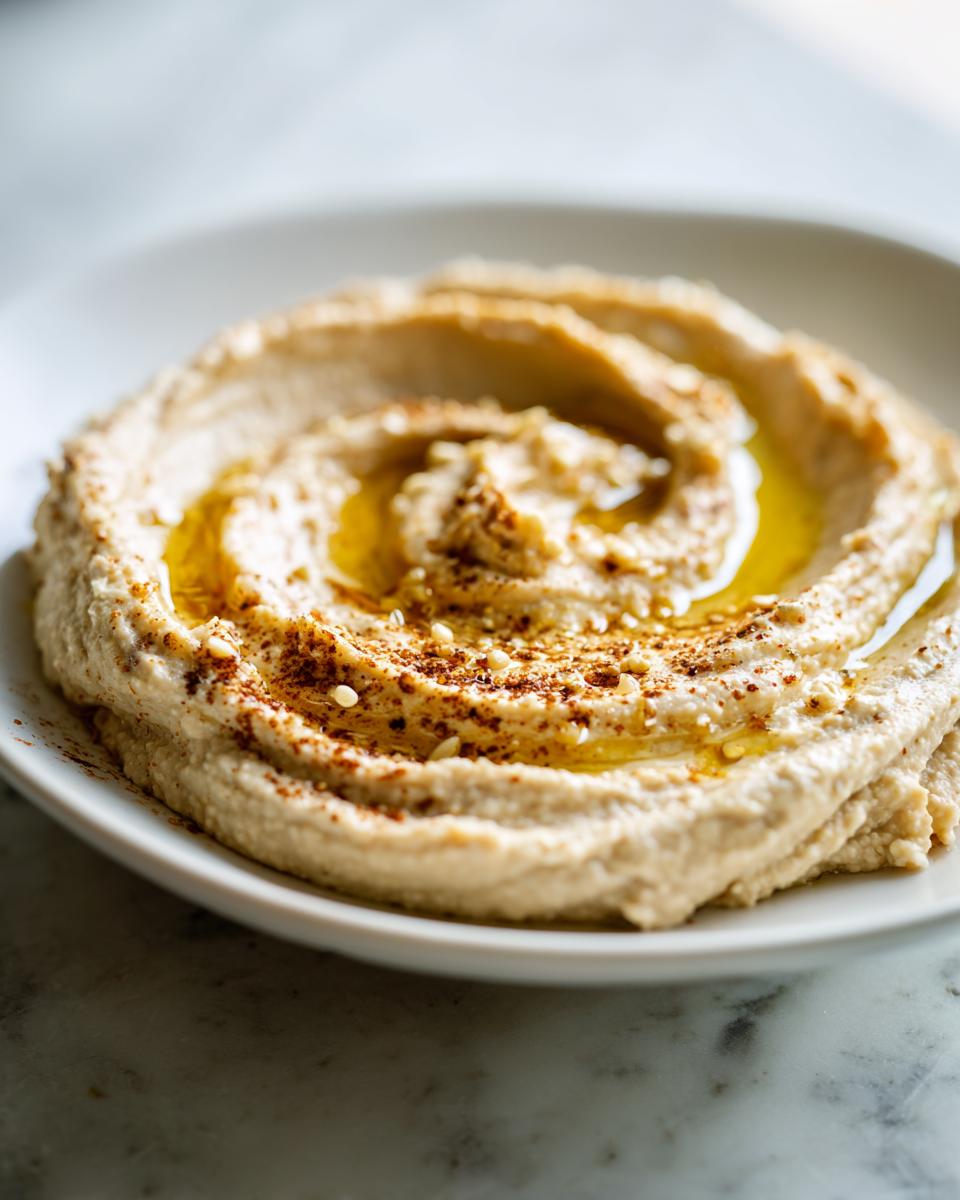
For more delicious recipes and inspiration, check out Recipes Best Of on Pinterest!
Print
1 Head: The Best Roasted Garlic Hummus Recipe!
- Total Time: 1 hour 15 minutes
- Yield: 4 servings
- Diet: Vegan
Description
Make delicious roasted garlic hummus from scratch. It is smooth and flavorful.
Ingredients
- 1 head of garlic
- 2 tablespoons olive oil
- 1 (15-ounce) can chickpeas, rinsed and drained
- 1/4 cup tahini
- 1/4 cup lemon juice
- 2-3 tablespoons water
- 1/2 teaspoon salt
- 1/4 teaspoon ground cumin
Instructions
- Preheat oven to 400°F (200°C).
- Cut the top off the garlic head. Drizzle with olive oil. Wrap in foil.
- Roast for 45-60 minutes, until softened.
- Let cool. Squeeze garlic cloves into a food processor.
- Add chickpeas, tahini, lemon juice, water, salt, and cumin.
- Process until smooth, adding more water if needed.
- Taste and adjust seasonings.
Notes
- For extra smooth hummus, peel the chickpeas.
- Use good quality tahini.
- Serve with pita bread and vegetables.
- Prep Time: 15 minutes
- Cook Time: 60 minutes
- Category: Dips & Spreads
- Method: Roasting & Blending
- Cuisine: Mediterranean