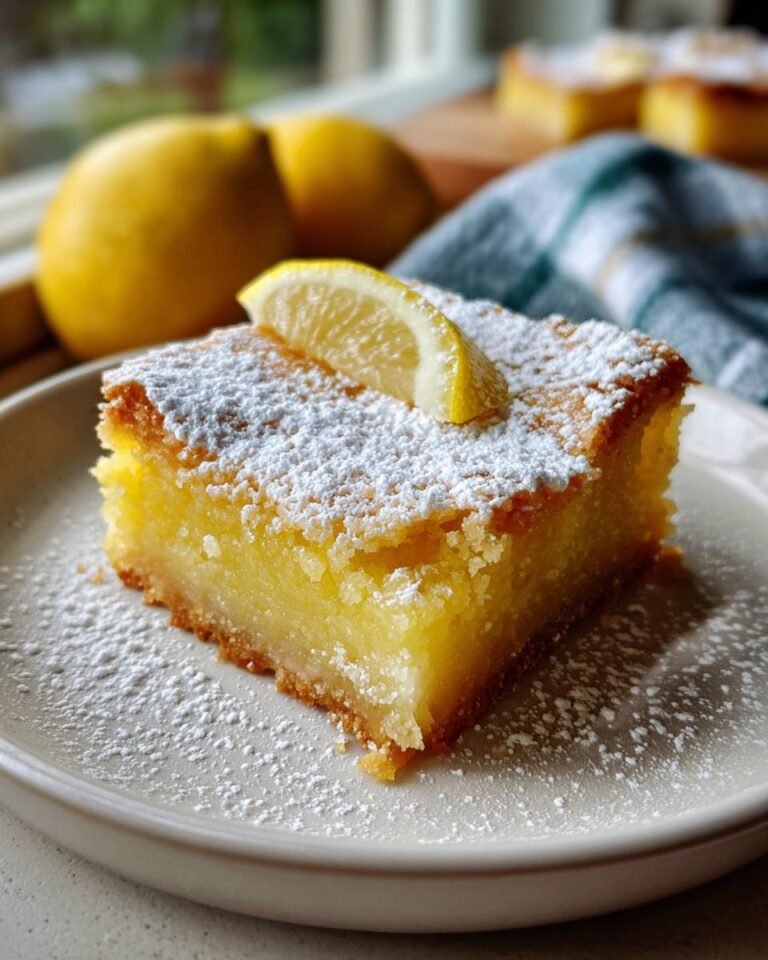
Oh my goodness, you guys, get ready to fall in love! We’re talking about **Classic Lemon Bars**, the kind of dessert that’s been a star on dessert tables for, like, forever. Seriously, these little squares of sunshine are timeless. They’re that perfect balance of sweet and tangy that just makes you go “Mmm!” with every single bite.
And the best part? They’re ridiculously easy to make. I mean, we’re talking a total breeze, even if you’re not a pro baker. I actually got my love for these from my Aunt Carol. She always made them for every family gathering. Her secret? Super fresh lemons and a whole lotta love! Now, I make them for my own family, and it’s like a little piece of her is still with us. These **homemade lemon bars** are more than just a recipe; they’re a warm memory, a taste of happiness, and a guaranteed crowd-pleaser. So, grab your apron, and let’s get baking! You’re going to love these **tangy lemon dessert bars**, I just know it!
Classic Lemon Bars: Why You’ll Love This Recipe
Okay, so you’re probably wondering, “Why should *I* make these **Classic Lemon Bars**?” Well, let me tell you! They’re seriously amazing, and here’s why you’ll be hooked from the first bite:
- Quick and Easy to Make: Seriously, these babies come together in a flash! Prep time is minimal, and the baking is a breeze. Perfect for when you need a dessert NOW!
- Perfectly Balanced Flavor Profile: That zesty lemon filling is a dream! It’s sweet, but with that perfect, tangy kick that keeps you coming back for more. It’s the best of both worlds!
- A Crowd-Pleasing Dessert: Seriously, these always disappear fast! They’re great for potlucks, parties, or just a sweet treat after dinner. Everyone loves them!
Trust me, these **easy lemon shortbread bars** are a winner, every single time.
Ingredients You’ll Need for Classic Lemon Bars
Alright, let’s get down to business! You don’t need a ton of fancy stuff to make these beauties. Here’s what you’ll need to gather up before you get started. Make sure you have the right stuff, okay? Trust me, it makes a difference!
- 1 1/4 cups all-purpose flour – regular old flour is perfect!
- 1/2 cup powdered sugar – the stuff for the crust, and for dusting later!
- 1/2 cup (1 stick) unsalted butter, cold and cubed – cold is KEY for that perfect crust!
- 1/4 teaspoon salt – just a pinch to balance the sweetness.
- 4 large eggs – gotta have those eggs!
- 1 1/2 cups granulated sugar – for the sweet part of the filling.
- 1/4 cup lemon juice – fresh is best, but we’ll talk about that later.
- 1 tablespoon lemon zest – that bright yellow stuff from the lemon skin!
- 1/4 cup all-purpose flour – more flour for the filling!
- Powdered sugar for dusting – for that pretty finishing touch!
See? Nothing too crazy, right? Now let’s get on with it!
Equipment List
Okay, so before we get started, here’s what you’ll need to have handy. No fancy gadgets required, promise!
- 9×13 inch baking pan – this is the star of the show!
- Mixing bowls – a few different sizes are helpful.
- Measuring cups and spoons – accuracy is key!
- Whisk – for whisking the filling to perfection!
That’s it! Easy peasy, right?
How to Make Homemade Lemon Bars: Step-by-Step Instructions
Alright, friends, let’s get those **Classic Lemon Bars** going! I’m going to walk you through it, step by step, so even if you’ve never baked before, you’ve got this. Seriously, it’s easier than you think. Just follow along, and you’ll be munching on these **tangy lemon dessert bars** in no time!
Preparing the Shortbread Crust
First up: the crust! It’s super simple. Grab a bowl and whisk together your flour, powdered sugar, and salt. Now, here’s the fun part: take your cold, cubed butter and cut it into the flour mixture. I usually use a pastry blender (you know, that thing with the curved wires?) but you can use your fingers or two knives if you don’t have one. You want the mixture to look like coarse crumbs. Don’t worry if it’s not perfect! Then, just press that crumbly mixture evenly into the bottom of your 9×13 inch pan. Easy, right?
Tips for a Perfect Crust
The key to a perfect crust? Cold butter, cold butter, cold butter! Seriously, it makes all the difference. Also, I like to pop the unbaked crust into the fridge for about 15 minutes while the oven preheats. Gives it a little chill and helps it set up nicely when baking. Don’t skip that step!
Making the Tangy Lemon Filling
Okay, crust done? Great! Now, let’s make that amazing lemon filling. In a separate bowl, whisk together your eggs, granulated sugar, lemon juice, lemon zest, and flour. Whisk, whisk, whisk until it’s all nice and smooth. It should be a beautiful, pale yellow color. Seriously, it’s almost a shame to bake it because it looks so good!
Getting the Right Lemon Zest
Now, about that lemon zest: you want the bright yellow part of the lemon skin only. That white stuff underneath? That’s the pith, and it’s bitter. Trust me, you don’t want that! I like to use a microplane zester – it makes the zest super fine. But a regular grater works too, just be careful not to grate too deep. Careful, it splatters!
Baking and Cooling Your Classic Lemon Bars
Alright, you’ve got your crust, you’ve got your filling, it’s time to put it all together! Pour the lemon filling evenly over the hot, pre-baked crust. Now, pop that pan into your preheated oven (350°F/175°C) and bake for about 20-25 minutes. You’ll know it’s done when the filling is set but still has a slight jiggle in the center. Don’t overbake, or they’ll be dry!
Here’s the hardest part: let the bars cool COMPLETELY before you cut them. I know, I know, it’s torture. But trust me, you’ll get nice, clean cuts if you’re patient. Once they’re cool, dust them with powdered sugar and cut them into squares. And then… enjoy! You’ve officially made some amazing **easy lemon shortbread bars**!

Ingredient Notes and Substitutions for Tangy Lemon Dessert Bars
Okay, so let’s talk ingredients! Sometimes you might be missing something, or maybe you just want to try something a little different. Don’t worry, we can totally work with that! Here are a few swaps and notes to help you make the best **tangy lemon dessert bars**, even if you’re missing something.
Butter Substitutions
Listen, butter is king in this recipe, but I get it, sometimes you run out! You can totally use a good quality unsalted margarine as a substitute. Just make sure it’s the kind that comes in a stick, like butter. You can also use shortening, but your crust might be a little less flavorful. I’d stick with butter or margarine if you can!
Flour Options
All-purpose flour is the classic, but if you’re feeling adventurous or have a dietary restriction, you’ve got options! You can try using a gluten-free all-purpose flour blend for the crust and filling. Just make sure it’s a blend that works well for baking. For a slightly different flavor, try pastry flour, which will give a more tender crumb. You can also use whole wheat flour, but your crust will be a bit more dense.
Lemon Juice Alternatives
Fresh lemon juice is *always* best, but if you’re in a pinch, bottled lemon juice will work. Just make sure it’s 100% lemon juice, not something with added sugar. You could even use lime juice for a fun twist! Be careful, though, because lime juice can be a little more tart, so you might want to adjust the sugar in the filling to taste. Don’t worry, it’ll still be delicious!
Tips for Success: Achieving the Best Easy Lemon Shortbread Bars
Alright, friends, let’s make sure these **easy lemon shortbread bars** turn out absolutely PERFECT! I’ve learned a few things along the way, so here are my top tips for success. Follow these, and you’ll be a lemon bar master in no time! Trust me, these little tricks make all the difference between a good lemon bar and a *great* one!
Preventing a Soggy Crust
Nobody wants a soggy bottom! The key here is to make sure your crust is fully baked before you pour in that filling. Also, let the bars cool *completely* before cutting. Seriously, I know it’s hard to wait, but it’s worth it for a nice, crisp crust. Also, don’t forget to chill the crust before baking! That helps too!
Achieving the Perfect Tang
The tang is what makes these **Classic Lemon Bars** so amazing! If you like a super-tart lemon flavor, use fresh lemon juice! You can also add a little extra zest for a brighter, more lemony punch. Taste your filling before baking, and adjust the lemon juice to your preference. Remember, you can always add more, but you can’t take it away!
Variations: Spice Up Your Classic Lemon Bars
Okay, so you’ve made the **Classic Lemon Bars**, and they’re amazing. But, you know, sometimes you just want to shake things up a little! That’s where variations come in! My favorite thing to do? Add a little extra zest! Try swapping out some of the lemon zest for lime or even orange zest. It gives a whole new dimension of flavor!
You can also add a tiny pinch of cardamom or a drop of vanilla extract to the filling. Cinnamon is also amazing. Don’t be afraid to experiment, friends! That’s the fun of baking! Just remember to keep the lemon flavor as the star of the show. Have fun!
Storage and Reheating Instructions for Classic Lemon Bars
So, you’ve got a whole pan of these amazing **Classic Lemon Bars**? Lucky you! But what do you do with the leftovers? Don’t worry, they last a little while, but you gotta store them right! You can keep them at room temperature for a couple of days, just make sure they’re in an airtight container. That’ll keep them nice and fresh!
If you want them to last longer, pop them in the fridge! They’ll stay good for up to a week. If you want to reheat them, you can, but I usually just eat them cold. They’re delicious either way! Microwaving them for a few seconds might bring back the fresh-baked feeling. Enjoy!

Estimated Nutritional Information for Classic Lemon Bars
Alright, so you’re probably wondering about the nitty-gritty, right? I know I always am! I’ve done my best to estimate the nutritional info for these **Classic Lemon Bars**, but remember, it’s just an estimate! It can change a little bit depending on the exact ingredients you use and how you cut your bars. But hey, it’ll give you a good idea!
So, based on this recipe, here’s what you can generally expect per serving (that’s one bar!):
- Calories: Around 180
- Sugar: About 20g (Yep, these are a treat!)
- Sodium: Roughly 30mg
- Fat: Around 9g (Gotta love that butter!)
- Saturated Fat: About 5g
- Unsaturated Fat: Around 3g
- Trans Fat: 0g
- Carbohydrates: About 24g
- Fiber: Around 1g
- Protein: About 2g
- Cholesterol: Around 45mg
Those numbers are approximate, of course! You can always use a nutrition calculator online and plug in the ingredients if you want to be super precise. But honestly, I just enjoy these **easy lemon shortbread bars** and don’t worry too much! Everything in moderation, right?
Frequently Asked Questions (FAQ) about Classic Lemon Bars
Okay, so you’ve got your **Classic Lemon Bars** all baked up, and you’re probably wondering a few things! Don’t worry, I’ve got you covered. Here are some of the most common questions I get about these **homemade lemon bars**, so you can be a lemon bar pro too!
Can I make these ahead of time? Absolutely! These **tangy lemon dessert bars** are actually even better the next day (if they last that long!). Just let them cool completely, cut them, and store them in an airtight container at room temperature. The flavors meld together beautifully overnight!
How do I store lemon bars? As I said before, room temperature is fine for a couple of days. But, if you want them to last longer (like, a whole week!), pop them in the fridge. Just make sure they’re in a container so they don’t dry out.
Why is my crust soggy? Oh no! That’s usually because the crust wasn’t baked long enough before you poured the filling in. Make sure the crust is golden brown before you add the filling. Also, let the bars cool completely before cutting. Patience, my friends, patience!
Can I freeze lemon bars? Yep! Wrap them tightly in plastic wrap and then put them in a freezer bag. They’ll last for a couple of months. Just let them thaw in the fridge before serving. Freezing is a great way to save the **easy lemon shortbread bars**!
Conclusion
So, there you have it, folks! My absolute favorite recipe for **Classic Lemon Bars**! I hope you love them as much as I do. Now that you’ve got this recipe in your arsenal, you’re ready to wow everyone with these **homemade lemon bars**. Seriously, these **tangy lemon dessert bars** are a guaranteed hit, whether you’re making them for a party, a potluck, or just a little treat for yourself (no judgment here!).
I seriously can’t wait to hear what you think of these **easy lemon shortbread bars**! Did you try any of the variations? Let me know in the comments below! And hey, if you loved this recipe, please give it a rating and share it with your friends and family! Sharing is caring, right? Happy baking, everyone!
For more delicious recipes and baking tips, check out Recipes Best Of.
Print
Unforgettable Classic Lemon Bars: 1 Recipe to Love
- Total Time: 1 hour
- Yield: 24 bars
- Diet: Vegetarian
Description
Delicious and easy-to-make classic lemon bars.
Ingredients
- 1 1/4 cups all-purpose flour
- 1/2 cup powdered sugar
- 1/2 cup (1 stick) unsalted butter, cold and cubed
- 1/4 teaspoon salt
- 4 large eggs
- 1 1/2 cups granulated sugar
- 1/4 cup lemon juice
- 1 tablespoon lemon zest
- 1/4 cup all-purpose flour
- Powdered sugar for dusting
Instructions
- Preheat oven to 350°F (175°C).
- Make the crust: Whisk together flour, powdered sugar, and salt. Cut in cold butter until crumbly. Press into a 9×13 inch pan.
- Bake crust for 15-20 minutes.
- Make the filling: Whisk eggs, sugar, lemon juice, zest, and flour.
- Pour filling over the hot crust.
- Bake for 20-25 minutes.
- Let cool completely.
- Dust with powdered sugar.
- Cut into bars and serve.
Notes
- Ensure butter is cold for the crust.
- Cool bars completely before cutting.
- Adjust lemon juice to your preference.
- Prep Time: 20 minutes
- Cook Time: 40 minutes
- Category: Dessert
- Method: Baking
- Cuisine: American


