Oh my goodness, you guys, do I have a treat for you! I’m absolutely obsessed with cherry desserts. Seriously, from cherry pie to cherry cobbler, I’ve tried them all. And let me tell you, there’s just something about that sweet and tart cherry flavor that gets me every single time. One summer, I spent weeks perfecting my grandma’s cherry pie recipe. It was a labor of love, let me tell you, but the taste… Chef’s kiss!
But sometimes, you just don’t have all day to spend in the kitchen, you know? That’s where these *Easy Cherry Pie Bars* come in. They are seriously the easiest dessert you will ever make, I promise! They’re perfect for potlucks, picnics, or even just a little something sweet after dinner. You only need a handful of ingredients, and the results are simply divine. These bars are a total crowd-pleaser, I’m not even kidding. So if you’re looking for a quick, delicious, and super simple dessert, then you’ve come to the right place. Trust me, you’re going to love these!
Ingredients for Delicious Easy Cherry Pie Bars
Okay, so listen up, because the ingredient list is short and sweet. You probably already have most of these in your pantry, which is always a bonus! I’m a stickler for clear instructions, so you’ll know exactly what you need. No guessing games here!
Ingredient List Breakdown
- 1 box yellow cake mix
- 1/2 cup unsalted butter, melted
- 1 large egg
- 1 (21 ounce) can cherry pie filling
Step-by-Step Instructions to Make Easy Cherry Pie Bars
Alright, let’s get down to the good stuff! Making these *Easy Cherry Pie Bars* is seriously a breeze. Even if you’re not a baking pro, I promise you can handle this. Just follow along, and you’ll be enjoying these bars in no time. I always say, the easier the recipe, the better, right?
Preparing the Crust for Your Easy Cherry Pie Bars
First things first, let’s get that oven preheated to 350°F (175°C). Don’t skip this step, because it’s super important to get the bars baked evenly. While the oven is warming up, grab a 9×13 inch pan. I like to grease it really well, or you can use cooking spray. You don’t want those bars sticking, trust me! You can also line the pan with parchment paper, leaving some overhang. This makes it even easier to lift the bars out later.
Next, in a bowl, you’re going to mix the cake mix, melted butter, and egg. I usually use a fork, but you can use a whisk if you want. Mix until it’s all nice and crumbly. Now, take half of that mixture and press it firmly into the bottom of your prepared pan. Make sure it’s evenly spread out, so you have a nice, solid crust. Don’t worry if it’s not perfect; it doesn’t have to be!
Assembling the Easy Cherry Pie Bars
Okay, now for the fun part: the layers! Once you’ve got your crust ready, it’s time for the cherry pie filling. Just open up that can and spread it evenly over the crust. Try to get it all the way to the edges. You want every bite to be bursting with that cherry goodness! Now, take the remaining cake mix and sprinkle it evenly over the cherry pie filling. Don’t press it down – just let it sit on top in little clumps. It’ll create a nice, crumbly topping.
Baking and Cooling Your Easy Cherry Pie Bars
Pop that pan into your preheated oven and let it bake for about 30-35 minutes. You’ll know they’re done when the topping is golden brown and the filling is bubbly. Keep an eye on them, because ovens can vary! You don’t want to burn them. Take them out of the oven and let them cool completely in the pan. I know, I know, it’s the hardest part, because they smell AMAZING! But trust me, letting them cool is super important. It allows the filling to set and makes it easier to cut into nice, neat squares.
Once they’re completely cool, you can cut them into squares or bars. I usually get about 12 servings out of a pan, but you can make them bigger or smaller if you like. And that’s it! You’ve officially made *Easy Cherry Pie Bars*! Now, go on and enjoy!
Why You’ll Love These Easy Cherry Pie Bars
Honestly, what’s not to love, right? These *Easy Cherry Pie Bars* are just the best! Here’s why you’re going to be obsessed, just like me:
- They’re super quick to make. Seriously, you can whip these up in under an hour!
- The recipe is so easy, even a beginner baker can nail it.
- That cherry flavor is just to die for! Sweet, tart, and totally irresistible.
- They’re perfect for any occasion – potlucks, parties, or just a Tuesday night treat.
- These bars are a total crowd-pleaser. Everyone always asks for the recipe!
Trust me, once you try these, you’ll be making them all the time. They’re just that good!
Tips for Easy Cherry Pie Bars Success
Okay, so you want to make these *Easy Cherry Pie Bars* absolutely perfect, right? I got you! I’ve made these bars more times than I can count, so I’ve picked up a few tricks along the way. These tips will help you make sure your bars come out perfectly every single time. Trust me, it’s all about a little extra care and attention to detail. You’ll be a cherry pie bar pro in no time!
Cake Mix Variations for Your Easy Cherry Pie Bars
One of my favorite things about this recipe is how versatile it is! You can totally switch up the cake mix flavor to create all sorts of delicious variations. Yellow cake mix is classic, of course, and it’s always a winner. But don’t be afraid to experiment! Chocolate cake mix with cherry filling is a match made in heaven, I tell you. Vanilla cake mix is another great option, or even a spice cake mix for a warm, cozy vibe. Just be aware that different cake mixes will affect the final flavor, so choose a flavor that you think will complement the cherry filling. Ooh, a lemon cake mix would be amazing too!
Preventing Sticking and Ensuring Perfect Easy Cherry Pie Bars
Nobody wants a sticky, messy situation, right? So, let’s talk about preventing those *Easy Cherry Pie Bars* from sticking to the pan. I always grease my pan really well. I’m talking every nook and cranny! You can use butter, shortening, or cooking spray. Make sure you get the sides and corners, too. Alternatively, you can line your pan with parchment paper. That way, you can just lift the whole thing out after it’s cooled, and no sticking is even possible! Also, letting the bars cool completely is key. I know it’s hard to wait, but it makes all the difference in getting those perfect, clean cuts. Patience, my friends, patience!
Easy Cherry Pie Bars Variations
Okay, so you’ve got the basic recipe down, and you’re ready to get creative? Awesome! These *Easy Cherry Pie Bars* are so easy to customize. It’s like a blank canvas just waiting for your personal touch! Don’t be afraid to experiment and have some fun with it. You might just stumble upon your new favorite dessert. I always say, baking should be fun, so let your imagination run wild!
Adding Flavor with Extracts to Your Easy Cherry Pie Bars
Want to amp up the flavor even more? Extracts are your secret weapon! A splash of almond extract with the cherry filling is absolutely divine. It really enhances that cherry flavor and adds a little something extra. I usually add about 1/2 teaspoon of almond extract. If you’re not a fan of almond, vanilla extract is another great option. It adds a warm, comforting vibe. I’d go with about a teaspoon of vanilla extract. Just add it to the batter when you mix it all up. Yum!
Nutty Additions for Easy Cherry Pie Bars
Nuts and cherry desserts are a match made in heaven, right? Adding some nuts to your *Easy Cherry Pie Bars* gives them a little extra crunch and texture. Chopped pecans or walnuts are my go-to choices. They both pair so well with the cherry flavor. You can sprinkle the nuts on top of the cherry pie filling before you add the crumble topping. Or, you can mix the nuts right into the crumble topping itself. Either way, you can’t go wrong. Just make sure the nuts are chopped, so you get a nice distribution throughout the bars.
Exploring Different Pie Fillings for Easy Cherry Pie Bars
Okay, so cherry is amazing, but what if you want to try something different? The great thing about this recipe is that you can totally swap out the cherry pie filling for other flavors! Think about it: blueberry, apple, peach, or even a mixed berry filling would be delicious. Just make sure you use a 21-ounce can of whatever filling you choose, so you get the right amount. Each filling will give you a totally different flavor profile, so get ready to try them all! I’m thinking a caramel apple version would be amazing!
Serving Suggestions for Easy Cherry Pie Bars
So, you’ve baked these amazing *Easy Cherry Pie Bars*! Now, how should you serve them? Well, let me tell you, the possibilities are endless! Honestly, they’re delicious all on their own, but if you want to take things up a notch, I have some ideas for you. A dollop of fresh whipped cream is always a classic, of course. Or, if you’re feeling fancy, a scoop of vanilla ice cream is pure heaven. You could even drizzle a little chocolate sauce on top. Oh my gosh, that sounds amazing! Whatever you do, enjoy!
Storage and Reheating Instructions for Easy Cherry Pie Bars
Okay, so you’ve got leftovers? Lucky you! These *Easy Cherry Pie Bars* are just as good the next day, if not better, because that cherry flavor really gets a chance to meld together. To store them, just pop them in an airtight container or cover the pan tightly with plastic wrap. You can keep them at room temperature for a couple of days, or in the fridge for up to a week. Honestly, they usually don’t last that long in my house, though!
If you want to reheat them, you can totally do that! Just pop a bar in the microwave for a few seconds until it’s warmed through. Or, if you want to be extra, you can warm them in the oven at a low temperature for a few minutes. This will help crisp up the topping a bit. Either way, they’ll be just as delicious as when you first made them! Yum!
Estimated Nutritional Information for Easy Cherry Pie Bars
Alright, so I know a lot of you are curious about the nutritional info, and I get it! I’m always curious too. Since I’m not a professional, and every single ingredient brand can be different, I can’t give you exact numbers, but I can give you a pretty good estimate. This is just a rough idea, okay?
A single bar is about 300 calories, with around 25g of sugar (yikes!). There’s about 12g of fat, 3g of protein, and 45g of carbs. Remember, this is just an estimate, and your numbers might vary a bit. But hey, it’s worth it, right?
Frequently Asked Questions About Easy Cherry Pie Bars
Okay, so I know you all are probably bursting with questions, and that’s totally cool! I get a lot of the same questions whenever I make these *Easy Cherry Pie Bars*, so I figured I’d address the most common ones right here. Hopefully, this will clear up any confusion and help you become a total *Easy Cherry Pie Bars* pro! Let’s dive in, shall we?
Can I use a different size pan for my Easy Cherry Pie Bars?
Absolutely! The recipe as written is for a 9×13 inch pan, but you can definitely use a different size. Just keep in mind that the baking time will change. If you use a smaller pan, like an 8×8 inch pan, the bars will be thicker, and you might need to bake them for a little longer, maybe 35-40 minutes. If you use a larger pan, like a 9×15 inch pan, the bars will be thinner, and you might need to reduce the baking time to about 25-30 minutes. Just keep an eye on them, and don’t be afraid to adjust the time as needed. You want that golden brown topping!
Can I make these Easy Cherry Pie Bars ahead of time?
You betcha! These *Easy Cherry Pie Bars* are actually a great make-ahead dessert. You can totally bake them a day or two in advance. Just let them cool completely, and then store them in an airtight container at room temperature. They’ll stay fresh and delicious for a couple of days. You can even freeze them! Just wrap them tightly in plastic wrap and then in foil, and they’ll last for a month or two. When you’re ready to eat them, just thaw them at room temperature. They’re perfect for parties, picnics, or anytime you want a sweet treat without the last-minute stress.
How do I know when my Easy Cherry Pie Bars are done?
This is a super important question! You want to make sure your *Easy Cherry Pie Bars* are baked just right, so they’re not too gooey or too dry. The best way to tell is to look for a few clues. First, the topping should be golden brown and bubbly. That’s a good sign that the cake mix is cooked. Second, the edges of the bars should be set. You don’t want them to look jiggly in the middle. Finally, you can do the toothpick test. Stick a toothpick into the center of the bars. If it comes out clean or with just a few moist crumbs, they’re done! If the toothpick comes out with wet batter, they need a little more time. But don’t overbake them, or they’ll be dry!
What if I don’t have yellow cake mix for my Easy Cherry Pie Bars?
No problem at all! You can totally use a different kind of cake mix. Like, seriously, the world is your oyster! Chocolate, vanilla, white, or even a funfetti cake mix would all work great! Just keep in mind that the flavor will change slightly depending on the cake mix you use. If you want a chocolatey flavor, use chocolate cake mix. If you want a vanilla flavor, use vanilla cake mix. You get the idea! You can even try using a gluten-free cake mix if you need to. The possibilities are endless! Just make sure the box of cake mix is about 15-16 ounces.
Let’s Get Baking!
So, what are you waiting for? Seriously, these *Easy Cherry Pie Bars* are calling your name! Grab those ingredients, preheat that oven, and get ready for a sweet treat that everyone will love. Don’t forget to come back and tell me how they turned out!
Follow us on Pinterest for more delicious recipes!


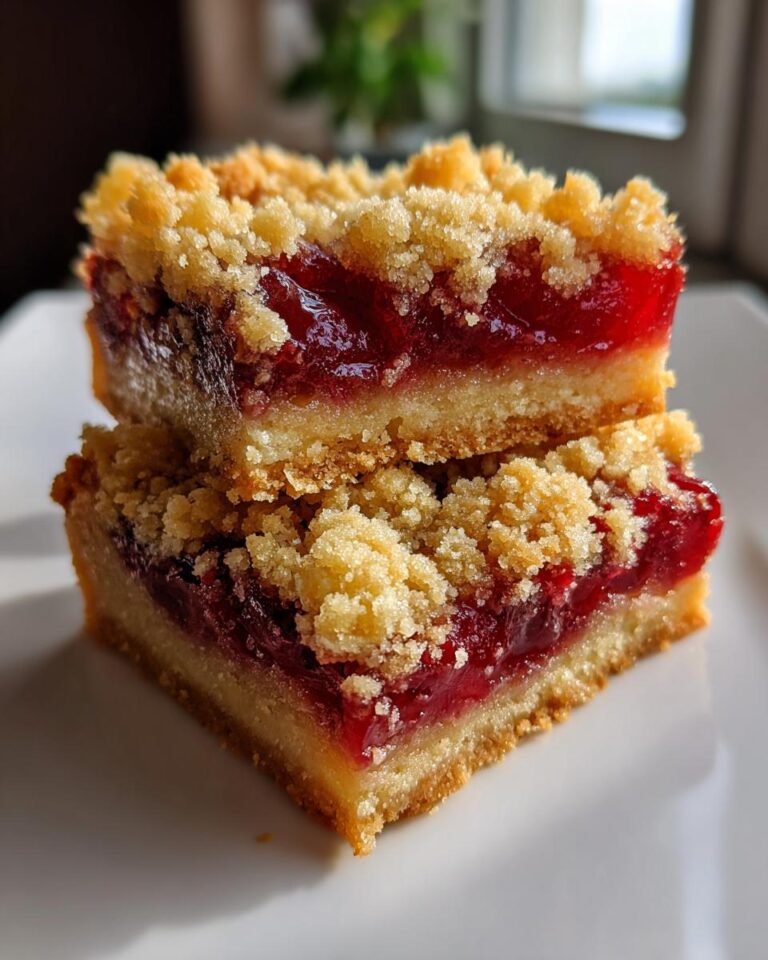
Easy Cherry Pie Bars You’ll Crave!
- Total Time: 45 minutes
- Yield: 12 servings
- Diet: Vegetarian
Description
These easy cherry pie bars are a sweet and simple treat. They’re perfect for any occasion.
Ingredients
- 1 box yellow cake mix
- 1/2 cup butter, melted
- 1 egg
- 1 (21 ounce) can cherry pie filling
Instructions
- Preheat your oven to 350°F (175°C).
- In a bowl, mix cake mix, melted butter, and egg.
- Press half of the mixture into a greased 9×13 inch pan.
- Spread cherry pie filling over the crust.
- Crumble the remaining cake mix over the filling.
- Bake for 30-35 minutes.
- Let cool completely before cutting and serving.
Notes
- You can use different flavors of cake mix.
- For extra flavor, add a sprinkle of almond extract.
- Prep Time: 15 minutes
- Cook Time: 30 minutes
- Category: Dessert
- Method: Baking
- Cuisine: American


